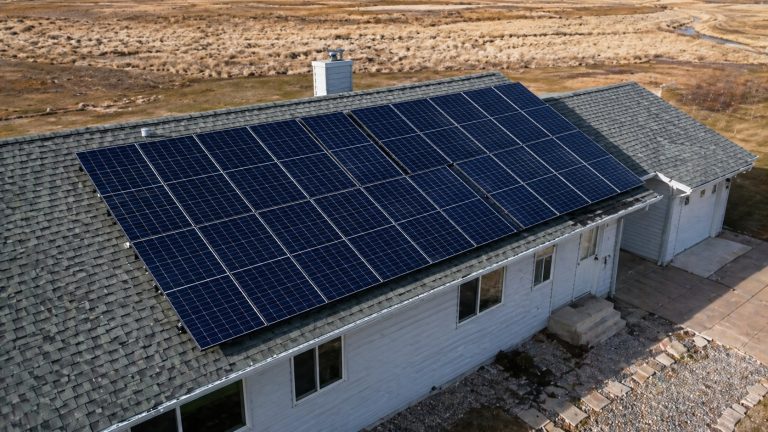
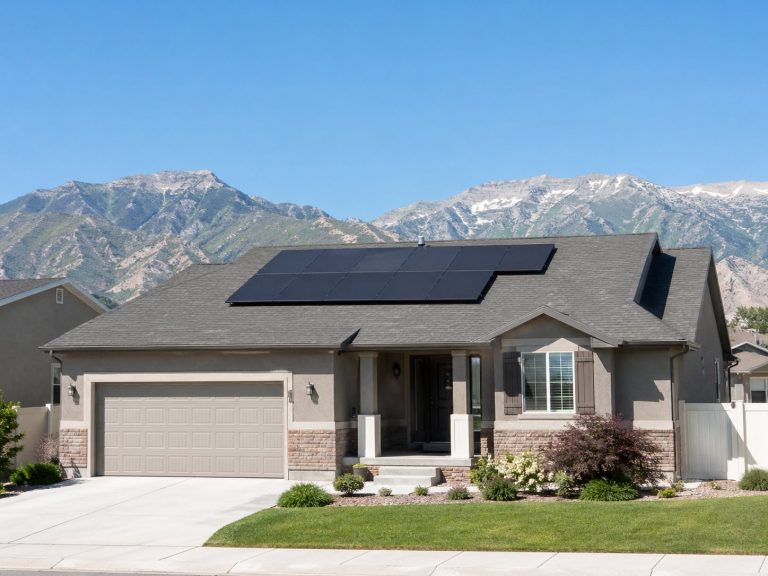
How to Remove Solar Panels Before Roof Replacement
Quick Answer
Hire a Solar Crew Before Roofing Starts
Solar panels should come off before roof replacement, and a qualified solar contractor should handle that removal. In a typical detach-and-reset, the solar crew makes one visit to shut down and remove the array, then returns after the roof is finished to reinstall, reconnect, and test the system. The hard part is usually not the physical removal. It is scheduling. Roofers may be ready next week. Solar service crews may not be. The smart decision is to confirm who is authorized to remove the system, what they will remove, and when they can return before the roofing date is locked in.
A good roofer can still be the wrong person to disconnect solar equipment. Panels, wiring, racking, conduit, monitoring, and roof penetrations all have to be handled correctly. The cleanest setup is simple: the solar contractor clears the roof, the roofer replaces the roof, and the solar contractor comes back only after the roof is ready for a proper reset.
What Removal Actually Involves
More Than Lifting Panels
Solar panel removal before roofing is usually called a detach-and-reset. That name makes the job sound smaller than it is. The work can include system shutdown, module removal, racking removal, wire labeling, connector protection, roof penetration handling, equipment storage, reinstallation, and final testing.
The point is not just to get panels out of the roofer’s way. The point is to protect the roof and the solar system at the same time. Most people miss this part. Solar panels are not loose roof accessories. They are part of an electrical system tied into mounts, rails, wiring, conduit, inverter equipment, and monitoring. The roofer needs a clear roof surface. The solar contractor needs to preserve the system so it can be put back without guesswork.
Detach, Roof, Reset
The basic order is straightforward: shut the system down, remove the panels and racking, finish the roof, reinstall the mounts and panels, reconnect the wiring, then verify that the system is working. When that order gets rushed or split between the wrong people, problems show up fast.
On a smooth job, the solar crew removes the array before tear-off. The roofer then replaces shingles, underlayment, flashing, and any damaged decking without working around live equipment or rails. After the roof is complete, the solar crew returns for the reset. Some projects move quickly, with removal first, roofing over a few days, and reinstall soon after. A more realistic planning range allows for weather, hidden roof repairs, inspection needs, and crew availability.
| Phase | Who Handles It | Main Purpose | Common Delay |
|---|---|---|---|
| Solar shutdown | Solar contractor | Make the system safe before removal | Solar crew availability |
| Panel and racking removal | Solar contractor | Clear the roof for replacement | Steep access or complex wiring |
| Roof replacement | Roofing contractor | Replace roof surface and repair damage | Weather or hidden decking issues |
| Solar reinstall | Solar contractor | Reset mounts, panels, wiring, and conduit | Inspection or return scheduling |
| Testing and recommissioning | Solar contractor | Confirm safe operation and monitoring | Monitoring or electrical fault |
The practical takeaway is simple. Roofing and solar work touch the same roof, but they are not the same trade. Treating them as one combined task without clear responsibilities is where jobs get messy.
Who Does What
Solar Contractor Responsibilities
The solar contractor should handle shutdown, electrical disconnect, panel removal, racking removal, wire labeling, equipment protection, reinstall, reconnection, and production checks. If the original installer is still operating, start there. They may already know the system layout, racking type, monitoring platform, and warranty requirements.
If the original installer is gone, that does not mean the roofer should take over the solar work. Hire a solar service contractor that performs removal and reinstallation. Their written scope should say whether panels, rails, roof attachments, conduit, flashing, and monitoring checks are included. It should also explain where the equipment will be stored and who is responsible if anything is damaged while it is off the roof.
Roofer Responsibilities
The roofer’s job starts once the solar equipment is out of the way. They need a clear roof surface so they can inspect decking, replace underlayment, install the new roof covering, detail flashing, and prepare the roof for the solar reset.

Some roofing companies coordinate solar removal through a qualified subcontractor. That can work well. What does not work well is a vague promise that the crew will “take care of the panels” without a real solar scope. Ask who is doing the disconnect, who is removing the racking, and who is testing the system after reinstall.
Shared Schedule Required
The roofer and solar contractor need to be on the same schedule before the first bundle of shingles hits the driveway. The solar crew must remove the system before tear-off. The roofer must finish the roof before reinstall. Then the solar contractor needs access again to reset and test the system.
If one part of that chain is missing, the homeowner pays for the confusion. The roof crew may arrive with panels still in place. Panels may sit in the yard longer than expected. Or the roof may be done while the solar system stays offline because no return visit was booked.
From a contractor’s point of view, the schedule is just as important as the price. A cheap removal quote is not useful if the crew cannot show up before the roofing start date. A solid detach-and-reset plan includes dates, scope, storage, and a clear plan for recommissioning.
When the Original Installer Is Gone
If the original installer is out of business, look for a solar service contractor that regularly handles detach-and-reset work. Ask about experience with your inverter type, racking brand, roof type, and local inspection process. They usually do not need to redesign the whole system unless the layout changes, but they do need to know how to take it apart and put it back correctly.
Leased systems and power purchase agreements need extra care. In those cases, the homeowner may not be free to hire anyone they want. The solar company or system owner may require approved service channels. Removing a third-party-owned system without permission can create contract problems on top of roof and electrical issues.
Step-by-Step Removal Process
Step 1: Review Ownership
Before anyone touches the array, confirm whether the solar system is owned, financed, leased, or under a power purchase agreement. That detail controls who can authorize removal, who may have to perform the work, and who is responsible for costs.
Pull the roof warranty, solar workmanship warranty, panel warranty, inverter warranty, and any insurance claim paperwork. This feels tedious, but it matters. If a leak or production issue appears after the roof job, the first question will be who removed the system and whether they were authorized to do it.
Step 2: Schedule the Detach
Schedule solar removal before the roof start date. Not the morning of tear-off. Not “sometime that week.” Before. A practical benchmark is to start calling several weeks ahead when the project is planned, because roofing crews, solar crews, inspectors, and weather rarely line up perfectly on short notice.
If the roof replacement is urgent because of storm damage or active leakage, the schedule may be compressed. Even then, get the scope in writing. Urgent work is exactly when verbal promises turn into expensive confusion.
Step 3: Photograph the System
Photos are cheap insurance. The solar contractor should document the array layout, wire paths, conduit locations, roof attachments, flashing condition, and any visible damage before removal. Homeowners should take their own photos too.
This helps during the reset. Split arrays, multiple roof planes, tight conduit routes, and older racking can all create reinstallation headaches. Photos and labels reduce the chance of wrong placement, wiring confusion, and finger-pointing.
Step 4: Shut Down and Remove
The system should be shut down before modules are disconnected. The exact method depends on the inverter, disconnects, rapid shutdown equipment, and system design. This is not the same as flipping one breaker and hoping everything is safe.
After shutdown, the crew removes panels, protects connectors, manages wiring, and removes rails or roof-mounted hardware as needed. The roofer generally needs full access to the roof area being replaced. Leaving parts of the mounting system in place can interfere with tear-off and flashing work.
Step 5: Complete Roof Work
Once the solar equipment is off the roof, the roofer can do the job properly. That includes tear-off, decking repair, underlayment, roof covering, and flashing details. This is also when hidden damage often appears. Soft decking, old leaks, bad penetrations, or failed flashing may not be obvious until the panels and shingles are gone.
If roof repairs are discovered, fix them before the solar system goes back on. Covering a questionable area with panels again is asking for another removal bill later.
Step 6: Reinstall the Array
After the roof is finished, the solar contractor resets the attachments, flashing, rails, panels, wiring, and conduit. This is the roof-solar interface, and it needs careful work. A new roof does not stay watertight by accident once penetrations are added back.
Damaged mounts, worn flashing, bent rails, or suspect seals should not be reused just to move the job along. That sounds cheaper upfront, but it often backfires when a leak appears under the array.
Step 7: Test and Recommission
The final step is not “panels are back on the roof.” The final step is confirming the system works. The solar contractor should check electrical operation, inverter status, production, and monitoring.
A system can look complete from the driveway and still have a production fault. Monitoring may not reconnect. A string may not perform correctly. A disconnect may be left off. Recommissioning catches those issues before the homeowner assumes everything is back to normal.
Practical Timing Before Roofing
Plan Several Weeks Ahead
Do not wait until the roofer is ready to start. Solar removal is a separate service visit, and reinstall is another one. Even if the roof itself only takes a few days, the solar crew’s calendar can control the actual downtime.
The clean approach is to line up the solar contractor first, confirm the roofing start date second, and then confirm the return window for reinstall. If insurance is involved, make sure the detach-and-reset scope is part of the claim conversation early. Otherwise it may get treated like an optional extra when it is not.
Reinstall May Take Days or Weeks
Many homeowners expect the panels to go back on the moment the roofer leaves. Sometimes that happens. Often it does not. A realistic field range after roof completion is several days to two weeks before the system is reinstalled and fully restored, depending on crew availability, weather, inspection needs, and whether the roof is actually ready.
Ask the blunt question before the project starts: “How soon after the roof is finished can the solar crew return?” If the answer is vague, plan for longer downtime.
Weather and Inspection Delays
Weather can slow both trades. Wet surfaces, wind, storms, or unsafe access can delay roof work and solar reset. Local inspections can also add time if the work triggers a permit, electrical review, or building department requirement.
Not every detach-and-reset needs a full new solar permit. Still, do not assume. If racking, wiring, layout, or electrical equipment changes, local rules may apply. The contractor should know who is checking that.
Solar Downtime Matters
While the system is removed or disconnected, it is not producing power. The dollar impact varies by season, system size, utility rate, net metering setup, and weather. Because of that, exact downtime loss is hard to quote without site-specific numbers.
The useful point is practical: tighten the schedule where you can. A roof that takes three days should not automatically turn into three weeks of solar downtime because nobody booked the return visit.
Permits and Inspection
Simple Reset vs Repermitting
A like-for-like detach-and-reset may be treated differently from a new solar installation. If the same equipment goes back in the same layout with no meaningful electrical or mounting changes, the process may be simpler.
But local rules control this. The authority having jurisdiction decides what requires review. If attachment points, conduit routes, equipment placement, or electrical configuration change, the project may need more documentation than the homeowner expected.
When Permits May Apply
Permits or inspections may apply when the work includes electrical reconnection, racking changes, structural attachment changes, or other local building requirements. Some areas treat the work as service. Others want documentation before the system is reactivated.
The homeowner does not need to memorize code. Ask one direct question: “Who is responsible for permits, inspections, and utility or monitoring confirmation after reinstall?” If the contractor cannot answer clearly, the scope is not finished.
Why Recommissioning Matters
Recommissioning confirms that the system is safe and operating after it has been disturbed. It can include inverter checks, production review, monitoring confirmation, wiring inspection, and a basic verification that the system is ready for normal use.
Skipping this step can quietly cost money. The panels may be back on the roof, but the system may not be producing correctly. Homeowners often do not catch that until a bill arrives or the monitoring app shows a problem weeks later.
Documents to Keep
Keep the solar removal invoice, roofing invoice, reinstall invoice, photos, permit paperwork, inspection records, and any monitoring confirmation. These documents matter during warranty disputes, insurance claims, home sales, and future service calls.
- Original ownership, lease, or PPA documents
- Written detach-and-reset scope
- Before and after roof photos
- Permit or inspection records, if required
- Post-reinstall testing or monitoring confirmation
Narrow Cost Context
Removal Cost Range
This is not a full solar pricing guide, but homeowners need a rough cost frame. A typical published range for professional solar panel removal is about $200 to $500 per panel. Some complete removal projects are commonly quoted in the $1,000 to $3,500 range, depending on array size, access, and complexity.
Treat those as planning numbers, not promises. A simple one-story array is one job. A steep roof with panels on several roof planes, older racking, tight conduit, or damaged hardware is another.
Why Labor Can Increase
Labor can rise when the roof is steep, access is awkward, the array is split across multiple sections, wiring is difficult to trace, or the mounting system is older. Costs can also increase if damaged mounts, flashing, wiring, or seals need replacement.
Roof repairs discovered after removal are separate from solar removal. Once the panels come off, the roofer may find bad decking, old leaks, or failed penetrations. Field pricing for those repairs often ranges from a few hundred dollars to the low thousands, depending on the damage. That is not a new solar cost. It is a roof condition problem revealed during the detach process.
Not a Full Solar Cost Guide
Do not judge a detach-and-reset quote the same way you would judge a new solar installation quote. This job is narrower. You are paying for safe removal, protection, storage, reset, reconnection, and testing of an existing system.
The lowest number is not automatically the best number. Compare scope, timing, responsibility, and warranty protection before comparing price.
| Cost Item | Typical Range | What Drives It | How to Treat It |
|---|---|---|---|
| Panel removal | $200-$500 per panel | Panel count, access, racking type | Planning range |
| Complete removal project | $1,000-$3,500 | Array size and roof complexity | Quote comparison baseline |
| Roof repair after removal | $300-$2,000+ | Leaks, decking, flashing, penetrations | Separate roof condition item |
| Reinstall complications | Variable | Damaged hardware, code issues, inspections | Clarify in scope |
The takeaway: a quote is only useful if it includes the work that protects the roof and brings the solar system back online. Ask what is included before comparing totals.
Common Mistakes to Avoid
Letting the Roofer Remove Panels
This is the mistake that causes the most avoidable trouble. A roofer may be comfortable on the roof, but solar removal involves electrical equipment, connectors, wiring, racking, monitoring, and warranty exposure. Those are different responsibilities.
The financial risk can be bigger than the removal quote. Damaged panels, connector problems, roof leaks, denied warranty coverage, and return service calls can all come from trying to save money on the wrong part of the job.
Starting Roof Work Too Early
Roofing should not begin under an active or half-removed solar array. If the roofer arrives before the panels are detached, the project may stop before it starts. If the crew tries to work around the system, roof quality can suffer.
This usually happens when the homeowner books the roofer first and treats solar removal as a quick side task. It is not. It is a separate trade that needs a real appointment.
Reusing Damaged Hardware
Old mounts, flashing, seals, and rails are not automatically reusable. Some parts may be fine. Others may be bent, worn, mismatched, or no longer suitable for the new roof surface.
Putting questionable hardware back onto a new roof is a bad trade. If it leaks later, the panels may need to come off again just to access the problem.
Skipping Warranty Review
Warranty problems usually show up after the job, not before it. A leak appears. A panel stops producing. Monitoring fails. Then everyone asks who touched the system and whether they were allowed to.
Review the solar warranty, roof warranty, workmanship coverage, insurance terms, and lease or PPA requirements before removal. It is far easier to sort that out before the work starts than after something fails.
Turning the System On Too Soon
After reinstall, the system should be checked before it is treated as fully back in service. Do not assume panels on the roof mean the system is producing correctly.
Monitoring should confirm operation. The inverter should be checked. If something is wrong, it is better to catch it while the solar crew is still responsible for the reset.
| Mistake | Why It Happens | Likely Consequence | Financial Risk |
|---|---|---|---|
| Roofer removes panels | Homeowner wants one contractor | Electrical or warranty issue | Panel damage, leak repair, denied claim |
| No written solar scope | Verbal coordination | Dispute over responsibility | Change orders or uncovered damage |
| No storage plan | Jobsite treated casually | Frame, glass, or connector damage | Replacement or service call |
| No recommissioning | System looks complete | Hidden production loss | Lost output and troubleshooting |
The pattern is easy to spot. The expensive mistakes come from treating solar removal like a small roofing chore instead of a coordinated solar service job.
Homeowner Checklist
Confirm Ownership First
Before signing anything, confirm whether you own the system, finance it, lease it, or buy power through a PPA. Ownership affects authorization, cost responsibility, and who may be allowed to touch the equipment.
Get Scope in Writing
The detach-and-reset scope should say what is being removed, where it will be stored, what will be reinstalled, whether damaged hardware is included, and how the system will be tested. A single vague line that says “remove solar” is not enough.
Ask About Storage
Panels need to be protected while they are off the roof. Ask whether they will stay on-site or be transported, who is responsible for storage, and what happens if the roof job is delayed.
Check Permit Responsibility
Ask whether permits, inspections, or utility coordination are required. The answer may depend on location and scope, but somebody needs to own that responsibility. Do not let it fall between the roofer and solar contractor.
Require Final Testing
The job is complete only when the system has been reconnected, tested, and confirmed through inverter status or monitoring. Physical reinstall is not the finish line.
- Who is authorized to remove the panels?
- What exact equipment is included in removal?
- Where will panels and rails be stored?
- Who replaces damaged mounts or flashing?
- Who confirms monitoring after reinstall?
- Who handles permits or inspections if required?
FAQ
Can a roofer remove solar panels?
A roofer should not remove solar panels unless qualified solar personnel are handling the electrical disconnect, racking, wiring, and recommissioning. Roofing and solar service are different trades. The safer setup is a solar contractor for detach-and-reset and a roofer for the roof once the array is clear.
How long are panels off the roof?
It depends on roof timing, solar crew availability, weather, inspections, and hidden roof repairs. A clean project may move quickly. A more realistic planning range is several days to two weeks after roof completion before the system is reinstalled and fully confirmed.
Do I need a permit?
Permit rules vary by city and scope. A like-for-like reset may be simpler than a project that changes racking, wiring, layout, or electrical equipment. Ask the solar contractor who is responsible for checking permit and inspection requirements before work starts.
Can removal void my warranty?
Improper removal can create problems with solar equipment warranties, roof workmanship coverage, or insurance claims. The risk is higher when an unauthorized crew removes panels, damage is not documented, or the system is reinstalled without testing. Keep written scopes, invoices, photos, and recommissioning records.
Should old mounting hardware be reused?
Only if it is compatible, undamaged, and appropriate for the new roof. Damaged flashing, worn seals, bent rails, or questionable attachments should be handled before panels go back on. Reusing bad hardware can put a new roof at risk and may force another removal later.