Removing Solar Panels for Roof Work
Quick Answer
Solar panels usually need to come off before roofing work starts. Then they need to go back on, get checked, and be restarted after the roof is finished. For many standard residential systems, the hands-on work is roughly a day to remove and roughly a day to reinstall, but the system can stay offline much longer if the roofer, solar crew, weather, inspection, or parts schedule slips. The main decision is simple: do not let a roofing crew treat a solar array like ordinary roof hardware unless they are also qualified to disconnect, remove, reinstall, and test the PV system.
What Solar Removal Means
Removal vs. Reinstallation vs. Relocation
Solar panel removal for roofing is usually called a detach-and-reset or detach-and-reinstall. The solar array comes off the roof so the roofer can reach the shingles, underlayment, flashing, decking, and penetrations. After the roof work is done, the solar crew puts the system back into service.
That is different from relocating the system. A normal detach-and-reset usually puts the panels back on the same roof area in roughly the same layout. A relocation means the array is redesigned, moved to another roof plane, shifted to a garage, or rebuilt with different electrical paths. That is a bigger job, and it should be priced and planned like one.
Why Roofers Need Clear Access
Roofing work cannot be done properly under an active solar array. Panels, rails, feet, flashing, conduit, and wiring block the roof surface. A roofer might be able to patch around the array, but that is not the same as replacing underlayment, checking decking, rebuilding flashing, or installing a clean roof system under the panels.
The bigger issue is responsibility. Roofers know roofs. Solar contractors know PV systems. When those roles get blurred, the homeowner is often the one left sorting out leaks, broken hardware, production faults, and warranty arguments.
Why This Is Not DIY
Removing solar panels is not a weekend maintenance task. It involves rooftop fall risk, glass modules, racking hardware, electrical connectors, grounding, inverter shutdown, and sometimes optimizers, microinverters, or rapid-shutdown equipment. A bad disconnect or rough handling can create a problem that is not obvious until the system is turned back on.
The homeowner’s job is not to take the system apart. It is to coordinate the work: confirm the scope, check warranties, get the schedule in writing, document the existing layout, and make sure the roofer and solar contractor both know where their responsibility begins and ends.
The Correct Work Order
Contact the Solar Company First
Call the solar company before you book the roofing job. That gives them time to look at the system, decide whether the whole array needs to come off, and price the removal and reinstall work.
If the original installer is still around, start there. They may already have the racking type, wiring path, monitoring setup, inverter model, and warranty terms on file. If they are not available, use a solar service contractor that does removal and reinstallation work regularly, not just new solar sales.
Confirm Full or Partial Removal
Not every roofing repair requires every panel to come off. A small repair near one roof plane may only require a section of the array to be detached. A full roof replacement usually means the complete roof-mounted array needs to be removed.
Partial removal can save labor, but it should not be forced. If the roofer needs access to underlayment, decking, flashing, valleys, vents, or penetrations under the array, the panels need to be out of the way. Working around them is how sloppy roof work gets hidden.
Schedule Removal Before Roofing
The solar removal date should happen before the roofing crew arrives. Not the same morning. Not “we’ll figure it out when they get here.” If the roofer shows up and the panels are still in place, the job stalls or someone starts rushing.
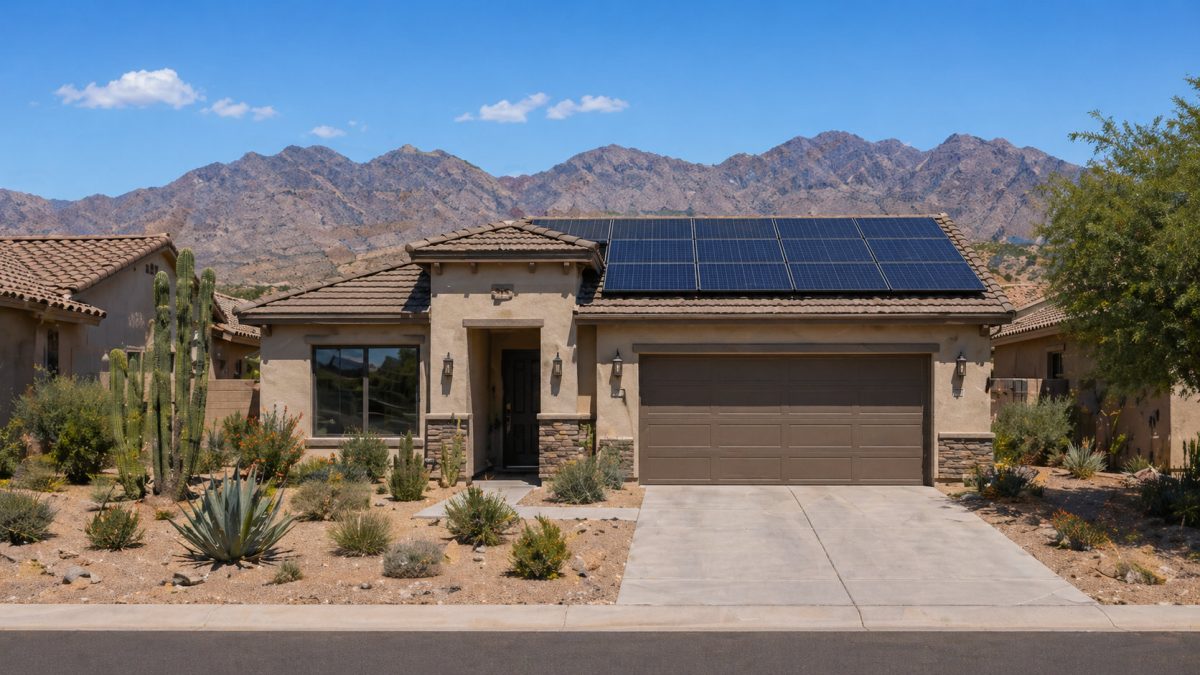
The clean sequence is solar removal, roofing work, roof quality check, solar reinstallation, inspection or testing, then system restart. The better the coordination, the less time the system sits offline.
Protect Equipment During Roofing
Panels, rails, clamps, flashing parts, wiring, and small hardware should be handled like reusable system components. They are not jobsite scrap. The solar crew should label parts and store panels somewhere protected while the roofer works.
Scratched glass, bent frames, damaged connectors, missing clamps, and mixed-up wiring can turn a simple reroof into a service problem. Decide where the equipment will be stored before removal begins.
Finish Roofing Before Reinstall
Panels should not go back on the roof until the work under the array is complete. That means shingles or membrane work, flashing, underlayment, deck repairs, and any roof penetrations in the solar area.
If the solar crew arrives too early, there are only two choices. They leave and reschedule, or they install over unfinished roof details. The first option is annoying. The second one is risky.
Reconnect the Solar Array
After the roof is done, the solar crew reinstalls the mounting system, rails, panels, wiring, grounding, and related electronics. This is the handoff point where roof quality and solar workmanship meet.
Old mounting locations may not line up perfectly after roofing. Decking may have been replaced. Vents may have moved. Roof planes may have changed. Local access requirements may also affect the layout. The goal is not to put everything back blindly. The goal is to put it back correctly.
Inspect and Restart
The system should be checked before it goes back into normal operation. In some places, contractor testing is enough. In others, permits, municipal inspection, or utility-related steps may apply.
At a minimum, the crew should verify attachment, wiring, grounding, waterproofing, inverter operation, monitoring, and production. Turning the system on without testing is a gamble. Sometimes it works. Sometimes the homeowner finds the problem later on the monitoring app or utility bill.
Who Should Remove Panels?
Use a Licensed Solar Contractor
A licensed or properly qualified solar contractor should handle the detach-and-reset. This is not just lifting panels off rails. The crew has to shut the system down, disconnect the array, protect electrical components, handle modules safely, label parts, and reinstall the system correctly.
Many companies price this separately from the roofing job. That is normal. The roofer owns the roof work. The solar contractor owns the PV equipment and the solar attachment work after reinstall.
What the Roofer Should Handle
The roofer should handle shingles, underlayment, deck repairs, roof vents, roofing flashing, and final roof workmanship. They also need to coordinate with the solar contractor around mount locations and waterproofing details.
The roofer should not disconnect solar wiring, remove modules, alter racking, or restart the system unless they are also qualified and insured for PV work. Some roofing companies have solar partners. That can work well, but only if the contract says who is doing what.
When to Call the Original Installer
The original installer is often the best first call because they know the system design. They may also have rules about third-party removal under their workmanship warranty or service agreement.
Even if another contractor ends up doing the work, ask the original installer for records: system layout, electrical diagram, equipment list, monitoring access, and warranty terms. Those documents make a cleaner reinstall much easier.
If the Installer Is Gone
If the original solar company is no longer in business, find a solar service contractor that specifically handles removal and reinstallation. Ask whether they have worked with your inverter type, panel-level electronics, racking brand, and roof type.
Do not assume any solar company will take this on. Some companies only want new installs. Detach-and-reset work is service work. It takes a different mindset and a lot more coordination with the roofer.
Typical Timeline
Removal Often Takes One Day
For many standard residential systems, removal is commonly a one-day job. Larger arrays, steep roofs, tile roofs, difficult access, split roof planes, and complicated wiring can push that longer.
Removal includes shutdown, disconnecting modules, taking panels off, removing or preparing racking components, labeling parts, and storing equipment. Fast is fine. Rushed is not.
Downtime Can Last Weeks
The system is usually offline longer than the labor time suggests. A one-day removal and one-day reinstall can still mean several days to two or more weeks without solar production if roofing runs long, weather interrupts the job, inspection is delayed, or the solar crew is booked out.
This catches people off guard. The lost production may not be the biggest cost, but it is still real. Homeowners who watch monitoring closely should expect a production gap.
Avoid Idle Days
The best schedule gives the roofer enough time to finish properly without leaving the solar equipment sitting for weeks. Ask for three dates in writing: removal, roofing start, and reinstallation.
The reinstall date may need to stay flexible until the roofer confirms the roof is ready. Still, there should be a tentative slot before the project starts. No slot usually means more downtime.
| Project Stage | Typical Timing | Main Delay Risk | Owner Checkpoint |
|---|---|---|---|
| Solar removal | Often about 1 day | Access, steep roof, complex array | Confirm shutdown and labeling plan |
| Roofing work | Varies by roof scope | Weather, decking repairs, inspections | Confirm roof is complete under array area |
| Solar reinstallation | Often about 1 day | Hardware damage, layout changes | Confirm flashing, racking, and wiring checks |
| Restart and testing | Same day to longer if inspection applies | Local permit or inspection requirements | Confirm monitoring and production |
The practical point is simple: labor time and outage time are not the same thing. Plan around the full handoff, not just the days when crews are on the roof.
During Solar Panel Removal
System Shutdown
The system should be shut down before panels are handled. The crew should follow the shutdown sequence for the inverter, disconnects, and array equipment. The exact steps depend on the system.
This is one of the clearest reasons not to hand the job to an unqualified crew. A panel looks harmless from the ground. The electrical system behind it is not something to guess at.
Disconnecting Panels and Wiring
The crew disconnects the modules and related wiring. Depending on the design, the system may include string wiring, optimizers, microinverters, rapid-shutdown equipment, conduit, and grounding conductors.
Good crews label as they go. Poor documentation slows down the reinstall and raises the chance of crossed wiring, monitoring faults, or production issues.
Removing Modules Safely
Solar modules are built for weather, not careless handling. They should not be dragged, stepped on, flexed, or stacked in a way that stresses the frames or glass.
A panel can look fine after rough handling and still have connector damage or hidden stress. That is why removal method and storage matter more than many homeowners realize.
Labeling Hardware
Rails, clamps, grounding parts, flashing pieces, conduit supports, and wiring should be organized. If everything gets tossed into mixed boxes, the reinstall crew wastes time sorting and may substitute parts incorrectly.
Labeling matters even more on multi-plane systems. Once the array is off the roof, parts that looked obvious in place can become a pile of similar-looking hardware.
Safe Panel Storage
Panels should be stored where they are protected from impact, theft, jobsite traffic, and unnecessary weather exposure around connectors. The storage plan should be agreed on before removal starts.
A garage, protected side yard, driveway staging area, or other secure location may work. The point is control. Panels should not be left where roofers, ladders, materials, or vehicles can damage them.
Racking and Roof Penetrations
Old Mounting Points May Shift
After a roof is replaced, the old mounting pattern may not be the best pattern anymore. Deck repairs, new roof details, moved vents, different underlayment, or updated access requirements can change where attachments belong.
A good reinstall is not “put it back exactly because that is where it was.” A good reinstall is “fit the solar correctly to the finished roof.” That small distinction prevents a lot of problems.
Flashing Must Be Watertight
Solar attachments interact directly with the roof system. Every attachment point needs proper flashing and waterproofing. Inspection checklists for roof-mounted PV commonly focus on support structure, roof membrane protection, wiring attachments, and grounding for a reason.
If flashing is reused poorly or sealed casually, the new roof can leak around the solar mounts. The leak may not show up the first week. It may appear after a hard storm, or later as staining, soft decking, or interior damage.
Damaged Hardware Adds Risk
Not every removed part belongs back on the roof. Bent rails, stripped clamps, cracked flashing, corroded fasteners, damaged tile hooks, and questionable hardware should be replaced.
Saving a little money by reusing bad parts is not smart savings. If that hardware causes a leak or attachment problem, the repair can cost far more than the part.
Coordinate Around Underlayment
The roofer and solar contractor need to agree on how the roof will be protected where the solar mounts return. Underlayment, shingles, flashing, sealants, and fasteners all play a role.
Asphalt shingles, tile, metal, and flat roofing all have different details. This does not need to turn into a roof-material lesson, but the installer does need to use a mounting and flashing method that fits the roof that was actually installed.
In field work, the most expensive problems often come from the handoff. The roofer assumes the solar crew will handle waterproofing at the mounts. The solar crew assumes the roofer prepared the attachment areas. The homeowner assumes both sides talked. Get the responsibility in writing before the first panel comes off.
Reinstalling After Roofing
Reattaching Rails and Mounts
Rails and mounts need to go back without compromising the new roof. The crew should use compatible flashing, sealants, fasteners, and structural attachment methods for the racking system and roof type.
This step affects both roof reliability and solar safety. A loose attachment can create movement or uplift concerns. A poor flashing detail can create a leak. A rushed reinstall can create both.
Reconnecting Wiring and Grounding
After the mechanical work is back in place, the electrical connections have to be rebuilt. Wiring should be routed securely, protected from abrasion, and reconnected according to the system design or any approved revision.
Grounding and bonding are not minor details. They are part of a safe PV installation, and they are often part of inspection review after roof-mounted solar work.
Using the Same Layout
Most systems go back in the same general layout. That is usually the simplest path because the electrical design, panel count, monitoring setup, and roof zones are already known.
Still, the old layout is not automatically the right layout. If the new roof has changed vents, repaired decking, different mounting conditions, or access requirements, the contractor may need to adjust the design.
Testing Production
After restart, the contractor should confirm that the system is producing and that monitoring is working. A completed array can look fine from the ground and still have a disconnected string, communication problem, inverter fault, or panel-level error.
Ask for proof that the system was tested. That might be a commissioning note, inverter reading, monitoring screenshot, or service invoice showing production verification.
Inspection and Recommissioning
When Testing Is Enough
In some areas, a straightforward detach-and-reset may only require contractor testing if the electrical design did not change and the local authority does not require another inspection.
That does not mean the system should be turned on casually. No municipal inspection required is not the same as no inspection needed. The contractor still needs to check the work.
When Permits Are Needed
Permit and inspection rules vary by city, county, and utility territory. Some authorities may require permits or inspection when roof-mounted PV is removed and reinstalled, especially if wiring, racking, structural attachment, or electrical equipment changes.
When permits or inspections apply, a practical service benchmark is often a few hundred dollars, commonly around $200 to $500. Treat that as a planning range, not a universal rule. Local requirements control the actual number.
Why Safety Review Matters
A reinstalled array should be checked for roof attachment, grounding, wiring support, roof membrane protection, and safe access. These are not paperwork details. They are the details that prevent leaks, failed inspections, and unsafe operation.
This matters even more when buying a home where solar was removed and reinstalled after roofing. Ask for the roof invoice, solar detach-and-reset invoice, inspection record if one exists, and proof that the system operated after reinstall.
What Owners Should Receive
At closeout, the homeowner should receive clear documentation of what was removed, what was reinstalled, what parts were replaced, whether permits or inspections applied, and whether the system was tested.
A receipt that only says “solar work” is weak documentation. If a leak or production issue appears later, detailed records help determine who is responsible.
Pre-Roofing Checklist
Confirm the Solar Contractor
Before roof work begins, identify the company responsible for solar removal and reinstallation. Get the company name, scope, contact person, and licensing or qualification details where applicable.
Check Warranty Coverage
Ask how the work affects the roof warranty, solar workmanship warranty, equipment warranties, and any service agreement. Warranty rules vary. Verbal reassurance is not enough.
Get Dates in Writing
The schedule should include removal, roofing, and reinstall. Weather and decking repairs can move dates, but a written sequence keeps the project from turning into guesswork.
Confirm Storage Plans
Ask where panels and hardware will be stored. Also ask who is responsible if equipment is damaged, stolen, or exposed to conditions that cause problems while it is off the roof.
Photograph the Existing System
Take photos before removal starts. Capture the panel layout, conduit paths, roof condition, penetrations, flashing areas, and any visible damage. Take more photos after reinstall.
Assign Leak Responsibility
The contract should say who handles a leak around solar mounts after reinstall. Without that, the roofer and solar contractor may each point to the other.
- Ask who disconnects and restarts the solar system.
- Ask whether electrical reconnect work is included.
- Ask whether permits or inspections are included if required.
- Ask whether damaged flashing or hardware will be replaced.
- Ask how production will be verified after reinstall.
Common Mistakes
Letting Roofers Remove Panels
This mistake is common because the panels sit on the roof, so people assume the roofer can remove them. Some roofers may offer to handle everything. Unless they have qualified solar personnel and proper coverage for PV work, that is a risk.
The financial risk can be bigger than the removal bill. A damaged panel, inverter issue, voided workmanship claim, or leak dispute can cost more than hiring the right solar crew in the first place.
No Labeling During Removal
When crews rush, they may remove panels and parts without documenting where everything belongs. That can create wiring mistakes, missing parts, longer troubleshooting, and delayed restart.
For a small, simple array, this may be manageable. For larger systems, split roof planes, optimizers, or microinverters, poor labeling can turn reinstall day into a diagnostic job.
Reusing Bad Flashing
Flashing is not trim. It is a water-control detail. Reusing damaged or incompatible flashing on a new roof can undercut the entire roof replacement.
This is avoidable. If hardware is worn, bent, cracked, corroded, or wrong for the new roof condition, replacement should be part of the scope.
Reinstalling Too Early
Panels should not go back until the roof work under the array is complete and checked. Reinstalling over unfinished roof areas traps the problem under the solar system.
If the roofer needs access later, the homeowner may pay for another removal. That is an expensive way to learn that the sequence mattered.
Skipping Electrical Testing
A solar array can be physically reinstalled and still not work correctly. A connector may be loose. A string may be down. Monitoring may not communicate. An inverter error may show up after restart.
Testing should happen before the contractor leaves. Otherwise the homeowner becomes the test process.
Forgetting Downtime
Many homeowners budget for the roof and the solar removal but forget that the system will be offline. The outage may be short. It can also stretch if scheduling or inspection drags.
The lost production is usually not the largest expense, but it is real. Anyone tracking solar performance should expect a visible gap in monitoring.
| Mistake | Why It Happens | Possible Result | Financial Risk |
|---|---|---|---|
| Roofer removes panels | Scope confusion | Damage, unsafe work, warranty dispute | Medium to high |
| No written reinstall date | Poor scheduling | Extended solar downtime | Medium |
| Old flashing reused blindly | Shortcut or missing scope | Leaks around mounts | High |
| No post-reinstall test | Rushed closeout | Hidden production fault | Medium |
The biggest problems are usually ordinary failures: unclear scope, undocumented wiring, questionable flashing, and no proof that the system worked after the roof was finished.
Narrow Cost Context
Typical Detach-and-Reset Range
Solar removal after roofing is not mainly a cost topic, but the cost matters when comparing quotes. A typical field range for residential detach-and-reset work is often about $1,500 to $6,000. Some providers price around $200 to $500 per panel, depending on the system, location, access, and roof conditions.
Some contractors separate removal, reinstallation, electrical reconnect, permits, and roof-related adjustments. Others bundle the service. Read the line items, not just the total.
Why Cost Varies
Cost drivers include panel count, roof pitch, roof height, tile versus asphalt surfaces, access difficulty, racking type, wiring complexity, damaged hardware, local labor rates, and inspection requirements.
Electrical reconnect work can add cost, especially if wiring or inverter work is involved. Permit and inspection fees, when required, may add a few hundred dollars. Roof repairs or mounting-area changes can add more if the finished roof no longer matches the old solar layout.
Separate From Roofing Quotes
Do not assume the roofing quote includes solar removal. Many roofing proposals exclude detach-and-reset work or list it as a coordination item. If a roofer includes it, the proposal should identify who performs the solar work.
A complete quote should say whether it includes removal, storage, reinstallation, replacement hardware, electrical reconnect, permits, inspection support, monitoring verification, and warranty coverage.
| Cost Item | Typical Field Range | What Drives It |
|---|---|---|
| Full detach-and-reset | $1,500 to $6,000 | System size, roof access, labor market, complexity |
| Per-panel service pricing | About $200 to $500 per panel | Panel count, roof type, handling difficulty |
| Electrical reconnect | About $500 to $2,000 | Wiring changes, inverter access, licensed labor |
| Permits or inspections | About $200 to $500 when required | Local jurisdiction rules |
The useful comparison is not just which quote is cheapest. It is which quote covers the full removal, roof handoff, reinstall, testing, and responsibility if something fails.
When Layout Should Change
Changed Roof Layout
If the roof layout changes during replacement, the solar array may not return exactly as it was. New vents, skylights, deck repairs, access paths, or changed roof details can affect panel placement.
This should be addressed before reinstall day. Last-minute layout changes slow the job and may require revised plans or inspection review.
Old Racking No Longer Fits
Older racking or flashing may not work well with the new roof condition. If the roof material changes or the old hardware is worn, replacement parts may be needed.
Forcing old hardware onto a new roof is poor practice. The racking system should fit the finished roof, not the other way around.
Code or Fire Access Changes
Local requirements can affect panel placement, roof access pathways, setbacks, and equipment layout. A system that was acceptable when first installed may need review if it is being reinstalled after major roof work.
That does not mean every detach-and-reset becomes a full redesign. It means the contractor should check current requirements before rebuilding the array.
Damaged Components Found
Removal can reveal damaged connectors, worn wiring, cracked hardware, corroded fasteners, or panel damage. Those issues should be documented and addressed before reinstall.
Do not bury known defects under the panels again. Once the array is back on the roof, access becomes harder and future service may require another removal.
FAQ
Can a roofer remove solar panels?
Usually, no. A roofer should not remove or reconnect solar panels unless the company has qualified solar personnel and proper coverage for PV work. Roofers can handle the roof system. Solar removal requires shutdown, equipment handling, wiring control, and recommissioning.
How long will solar be off?
For many standard residential systems, removal may take about one day and reinstallation may take about one day. The actual outage can last several days to two or more weeks because roofing, weather, scheduling, inspections, and crew availability all affect restart timing.
Do panels go back in the same place?
Often they do, but not always. If the new roof has changed vents, repaired decking, different mounting conditions, or updated access requirements, the layout may need adjustment. The installer should verify the layout before rebuilding the system.
Will removal void my warranty?
It can create warranty problems if the work is done by an unqualified crew or outside the warranty terms. Check the roof warranty, solar workmanship warranty, equipment warranties, and any installer requirements before scheduling removal.
Is inspection needed after reinstall?
Sometimes. Local rules vary. Even when a municipal inspection is not required, the contractor should still check the roof attachments, wiring, grounding, waterproofing, inverter operation, monitoring, and production before leaving the system in service.