Solar Panels and Roof Leaks: Causes, Fixes, and What to Do
Quick Answer
Solar panels should not make a roof leak when the mounts, flashing, and wiring penetrations are installed correctly. When leaks do show up, the problem is usually not the glass panel. It is usually a roof penetration, a flashing detail, a conduit entry, a cracked tile, a damaged shingle, or an older roof area that was already close to failing. As a practical benchmark, removing and reinstalling panels for roof access can add about $1,500–$6,000 on many residential jobs. The main decision is simple: figure out whether the water is coming from solar workmanship, roof wear, storm damage, or a separate roof defect before anyone starts tearing into the array.
Solar leaks usually come from flashing or penetrations
The panel is rarely the leak source. The weak spots are where the solar system touches the roof: mounts, lag bolts, flashing, conduit, junction boxes, roof-mounted equipment supports, and the walk paths used by installers or service crews. In the field, every attachment point has to be treated as a roof detail first and a solar detail second.
Call the solar installer first
If the leak appears under the array, near a row of mounts, near a conduit run, or shortly after installation, call the solar installer or a qualified solar service contractor before letting a roofer remove panels. A roofer may be needed to repair the roof, but solar equipment should not be handled casually. That is where warranty problems and electrical issues start.
Repairs range from minor to expensive
A small accessible flashing or penetration repair may stay in the low hundreds. A broader roof leak repair often lands somewhere around $400–$2,500, depending on the roof and damage. The expensive part is usually access. If the leak sits under active panels, the removal and reinstallation can cost more than the roof repair.
Do Solar Panels Cause Roof Leaks?
Panels are rarely the leak source
Solar panels do not usually cause leaks just by sitting above the roof. A properly mounted array sheds water while the roofing underneath keeps doing its job. The trouble starts when the attachment details are wrong, rushed, or placed on a roof that was already in poor condition.
On a shingle roof, the mount needs to tie into structure and work with the shingle courses. On a tile roof, cracked tiles and poor flashing around hooks are common concerns. On a low-slope membrane roof, foot traffic, punctures, and equipment supports need closer attention.
The risk comes from roof penetrations
Most rooftop solar systems need some kind of roof interface. That might mean lag bolts, flashed mounts, tile hooks, conduit penetrations, or roof equipment supports. Each one has to do two jobs: hold the system down and keep water out.
Good installation manuals spend a lot of time on flashing placement, pilot-hole sealing, sealant compatibility, and fastener seating. That is not paperwork fluff. If one of those details is wrong, water can follow a fastener, slip under flashing, or run along conduit into the house.
Leaks can appear years later
A leak that shows up years after the solar installation is not automatically an installer mistake. Roofs age. Sealants shrink. Storms move debris. Tiles crack. Old repairs fail. Panels can also hide a slow roof problem until it finally reaches the ceiling.
Timing still matters. A leak after the first hard rain following installation points one way. A leak after hail, wind, or ten years of roof wear points another way. Do not guess. Trace it.
Main Causes of Solar Roof Leaks
The quickest way to narrow the problem is to connect the symptom to the roof detail above it. The table below shows the leak patterns I would check before blaming the whole solar system or the whole roof.
| Leak pattern | Likely cause | What usually confirms it | Typical seriousness |
|---|---|---|---|
| Water stain below a mount row | Failed flashing, poor seal, or fastener issue | Attic staining near attachment line | Moderate to high |
| Leak near conduit path | Poorly flashed wiring entry | Water follows conduit or roof penetration | Moderate |
| Leak after panel service | Disturbed flashing, cracked tile, or foot traffic damage | Timeline matches service visit | Moderate |
| Leak under tile array | Broken tile or incorrect tile hook detail | Cracked or displaced tile near mount | Moderate to high |
| Leak on low-slope roof | Membrane puncture or equipment support issue | Wet insulation or membrane damage near array | High |
Do not treat the ceiling stain as the exact entry point. Water moves sideways, follows framing, and can show up several feet away from the actual opening. A proper diagnosis checks the attic, roof deck, roof surface, and solar attachment layout together.
Poor flashing around mounts
Flashing is supposed to move water around the mount and back onto the roofing surface. If it is placed wrong, cut wrong, set over the wrong shingle course, or sealed poorly, water can get behind it.
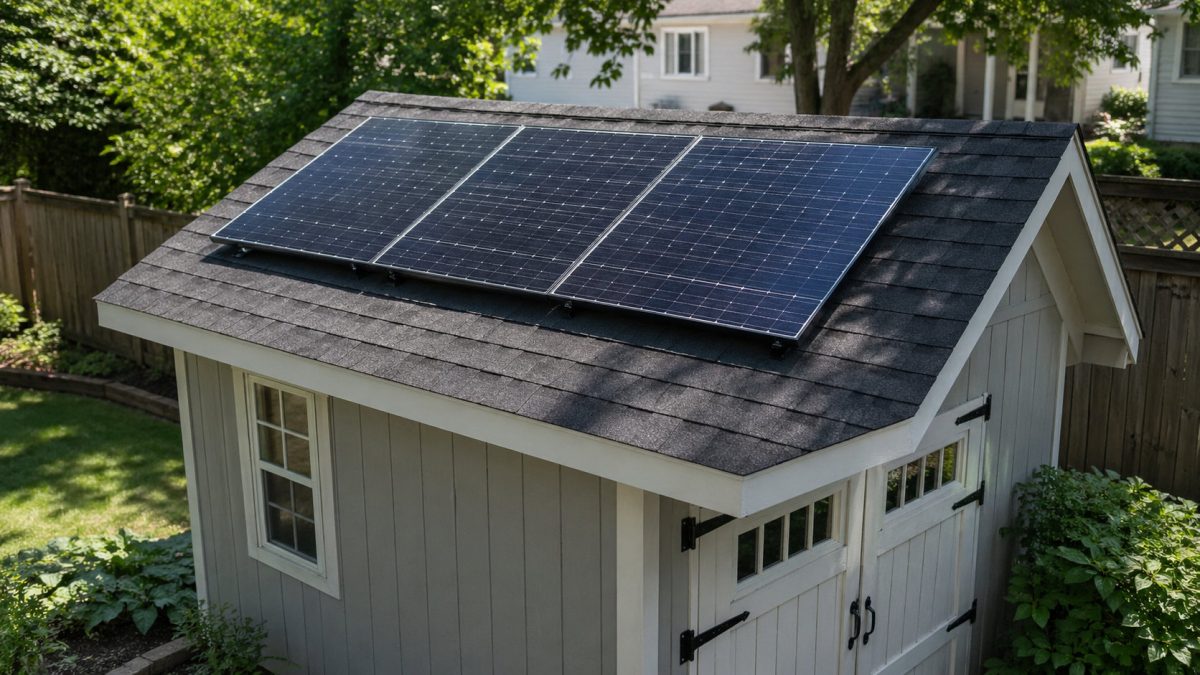
This is one of the most common solar-roof leak concerns because it sits between two trades. The solar crew has to understand roof waterproofing. The roofer has to understand how the solar hardware was installed. When either side ignores the other, leaks become more likely.
Lag bolts or bad attachments
Solar mounts are often fastened into rafters or other structural members. Problems happen when pilot holes are not sealed, fasteners are overdriven, washers are not seated correctly, or attachments miss the intended framing.
A mount can feel solid and still be wrong from a waterproofing standpoint. That is the part homeowners usually cannot see from the ground.
Cracked or lifted shingles
Asphalt shingles can crack, lift, or lose their seal around an attachment point. This can happen during installation, during later service, or because the roof was already brittle.
A bead of caulk might look reassuring, but it is not a real fix if the shingle and flashing relationship is wrong. That kind of patch often buys time, not reliability.
Broken tiles
Tile roofs are easy to damage if workers do not know how to move across them. Clay, concrete, and slate can crack during installation or during later service. Some cracks are obvious. Others sit under the array where nobody sees them until water appears inside.
A broken tile does not automatically prove the solar system was installed badly. It does mean the repair needs someone who understands both tile roofing and solar mounting hardware.
Conduit penetration leaks
Solar wiring has to leave the roof array and travel to the rest of the system. Anywhere conduit enters the roof, passes through a roof surface, or connects near roof-mounted equipment, the waterproofing detail matters.
Conduit leaks can fool people. The stain may not show up directly under the panels because water can follow the conduit, roof slope, or framing before it drops into the living space.
Old roof materials
An older roof can start leaking after solar is installed even if the solar work did not cause the original weakness. The array may simply make the area harder to inspect and harder to repair.
This does not mean every older roof needs replacement before solar. It means roof condition has to be part of the leak diagnosis. Brittle shingles, failing underlayment, widespread tile cracks, or old patchwork can point to a roof problem rather than a solar workmanship issue.
Storm, hail, wind, or debris damage
Storms can damage roofing around an array. Hail can crack materials. Wind can lift shingles. Branches can hit panels, rails, mounts, or the roof surface around them.
After a storm, document everything before repair work starts. Photos, dates, and inspection notes matter if the issue becomes an insurance claim or a warranty dispute.
How to Tell if the Leak Is Solar-Related
Match stains to the panel layout
Start inside. Mark where the ceiling stain, attic moisture, wet insulation, or roof deck staining appears. Then compare that location with the solar layout above it. If the stain lines up with a mount row, conduit path, or roof equipment support, the solar roof details deserve close inspection.
This is not perfect. Water travels. But it gives the contractor a real starting point instead of a guess.
Watch rain and snow timing
A leak that appears only during wind-driven rain may involve lifted shingles, flashing edges, or a side-facing opening. A leak after snow melt may involve water lingering around a penetration or moving slowly under roof materials.
Write down when the water appears. During the storm? After the storm? Only with wind? Only after snow starts melting? That timing can save a lot of diagnostic time.
Check mounts, rails, and conduit
From the ground, look for obvious problems: shifted conduit, missing roof pieces, displaced trim, sagging wire runs, debris, or visible damage near the array. Do not climb up there to prove a point. A wet roof with solar equipment on it is not a homeowner inspection area.
A professional inspection should cover the mounts, rails, flashing edges, conduit entries, junction points, and the roofing immediately around the attachment points.
Compare timing to installation
If the leak started after the first major rain following installation, workmanship needs to be reviewed. If it started after a service visit, check for disturbed flashing, cracked tiles, or wiring-entry issues. If it started years later after storms or normal roof wear, keep the diagnosis open.
Timing is not proof. It is evidence.
Look for repeat leaks
A leak that returns in the same area after patching usually means the real entry point was missed. That often happens when someone seals the visible spot instead of correcting the flashing, shingle course, conduit boot, or damaged underlayment.
Repeat staining under a solar array is a sign to stop patching and coordinate proper roof and solar access.
What to Do Immediately
Take photos first
Before anyone moves panels, pulls flashing, or smears sealant on the roof, take photos. Photograph the ceiling stain, attic moisture, wet insulation, roof deck staining, exterior array, and any visible roof damage. Use wide shots and close-ups.
If water is actively dripping, record a short video. It may feel unnecessary in the moment, but good documentation can decide a warranty or insurance argument later.
- Photograph the interior stain and surrounding ceiling.
- Check the attic only if access is safe.
- Note the storm date or first leak date.
- Save recent solar service records.
- Do not remove panels before documentation.
Reduce electrical risk
If water is near electrical equipment, wiring, a service panel, an inverter, or a junction area, treat it seriously. Do not touch wet electrical components. Do not climb onto the roof to inspect live solar equipment.
A qualified solar contractor can shut down and isolate the system if roof work or panel removal is needed. A roofing crew may be excellent at roofing and still not be qualified to handle solar electrical equipment.
Do not climb or remove panels
Do not lift a panel, tighten a mount, or try to seal around a suspected attachment point yourself. That can damage the system, disturb wiring, break roof materials, and complicate warranty coverage.
Panel removal is a process. It involves shutdown, labeling, handling, storage, roof coordination, reinstallation, and testing. It is not just taking a few bolts loose.
Contact the solar installer
If the leak is near the array or began after solar work, call the original installer first. Ask them to inspect the attachment points, conduit entries, flashing, and workmanship coverage.
If the original installer is gone or unresponsive, look for a solar service contractor that handles detach-and-reset work. A roofer may still be needed, but the solar side needs the right trade involved.
Use emergency roof help carefully
If water is actively damaging the home and the solar installer cannot get there quickly, a roofer may need to perform temporary mitigation. Keep the scope narrow: stop water where safe, protect the interior, and avoid disturbing the array unless the contractor is qualified.
A temporary tarp or interior water control may be the better short-term move. Unauthorized panel removal can turn a leak into a bigger and more expensive job.
Who Is Responsible?
Installer responsibility
If the leak comes from solar mounting, flashing, fastener sealing, conduit penetration, or installation damage, the installer may be responsible under workmanship coverage. The contract language, install date, warranty terms, and inspection findings all matter.
This is much easier to sort out when there are photos of the original roof condition and attachment details. Without documentation, the argument often becomes slower and messier.
Roofer responsibility
If the roof was already worn out, poorly repaired, or leaking away from the solar attachment points, the roofer or homeowner may own that problem. Solar panels can make a weak roof harder to access, but that does not mean they caused the leak.
A roofer should identify whether the failure is in shingles, tiles, underlayment, flashing, decking, or an old repair.
Manufacturer warranty limits
Panel manufacturer warranties usually do not cover roof leaks unless a covered component defect directly created the problem. Most leak disputes are about workmanship, roof condition, storm damage, or access, not the panel warranty itself.
Mounting hardware may have its own product warranty, but product coverage is not the same as labor coverage or roof waterproofing coverage.
Insurance situations
Homeowner insurance may apply after sudden storm damage, hail, wind, falling debris, or resulting interior water damage. It usually does not treat poor workmanship or long-term roof wear the same as a storm event.
Get a diagnosis before assuming insurance will solve it. Warranty, insurance, and roof repair responsibility are three different conversations.
Why documentation matters
The first contractor to disturb the area can remove the evidence. Once panels are moved, flashing is replaced, or sealant is added, it becomes harder to prove what failed first.
On leak calls, the best evidence is rarely the ceiling stain alone. The useful picture comes from the attic location, mount layout, weather history, service history, and photos taken before anybody starts patching.
How Professionals Diagnose Leaks
Attic inspection
A solid inspection often starts below the roof. The attic can show staining on decking, wet insulation, water trails along rafters, or moisture that does not line up neatly with the ceiling mark.
That matters because water may enter at one solar mount and travel before it drops into the room below.
Roof-side inspection
On the roof, the contractor should check attachment points, flashing edges, rails, conduit entries, junction areas, cracked roof materials, and signs of foot traffic damage. On tile roofs, that means checking nearby tiles and underlayment details carefully. On membrane roofs, punctures and equipment-contact areas need attention.
The goal is to find the entry point, not just the wettest-looking area.
Water testing
Water testing can help when done carefully. Spraying the whole roof with a hose is not a diagnosis. A useful test isolates one area at a time while someone watches from below.
Poor water testing can make the problem worse, especially near electrical penetrations or already damaged roof areas.
Moisture checks
Moisture meters, thermal checks, or careful probing can help find wet insulation, damp decking, or hidden spread. This is useful when a leak has been active for a while or when the ceiling stain looks smaller than the wet area above it.
When panels must come off
If the suspected leak point sits directly under the array, the contractor may need to remove part of the system to inspect it. This is where a small roof problem can become a bigger service bill.
The roof penetration itself may be inexpensive to correct. Getting to it is often the expensive part.
Repair Options
Reseal or replace flashing
If flashing is the problem, the repair usually means resetting, replacing, or properly integrating it. Surface sealant alone is not a durable substitute for a flashing detail that sheds water correctly.
On shingle roofs, flashing has to work with the shingle courses. On tile, metal, or low-slope roofs, the right detail depends on the roofing system and the solar mounting product.
Repair small penetrations
For accessible solar-related roof penetrations, practical service benchmarks may be around $100 for a small flashing or stanchion penetration repair, with larger roof-mounted equipment penetrations sometimes closer to $500. Treat those as reference points, not a guaranteed quote.
The actual price depends on roof height, pitch, material, labor minimums, and whether panels block the work area.
Replace damaged shingles or tiles
If the leak comes from cracked shingles, lifted shingles, or broken tiles, the roof material needs to be repaired properly around the solar hardware. On tile roofs, that may also mean checking the underlayment below the tile.
A single accessible broken tile can be a small repair. A broken tile buried under an array is a coordination job.
Fix conduit and equipment penetrations
Conduit boots, junction areas, combiner supports, and roof-mounted equipment stands can all leak if the flashing or sealing is wrong. Repairs in these areas need both roof knowledge and solar safety.
Do not let someone bury an electrical penetration under a pile of incompatible sealant. It may look fixed for a season and become harder to service later.
Remove panels for access
When the leak sits under the array, panels may need to be detached. A common practical benchmark for residential solar removal and reinstallation is about $1,500–$6,000. Some contractors price by panel, with service-guide ranges often around $200–$500 per panel.
The roof repair and the solar detach are different scopes. Ask for them to be separated on the estimate.
Repair decking or underlayment
If water has reached the decking, underlayment, or insulation, the fix is no longer just “seal the mount.” Rotten decking, damaged underlayment, and wet insulation change the job.
That is why a small stain under a solar array should not be ignored. Hidden water damage rarely gets cheaper with time.
When Panels Must Be Removed
Panels may stay for edge leaks
If the leak is near the array edge, along a valley, or outside the panel footprint, panels may be able to stay in place. A roofer and solar contractor can sometimes work around the system safely.
That decision should come from inspection, not a guess from the driveway.
Partial removal may be enough
If only one section blocks the suspected leak point, partial removal may solve the access problem. That can save money compared with removing the whole system.
Partial removal still needs solar-safe shutdown, labeling, handling, and reinstallation. It is smaller work, not casual work.
Full detach can cost $1,500–$6,000
Full residential detach and reset work often falls around $1,500–$6,000, depending on panel count, roof height, roof pitch, roof material, racking layout, and testing requirements after reinstall.
Steep roofs, three-story homes, fragile tile or slate, and arrays spread across several roof planes can push the job toward the higher end.
Per-panel work can run $200–$500
Some service providers quote removal and reinstallation by the panel, often around $200–$500 per panel as a practical benchmark. Not every contractor prices this way, but it helps homeowners spot unrealistic quotes.
If the leak appears limited to one section, ask whether partial removal is enough and how many panels are included.
Roofers should not remove solar alone
A roofer can be excellent at roof repair and still be the wrong person to remove solar equipment. Solar work involves wiring, grounding, racking, labeling, and recommissioning.
The cleanest setup is coordinated work: solar contractor detaches and protects the system, roofer repairs the roof, solar contractor reinstalls and tests the array.
Mistakes That Make Leaks Worse
Caulking without fixing flashing
Sealant has a place. It is not a replacement for proper flashing. A caulk-only patch around a bad mount often fails because water is still getting behind the roof detail.
Letting roofers remove panels
This usually happens because everyone wants the leak fixed fast. The roofer needs access, the homeowner wants the ceiling to stop dripping, and the solar contractor may not be available immediately.
That shortcut can get expensive. Improper removal can damage equipment, void coverage, create lost production, and force a second contractor to reinstall the system correctly.
Ignoring small stains
A small stain below a solar array may not look urgent. It can still mean wet decking, wet insulation, or a leak path that has been active for weeks.
By the time water reaches drywall, it has already passed through the roof system.
Walking on panels or wet roofing
Walking on panels, rails, brittle shingles, tile, or wet roofing is asking for trouble. You can crack roof materials, damage equipment, or fall.
Leave roof access to people with the right equipment and fall protection.
Filing before diagnosing
Insurance may help after storm damage, but it is not the same as workmanship coverage or roof warranty coverage. Filing a claim before understanding the cause can muddy the process.
Diagnose first. Then decide whether the next conversation is with the installer, roofer, insurer, or all three.
Hiring without assigning responsibility
When a roofer and solar contractor both work on the same leak, the scope needs to be clear. Who removes panels? Who repairs flashing? Who fixes roofing? Who tests the system after reinstall?
If the estimate does not answer those questions, expect finger-pointing later.
The table below shows where homeowners often underestimate the job.
| Expectation | Reality | Financial consequence |
|---|---|---|
| “It just needs caulk.” | The flashing or penetration detail may need correction. | Repeat leak and interior repair costs. |
| “Any roofer can remove panels.” | Solar detach requires electrical and warranty-aware handling. | Possible $1,500–$6,000 reset or damage exposure. |
| “The stain proves the solar installer caused it.” | Water can travel from old roof defects or storm damage. | Wrong claim, delayed repair, denied coverage. |
| “The panels must all come off.” | Partial removal may be enough in some cases. | Overpaying for unnecessary access work. |
The takeaway is blunt: do not buy the cheapest patch or the biggest teardown until someone has traced the water path.
How to Prevent Leaks
Require proper flashing
For a new installation or a repair, ask what flashing method will be used for your roof type. If the answer sounds like “we just seal it,” ask more questions.
Keep installation photos
Photos of mount locations, flashing, conduit entries, and roof condition before panels go down are valuable. Ask for them as part of the project record.
Get warranty terms in writing
Workmanship coverage, roof penetration coverage, roof warranties, and equipment warranties are different things. Know which one applies before approving repair work.
Inspect after heavy rain
After a new solar installation, check ceilings and attic areas after the first heavy rain if you can do so safely. Early water signs are much easier to handle than a months-old leak.
Check after major storms
After hail, strong wind, falling branches, or debris impact, look for interior stains and obvious roof damage from the ground. If anything looks off near the array, schedule a professional inspection.
Fix small problems early
A small flashing or penetration issue may stay manageable if it is caught early and the area is accessible. Once water reaches decking, insulation, or interior finishes, the job changes.
Checklist Before Hiring Help
Ask about solar experience
Ask whether the contractor has worked on solar-equipped roofs before. A leak under panels is not the same as a normal roof patch.
Confirm licensing and scope
Confirm who handles roof repair, solar detach, electrical safety, reinstallation, and testing. If one contractor cannot handle the full scope, the estimate should make that clear.
Protect warranties
Before work begins, ask how the repair affects your solar workmanship warranty, roof warranty, or equipment warranty. If the contractor cannot answer, slow the job down.
Require leak-source photos
Ask for photos showing the suspected source before repair and the corrected detail after repair. This is especially important when panels are removed.
Separate costs on estimates
A useful estimate separates solar removal, roof repair, materials, reinstallation, testing, and any interior damage work. Bundled pricing makes it harder to compare bids or assign responsibility.
Confirm system testing
After reinstallation, the system should be tested. The job is not finished just because the panels are back on the roof.
FAQ
Can solar panels cause roof leaks?
The panels themselves usually are not the leak source. Leaks are more often tied to roof penetrations, flashing errors, conduit entries, broken roof materials, or damage caused during installation or service.
How soon can a solar roof leak appear?
A workmanship-related leak can show up after the first heavy rain. Leaks can also appear years later from roof aging, storms, sealant failure, or damage hidden under the array.
Is the solar installer responsible?
The installer may be responsible if the leak comes from mounting, flashing, fastener sealing, conduit penetrations, or installation damage. If the leak comes from old roofing, storm damage, or a separate roof defect, responsibility may fall elsewhere.
Can a roofer fix a leak under panels?
A roofer can repair the roof, but panels should usually be removed and reinstalled by a qualified solar contractor. The safest approach is coordinated work between the roofer and solar service provider.
Will insurance cover a solar roof leak?
Insurance may apply when the leak is tied to sudden storm damage, hail, wind, falling debris, or resulting interior water damage. It usually does not cover poor workmanship or long-term roof wear in the same way. Document the damage and get a diagnosis before assuming coverage.