Roof Damage From Solar Panels: Myths, Real Risks, and What to Check
Quick Answer
Solar panels do not usually damage a roof on their own. In the field, the roof problems I see are usually tied to bad flashing, sloppy attachment work, cracked tiles, failed sealant, or a roof that was already close to the end of its service life. A typical residential solar array adds only a small distributed load, commonly estimated at a few pounds per square foot, so weight is rarely the first suspect on a sound roof. The harder part is access. Once panels cover the problem area, leak tracing and roof repair can get expensive and may require both a roofer and a solar technician. The real question is not, “Do solar panels ruin roofs?” It is, “Is this specific damage caused by the solar work, normal roof wear, storm damage, or another roof penetration?”
How Solar Can Damage a Roof
Solar roof damage is usually a workmanship problem or a roof-condition problem. It is rarely the panel itself. The panel sits above the roof. The risk is in the attachment points, the flashing, the sealant, the walking paths, and the way the crew handles the roof surface.
A clean installation keeps water moving the way the roof was designed to move it: down the slope, over the flashing, and away from openings. A bad installation gives water a shortcut. Under shingles. Around fasteners. Through cracked tile. Into a membrane puncture. That shortcut might not show up during the first light rain, but it will show up eventually.
Poorly Sealed Penetrations
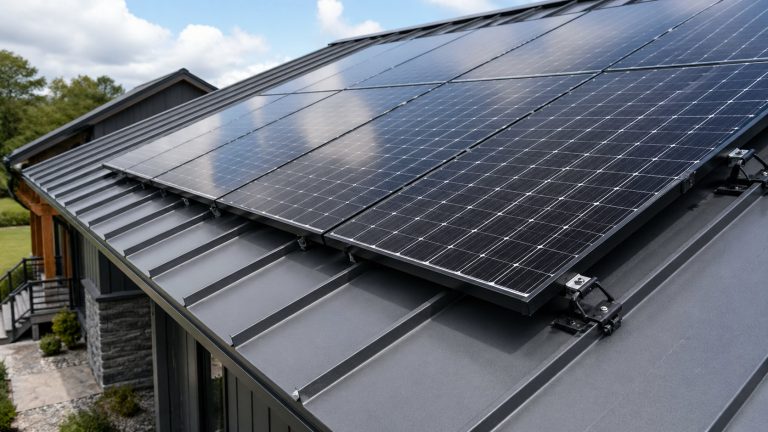
Most pitched-roof solar systems need attachments that fasten into rafters or other structural framing. That usually means drilling through the roof surface. Done correctly, the hole is sealed, flashed, and protected as part of a tested mounting assembly. Done poorly, it becomes a leak waiting for the right storm.
The usual problems are not mysterious: oversized pilot holes, missed rafters, thin sealant, the wrong sealant, exposed fasteners, or mounts that depend too much on surface caulk. Caulk is not a roof system. It can be part of the detail, but it should not be the only thing standing between rainwater and a hole in the roof.
Failed or Missing Flashing
Flashing is the serious part of the waterproofing. On a shingle roof, it needs to work with the shingle courses so water sheds over the flashing instead of sneaking underneath it. When flashing is forced in, set wrong, left too exposed, or installed like an afterthought, water can move sideways or backward under the roofing.
This is where many solar-related leaks start. You may not see the problem from the driveway. The better clues are often inside the attic: staining near a mount, wet insulation below an attachment row, rust around fasteners, or a water trail that lines up with the racking layout.
Cracked Tiles or Shingles
Tile roofs are easy to damage if the crew is careless. One bad step can crack a tile. Sometimes the crack is obvious. Sometimes it hides under the array and does not show itself until the next heavy rain.
Asphalt shingles can be damaged too, especially when they are brittle, hot, old, or lifted aggressively during flashing work. Not every broken shingle near an array is the solar crew’s fault, but broken roofing around panel rows should never be ignored.
Lifted Shingles
Lifted shingles create a lot of confusion. A homeowner sees a stain below the panels and assumes the panel caused it. In reality, the problem may be a shingle that was disturbed during mount installation or flashing insertion.
A lifted shingle can let wind-driven rain get underneath the roof covering. It can also trap debris, slow water, and create a weak spot through freeze-thaw cycles. The repair depends on what actually failed: the shingle, the flashing, the fastener, the underlayment, or the attachment detail.
Punctured Flat-Roof Membranes
Flat and low-slope roofs have their own set of risks. Many use membrane roofing, and membrane damage can come from punctures, sharp hardware, ballast movement, careless service traffic, or water ponding around the array.
On a flat roof, the issue is not just one hole. It is water behavior. If water sits near a weak seam, mount, or membrane defect, a small problem can turn into a stubborn leak. These roofs often need a roofer and solar contractor looking at the same area together.
Blocked Drainage Paths
Panels, rails, conduit, and wiring can change how leaves, branches, and water move across a roof. On steep roofs, debris can gather around rails or low spots. On flat roofs, supports and conduit runs can slow drainage.

This is not the most common solar roof problem, but it matters when leaks show up after storms or when debris keeps collecting under the array. Water that cannot drain cleanly will find the weakest detail.
Myth: Panels Are Too Heavy
Weight gets blamed more often than it should. A typical residential solar array is commonly estimated at about 2–4 pounds per square foot when the load is distributed across the roof. Some flat-roof systems can be heavier, especially with ballast, but weight alone is not usually the reason a healthy roof fails.
Typical Loads Are Distributed
A solar array may weigh hundreds of pounds in total, but that number can sound scarier than it is. The load is spread through rails, attachments, rafters, or a designed mounting system. It is not usually sitting in one small spot like a heavy safe.
That matters because homeowners often focus on the total system weight and miss the more likely issue. If there is a leak, the first place to look is usually the water path, not the total pounds on the roof.
Distributed Versus Concentrated Load
Distributed load is spread over a larger area. Concentrated load is packed into a smaller point. Solar becomes more concerning when attachments miss framing, ballast is poorly placed, or the roof already has structural weakness.
A medium-size residential system can have a total weight that sounds substantial, but a properly designed roof feels that load across a broad footprint. Sagging, cracked rafters, soft decking, or ceiling movement is different. That is not normal solar behavior. That calls for a structural review.
When Weight Becomes Real
Weight deserves a closer look when the roof has old framing, existing sagging, water-damaged decking, heavy snow exposure, multiple roof layers, or a ballasted flat-roof system. These are not automatic deal-breakers. They are inspection triggers.
For homebuyers, this is worth remembering. If a house has solar and you see uneven roof planes, ceiling cracks, soft decking, or visible deflection in the attic, do not assume it is just cosmetic. Get it checked before closing or before accepting the system as-is.
When Structure Needs Inspection
If the roof visibly sags, rafters are cracked, or the decking feels soft, stop treating this as a simple solar issue. The roof may have a structural or moisture problem that solar only made harder to access.
In the field, I do not start by blaming the panels. I start by mapping the symptom: where the stain is, what is above it, where the mounts sit, and whether the water path lines up with the solar work. That saves people from expensive guessing.
Myth: Every Leak Is Solar-Caused
A leak below a solar array is not proof that solar caused it. Roofs already have plenty of leak-prone areas: vents, valleys, chimneys, skylights, plumbing boots, old flashing, storm-damaged shingles, and worn underlayment. Solar may be involved. It may also be nearby and innocent.
Check the Leak Location
Start with alignment. Does the stain sit below a mount, rail, conduit run, or penetration? If yes, solar workmanship moves higher on the list. If the stain lines up with a skylight, chimney, plumbing vent, or valley, the panels may have nothing to do with it.
Roof leaks travel. Water can enter high on the roof and run along rafters, decking, or underlayment before it appears inside. That is why attic inspection often tells you more than a quick look at the panel layout.
Storm Timing Can Mislead
A lot of leaks show up after a hard storm. That does not automatically mean the most recent roof work caused the problem. Wind-driven rain can expose an older weak spot that had been quiet for years.
Timing still matters. A leak that appears right after solar installation or after a service visit deserves close attention. A leak that appears years later may still involve solar flashing, but roof age, storm damage, and other penetrations need to stay in the diagnosis.
Evidence Beats Assumptions
Good evidence includes photos of the stain, attic moisture, wet insulation, mount locations, installation photos, and weather timing. A written finding from a roofer or solar technician is much more useful than someone standing on the driveway saying, “Yep, it’s the panels.”
This matters because unnecessary panel removal is expensive. Practical benchmarks often put removal and reinstallation around $200–$500 per panel, with some contractors quoting detach-and-reset work around $275–$300 per panel. If panels come off before the source is confirmed, you may pay a large access bill and still have the same leak.
Myth: Penetrations Always Fail
Roof penetrations are not automatically bad. Roofs already have penetrations for vents, pipes, skylights, and chimneys. Those work when they are flashed correctly. Solar attachments are no different in principle.
Proper Flashing Is Standard
On an asphalt shingle roof, a proper solar attachment should be integrated with the roof layers so water sheds over the flashing. On tile roofs, the mounting method may use tile-specific flashing, hooks, replacement flashing components, or other details designed to avoid breaking the tile. On flat roofs, the waterproofing approach depends on the membrane and mounting design.
The problem is not simply that a hole exists. The problem is a hole without a reliable waterproofing detail.
Failed Flashing Signs
Failed flashing can be subtle. On the roof, you might see exposed sealant, lifted shingles, crooked flashing, loose hardware, cracked tiles, or staining around an attachment. In the attic, you may see dark trails on decking, damp insulation, rusted fasteners, or water marks below a mount.
If the roof is actively leaking, do not turn the inspection into a roof-walking experiment. Wet roofing, solar equipment, and guesswork are a bad mix. Start with photos, attic access if safe, and a qualified inspection.
Red Flags Around Mounts
- Exposed fasteners where flashing should protect the opening
- Large surface caulk patches doing the real waterproofing work
- Cracked or shifted tiles around attachment points
- Lifted, buckled, or torn shingles near mounts
- Racking that moves, rattles, or looks loose after wind
- Interior stains that line up with attachment rows
One warning sign does not prove fault. It does mean the area deserves a closer look. The goal is to find the water path, not just the nearest contractor to blame.
Myth: Solar Voids Every Warranty
Solar does not automatically void every roof warranty. That said, solar can make warranty questions messy. Roof warranties, solar workmanship warranties, equipment warranties, and contractor guarantees are often separate documents with separate responsibilities.
When Warranties Become Complicated
Warranty disputes usually begin when roof penetrations are made with unapproved methods, a non-authorized contractor modifies the roof, or panels are removed without following the solar company’s requirements. A roof manufacturer may object to unapproved penetrations. A solar installer may reject damage caused by another contractor. A roofer may exclude areas affected by solar attachments.
That is why paperwork matters. Keep the solar contract, roof warranty, installation photos, permit records, inspection records, service reports, and written leak findings. Without documentation, everyone has room to point at someone else.
Different Warranties Cover Different Problems
| Problem | Likely Party to Review | What Matters |
|---|---|---|
| Leak at a solar mount | Solar installer | Attachment method, flashing, workmanship warranty |
| Leak at chimney or valley | Roofer | Roof flashing, roof age, storm damage |
| Cracked tiles near array | Solar installer and roofer | Foot traffic evidence, installation photos, tile condition |
| Loose racking | Solar contractor | Fastening, hardware, structural attachment |
| Membrane puncture on flat roof | Roofer and solar contractor | Mounting design, traffic damage, waterproofing details |
The practical takeaway: do not accept vague explanations. “Solar voided the warranty” is not specific enough. Neither is “the roof was already bad.” A useful report identifies the leak source, the evidence, the likely cause, and the repair scope.
Documents to Collect
Collect the solar agreement, roof warranty, installation photos, roof inspection report, service history, storm dates, and contractor emails. If panels need to be removed, get the detach-and-reset scope in writing before roof work begins.
Solar-Related Damage Symptoms
Solar-related roof damage usually shows up as a pattern. One symptom may not prove much. Several symptoms that line up with the array layout are more meaningful.
New Stains Below Attachments
A ceiling stain below a solar array deserves attention. If the stain lines up with a mount row, flashing failure or penetration leakage becomes a real possibility. If it lines up with a vent, chimney, skylight, or valley, the source may be unrelated.
Damp Insulation After Rain
Wet insulation in the attic can help trace the path. Moisture directly below a solar attachment is useful evidence. Moisture several feet away from the array means the water may be traveling from another roof feature.
Broken Roofing Around Panels
Cracked tiles, broken shingles, torn roof material, or disturbed flashing near panel rows are stronger warning signs than normal aging across the whole roof. On tile roofs, damage may be hidden under the array and only visible during a careful inspection.
Loose Racking or Movement
Racking should not shift, rattle, or look loose. Movement can stress the waterproofing around attachments and may point to a fastening issue. This is not a homeowner adjustment job. It needs a solar-qualified technician.
Pooling Around Flat-Roof Mounts
On flat roofs, ponding water around supports, conduit, or ballast can make a small membrane defect worse. If water repeatedly sits near a weak point, the roof has less margin for error.
Stains That Follow Rail Lines
Interior stains that repeat along rail or attachment rows are more suspicious than one isolated stain far from the system. Pattern matters. It tells you where to look first.
Likely General Roof Problems
Sometimes the panels are just near the problem. A careful inspection should separate solar-related damage from ordinary roof failure.
Leaks Around Roof Features
Skylights, chimneys, plumbing vents, exhaust vents, and valleys are common leak sources. If one of these sits uphill from the stain, water may be entering there and showing up below the array.
Widespread Aging Signs
Curling shingles, brittle shingles, granule loss, cracked vent sealant, widespread tile breaks, or worn flat-roof membrane seams point toward broader roof wear. Solar may make access harder, but it may not be the cause.
Multiple Leaks Across Roof Planes
If the home has leaks on roof areas with no panels, the issue is less likely to be isolated solar workmanship. It could still include a solar-related defect, but the roof as a whole needs evaluation.
Storm Damage Beyond Panels
Hail, wind, falling limbs, and debris can damage gutters, flashing, shingles, and roof accessories. If storm damage appears across the property, the array is only one part of the inspection.
What To Do First
The first move can save money or waste it. Do not pull panels, walk the roof, or let someone start opening up the array area until the leak is documented and the likely source is narrowed down.
Photograph the Evidence
Take photos of the ceiling stain, attic area, wet insulation, roof plane, and array location. Note the date, the weather event, and whether the stain appeared after installation, after a solar service visit, or after a storm.
Do Not Remove Panels Yourself
Solar panels involve glass modules, roof attachments, wiring, and electrical connections. DIY removal can damage the system, create safety issues, and weaken a warranty claim. Even when the system appears shut down, rooftop solar work should not be treated casually.
Call the Solar Installer First
If the leak lines up with mounts, racking, conduit, or panel rows, contact the original solar installer when possible. They know the mounting system and may have workmanship obligations.
Bring in a Roofer
If the source is unclear, bring in a roofer. A proper roof inspection looks beyond the panels and checks vents, valleys, chimneys, roof age, storm damage, underlayment, and material condition.
Request Written Findings
Ask for written findings with photos, location notes, suspected source, and recommended repair scope. This helps with warranty claims, insurance conversations, and contractor coordination.
When Panels Must Be Removed
Sometimes there is no way around it. If the repair is under the array, if several attachments need correction, or if the roof plane needs major work, panels usually have to come off before the roofer can do the job correctly.
Minor Repairs May Stay Accessible
Some edge-area repairs or accessible flashing work can be handled without removing the entire array. But repairs under panel rows are different. A roofer cannot properly replace shingles, tiles, underlayment, or membrane sections that are covered by panels and rails.
Larger Repairs Need Detach
Roof work under the array often requires a solar detach and reset. The solar contractor removes the panels and necessary hardware, the roofer completes the roof repair, and the solar contractor reinstalls and checks the system.
Removal Costs Can Be Significant
Practical benchmarks for solar panel removal and reinstallation often fall around $200–$500 per panel, depending on location, roof access, system complexity, and scope. Some contractors quote detach-and-reset work around $275–$300 per panel. A 20-panel system can land around $4,000–$10,000. A 25-panel system may fall around $5,000–$12,500 in many planning estimates.
That is not the roof repair cost. That is the cost of getting the solar array out of the way and putting it back correctly. The roof repair itself may be separate.
Who Pays Depends on Cause
If the leak comes from solar workmanship, the installer’s warranty may apply. If the roof was already deteriorated, the homeowner may be responsible. If a storm caused the damage, insurance may come into play. If another contractor disturbed the system, responsibility can shift again.
| Scenario | Likely Cost Exposure | Key Decision |
|---|---|---|
| Small leak at accessible flashing | Lower repair cost, possible no full detach | Confirm source before removing panels |
| Leak under middle of array | Possible detach and roof repair | Coordinate solar and roofing schedules |
| Cracked tiles under panels | Tile repair plus access labor | Determine whether installation traffic caused damage |
| Flat-roof membrane damage | Roofing repair plus solar access | Inspect drainage, membrane, and mounts together |
| Full roof plane repair | High detach/reset and roof work cost | Get written scopes from both trades |
The practical point is simple: before approving removal, make sure both scopes are clear. One scope is for the solar detach and reset. The other is for the roof repair. Mixing them up is how homeowners get surprised.
Solar Damage Checklist
This checklist will not replace a professional inspection, but it will help you ask better questions and avoid chasing the wrong problem.
Does the Leak Line Up?
Compare the inside stain with the roof layout. If the stain sits below a mount, rail, or conduit penetration, solar workmanship becomes more likely. If it sits below a vent, valley, chimney, or skylight, keep looking.
Did It Start After Solar Work?
A leak that begins soon after installation or after a service visit deserves a closer solar review. A leak that appears years later may still involve solar flashing, but roof age, storms, and other penetrations need to be checked too.
Are Materials Broken Nearby?
Look for cracked tiles, lifted shingles, torn roof surface, or disturbed flashing around the array. Do not climb onto the roof if access is unsafe. Photos from the ground or attic are better than a fall.
Is Attic Staining Aligned?
Attic staining below attachment rows is valuable evidence. Moisture far from the array suggests another water path may exist.
Do Photos Show Proper Flashing?
Installation photos can help show whether flashing was installed, whether mounts were aligned correctly, and whether roof material was damaged during the work.
Has a Roofer Ruled Out Other Sources?
Before blaming solar, a roofer should check vents, valleys, skylights, chimneys, storm damage, roof age, and material failure. Good leak diagnosis follows the water, not the assumption.
Common Homeowner Mistakes
The most expensive mistakes often happen before the repair starts. Homeowners panic, call the wrong trade first, approve panel removal too early, or accept blame without documentation.
Assuming Panels Caused Everything
A stain below panels is a clue, not a verdict. The roof may have a vent leak, old flashing, storm damage, or worn roofing nearby. If the diagnosis is wrong, the repair may not stop the leak.
Letting a Roofer Remove Panels
Roofers are not automatically qualified to disconnect, move, store, and reinstall solar equipment. Some can coordinate it properly. Some cannot. If panels are removed incorrectly, the homeowner can end up with equipment damage, electrical problems, warranty trouble, and extra labor charges.
Ignoring Electrical Safety
Solar equipment is electrical equipment. Do not disconnect wiring, move panels, or adjust racking just because the hardware is on the roof. A solar-qualified technician should handle that work.
Waiting on Small Stains
A small ceiling stain may hide wet insulation, damp decking, or a slow leak that gets worse every time it rains. Roof repairs often start in the hundreds or low thousands, depending on the damage, but waiting can add drywall, insulation, mold cleanup, and larger roof work.
Accepting Verbal Blame
“It’s the solar company’s fault” is not enough. “The roof was already bad” is not enough either. Ask for photos, location mapping, and written findings. When detach-and-reset work can run thousands of dollars, vague opinions are expensive.
| Mistake | Why It Happens | Financial Risk |
|---|---|---|
| Blaming solar without leak tracing | Stain appears below array | Wrong repair, unresolved leak |
| Removing panels too early | Roofer needs access | $200–$500 per panel in many cases |
| Using caulk as the repair | Looks fast and cheap | Repeat leak and extra service calls |
| Walking on tile roof | DIY inspection attempt | Broken tiles and new leak paths |
| No written documentation | Contractors give verbal opinions | Warranty or claim dispute |
Slow down long enough to document the source. That does not mean ignoring an active leak. It means fixing the actual problem instead of paying for the most obvious guess.
FAQ
Do solar panels cause roof leaks?
Solar panels themselves usually do not cause leaks. Leaks are more often tied to penetrations, flashing errors, failed sealant, cracked roof material, or pre-existing roof problems. The important question is whether the water path lines up with the solar attachments.
Can panels protect shingles?
Panels can shade the roof area they cover, which may reduce some direct sun exposure on those shingles. That does not remove the risk around mounts, flashing, wiring paths, or service traffic. Covered roofing still needs proper waterproofing.
Who is responsible for a leak?
Responsibility depends on the cause. If the leak comes from solar attachment workmanship, the solar installer may be responsible. If it comes from old roofing, vents, storm damage, or non-solar flashing, the homeowner, roofer, insurer, or roof warranty provider may be involved.
Do panels need removal for repairs?
Not always. Some accessible flashing or edge-area repairs can be done without removing the full array. Repairs under the panels, larger roof repairs, tile replacement under the array, and many reroofing jobs usually require a solar detach and reset.
How do I prove solar caused damage?
Useful proof includes photos of the stain, attic moisture mapping, mount locations, installation photos, written roofer findings, written solar installer findings, and timing records. The strongest case connects the water path directly to a solar attachment or a recent solar service visit.