Solar Panel Roof Preparation Checklist
Quick Answer
Before installing solar panels, get the roof ready by checking four things: water tightness, structural condition, safe access, and approval readiness. The rooftop work itself is often done in about 1–3 days, but roof problems can stall the wider design, permitting, inspection, and activation timeline. The decision is straightforward: do not let panels go on until the roof surface, framing access, penetrations, and paperwork are in order. A checklist helps, but it cannot replace a roofer’s leak diagnosis or a structural review when the roof shows warning signs.
Why Roof Preparation Comes First
Solar panels are not patio furniture. Once the rails, mounts, wiring, and panels are installed, that part of the roof becomes harder to inspect and harder to repair. That is why roof preparation has to happen before the solar crew starts drilling, flashing, and fastening equipment.
A roof can look fine from the driveway and still have soft decking, cracked flashing, attic stains, loose tiles, ponding water, or framing issues. Those are not cosmetic problems when solar is involved. They affect mounting, waterproofing, inspections, and future repair access.
The real mistake is installing over a roof problem and hoping it stays quiet. If a leak shows up later, nobody wants to sort out whether it came from an old vent boot, a solar attachment, a skylight, or a patch that should have been replaced months earlier.
Roof preparation does not mean every homeowner needs a new roof. It means the roof has to be checked well enough that the installer, roofer, inspector, and homeowner are not guessing after the panels are already installed.
Roof Readiness and Project Timing
A residential solar project usually moves through a site visit, design, permitting, installation, inspection, utility review, and permission to operate. The roof can slow down several of those steps. Bad access can weaken the site assessment. Structural concerns can hold up design. Missing roof details can delay permits. Poor flashing or attachment work can fail inspection.
The actual rooftop installation is often the quick part. Many residential jobs are physically installed in a typical range of 1–3 days once approvals and scheduling are complete. The longer delays usually come from design changes, permits, utility coordination, inspection corrections, or roof issues discovered too late.
| Project Stage | Roof-Related Risk | What To Prepare |
|---|---|---|
| Site assessment | Incomplete roof data | Clear attic, roof, meter, and panel access |
| Design | Obstruction or layout conflict | Document vents, skylights, chimneys, and roof repairs |
| Engineering | Structural concern | Provide roof age, framing access, and repair history |
| Installation | Leak or attachment issue | Fix damaged roofing and flashing before mounting |
| Inspection | Failed roof or mounting detail | Confirm proper flashing, attachments, and access paths |
The takeaway is simple. Roof preparation is part of installation control. A clean solar quote can still turn messy if the roof is not ready for assessment, mounting, inspection, and approval.
The Solar Roof Checklist
A useful checklist does more than tell you to “look at the roof.” It separates what a homeowner can safely check from what a roofer, installer, or engineer needs to verify. The goal is to catch issues that affect mounting, waterproofing, access, code approval, and future service.
- Check for active leaks, ceiling stains, attic moisture, or unexplained damp areas.
- Look for missing shingles, cracked tiles, rust, membrane damage, sagging, ponding water, or soft spots.
- Document vents, chimneys, skylights, dormers, satellite mounts, drains, and other roof obstructions.
- Clear access to the attic, electrical panel, utility meter, garage, driveway, side gate, and roof access points.
- Collect roof age, repair records, warranty documents, permits, and photos of existing roof conditions.
Confirm the Roof Surface
The roof surface has to be stable enough for work and reliable enough to receive attachments. On asphalt shingles, look for missing, curled, loose, or brittle shingles. On tile roofs, cracked or displaced tiles matter. On metal roofs, watch for rust, loose fasteners, and seam problems. On flat roofs, membrane cracks, blisters, open seams, and ponding water deserve a closer look.
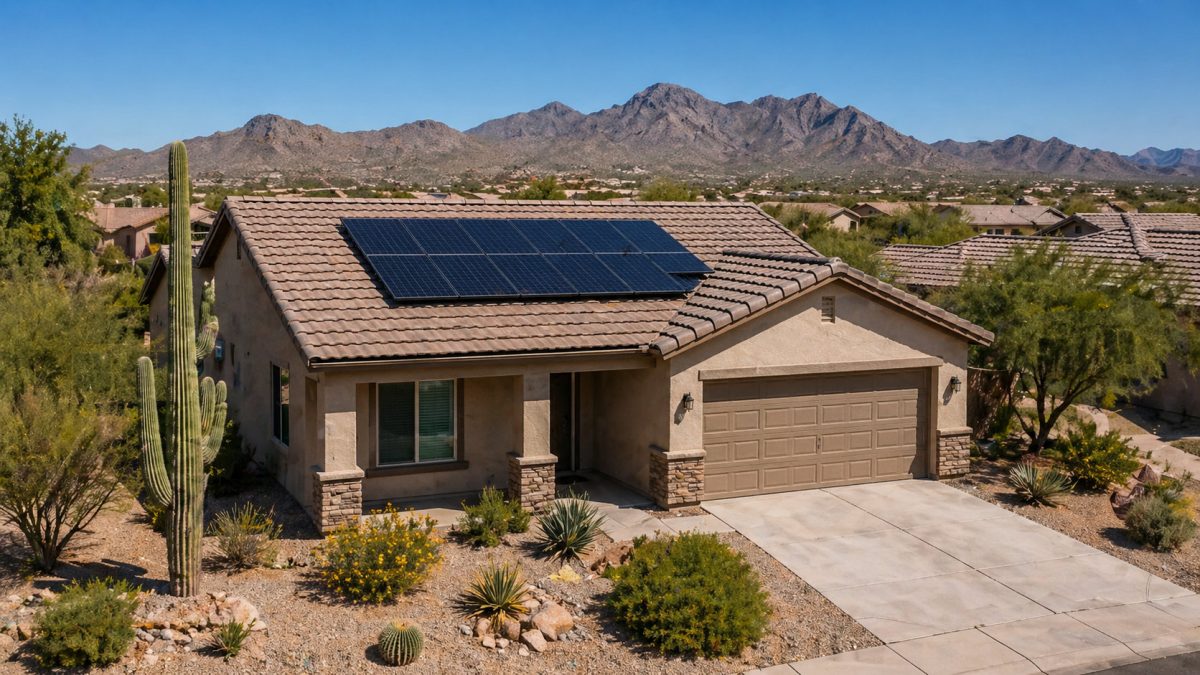
This is not about making the roof look perfect. It is about finding weak spots before they end up under rails and panels. A small defect in the wrong place can become a much bigger headache once access is blocked.
Check for Damage and Sagging
Sagging, soft decking, uneven roof planes, and interior water stains are not small details. They can point to old leaks, deteriorated sheathing, framing movement, or prior repairs that did not hold.
From the ground, sight along the roofline and look for dips or waves. From the attic, look for dark staining, damp insulation, cracked framing, deflected sheathing, or daylight around penetrations. Do not climb a steep or fragile roof just to prove a point. Take photos from safe locations and let a roofer or solar site assessor handle risky access.
Verify Structural Readiness
Rooftop solar often adds a modest distributed load, commonly discussed in the industry around 2–4 pounds per square foot depending on the equipment and layout. Treat that as a planning benchmark, not a guarantee. Snow load, wind exposure, rafter span, roof age, prior water damage, and local code requirements can all change the answer.
Structural review matters most on older roofs, visibly sagging roofs, unusual framing, roofs with water damage, and homes in heavy snow or high wind areas. Some installers include engineering review in the solar process. In other cases, the permit office or installer may require a separate structural letter.
In the field, I do not treat sagging and attic water stains like normal wear. Normal wear may be a roofing repair item. Sagging or stained framing can turn into an engineering, waterproofing, and inspection problem all at once.
Open Attic Access
Attic access gets ignored because the panels go outside. That is a mistake. The installer or engineer may need to verify rafter direction, truss spacing, roof deck condition, leak evidence, or wiring paths. If the attic hatch is blocked, locked, or unsafe, the site visit may not give the design team enough information.
Before the assessment, clear the attic hatch and move stored items away from the entry point. If the home has no usable attic access, say so early. The installer may need another way to document framing or roof structure.
Map Roof Obstructions
Vents, chimneys, skylights, roof drains, dormers, satellite mounts, ridges, and valleys all shape the panel layout. They can reduce usable roof space, force layout changes, affect worker access, or create waterproofing conflicts.
This is not only an efficiency issue. It affects where rails can go, where attachments can land, how close panels can sit to code-required access paths, and whether the final layout matches the quote. Miss an obstruction early, and the array may need to shrink or move later.
Check Vent and Flashing Conflicts
Existing roof penetrations are common leak points. Plumbing vents, roof jacks, chimneys, skylights, and old satellite mounts should be checked before solar mounting begins. Cracked rubber boots, lifted flashing, exposed fasteners, and patched areas near the planned array are worth dealing with first.
Solar flashing does not fix unrelated roof flashing. It protects the solar attachment when installed correctly. It does not magically repair a worn-out vent boot three feet away. If that old penetration leaks later, the repair can be harder and the responsibility can become harder to prove.
Confirm Waterproofing Details
Roof penetrations need to match the roof type, the racking system, and the manufacturer’s instructions. On many pitched roofs, proper work includes locating rafters, drilling the right pilot holes, using specified fasteners, applying approved sealant where required, and installing flashing or approved attachment products.
Sealant alone is not a plan when the mounting system calls for flashing. Before signing, ask who is responsible for roof penetrations, what attachment system will be used, and how roof warranty concerns are handled. Get that answer in writing.
Clear Work Access
Solar crews need real access, not just permission. Locked gates, parked cars, blocked driveways, full garages, tenant access issues, and electrical panels buried behind storage can stop work fast. The roof, attic, meter, garage, and electrical panel all need to be reachable.
This is one of the few delays the homeowner can control almost completely. Clear the access before the site visit. Then clear it again before installation day.
Gather Roof Records
Pull together the roof age, material type, repair records, warranty papers, prior permit documents, and leak history before the solar assessment. If the roof was repaired after storm damage, or if one area has been a repeat problem, disclose it early.
Take photos before installation. Include roof planes, flashing, vents, chimneys, skylights, gutters, stains, attic conditions, and existing damage. Those photos are useful later if anyone needs to separate old roof wear from new installation work.
Check HOA and Local Rules
Permits are not the only approvals that can affect rooftop solar. Some homes also deal with HOA review, historic district rules, exterior design limits, or local appearance requirements. These may affect array placement, conduit routing, visible equipment, or the approval timeline.
Do not wait until install week to ask about this. If the home is in an HOA or regulated district, confirm the process before the final design is locked.
Photograph Existing Conditions
Photos create a baseline. They show what the roof looked like before anyone installed rails, flashed attachments, routed conduit, or walked the roof with equipment.
A good photo set includes wide roof views, close-ups of visible damage, attic access, the electrical panel, the utility meter, driveway access, and any roof area the crew will likely use. Keep the photos with the contract, permit, and warranty documents.
Roof Readiness Decision Criteria
A roof does not need to be flawless before solar. It does need to be reliable enough that panels can be mounted without creating avoidable roofing, structural, or inspection trouble. The fastest way to think about it is readiness level: ready, repair first, review first, or delay.
| Roof Condition | Solar Readiness | Recommended Action |
|---|---|---|
| No leaks, sound surface, clear access | Likely ready | Proceed with site assessment and design |
| Minor localized damage | Conditionally ready | Repair affected areas before mounting |
| Damaged flashing near planned array | Not ready yet | Repair or replace flashing first |
| Sagging, soft decking, or water-stained framing | Needs review | Use roofer or structural engineer before install |
| Active leaks or unsafe access | Delay installation | Fix roof or access issue before solar work |
Do not treat every roof issue the same. A cracked tile is not the same as sagging framing. A worn vent boot is not the same as repeated attic moisture. Sorting the severity early keeps the homeowner, roofer, installer, and inspector working from the same facts.
Ready for Solar
A roof is usually ready for the next solar step when the surface is sound, there are no active leaks, work areas are accessible, and the installer can verify framing and layout requirements. The design still has to be checked. The permit still has to be approved. But there is no obvious roof problem standing in the way.
Ready does not mean nothing will change during design. It means there is no known roof condition that should stop the assessment before it starts.
Needs Minor Repair
Minor repairs often include a small number of damaged shingles, cracked tiles, worn vent boots, exposed fasteners, small flashing defects, or gutter-related water issues. These are usually easier to handle before panels and rails cover the area.
As a practical benchmark, localized roof repair may land around $250–$700 in many common situations, but roof type, height, pitch, access, labor rates, and material availability can move that number. The exact price is less important than the sequence. Repair first. Mount second.
Needs Professional Review
Professional review is the right move when the roof shows sagging, soft spots, repeated leaks, ponding water, old water stains, cracked framing, unusual construction, or failed prior repairs. A roofer should handle roof condition and leak diagnosis. A structural engineer may be needed when framing capacity, spans, loads, or permit documentation are the question.
Do not ask a solar salesperson to casually “eyeball” a structural concern. If the roof has warning signs, the final design needs defensible information.
Delay Solar Until Fixed
Delay installation when there is an active leak, unsafe access, unresolved structural concern, failing roof surface, blocked inspection access, or missing required approval. Pushing forward may feel efficient for a day. It can cost more later.
A delayed solar project is annoying. A completed solar installation over a bad roof is worse.
What Installers Check
The site assessment is where the roof becomes part of the solar design. A good installer is not only looking for panel space. They are checking whether the roof can be worked on safely, attached to correctly, waterproofed properly, and passed through local review.
Roof Measurements and Obstructions
Installers measure roof planes, usable areas, ridges, hips, valleys, obstructions, and access paths. They may use photos, satellite imagery, drone data, physical measurements, or a mix of methods. The final layout depends on what can actually be built.
Skylights, vents, chimneys, dormers, drains, and odd roof angles often force changes. That is why early roof documentation matters.
Rafter and Truss Spacing
Many roof-mounted systems need attachments to land correctly into structural framing. The installer may need to confirm rafter or truss direction, spacing, and access limits. Attachment instructions can specify pilot holes, fasteners, sealant, flashing, and placement.
Missing the framing is not a minor layout error. It can create weak attachment, leak risk, rework, or inspection trouble.
Electrical and Conduit Access
Roof preparation also includes what happens below the roof. Crews need a practical path for wiring, conduit, inverters, disconnects, grounding, and panel access. If the electrical panel or utility meter is blocked, the site assessment or installation can stall.
The roof plan and the electrical plan meet in the real world. If that route is not planned early, the finished job may be harder to approve or uglier than expected.
Roof Slope and Orientation
Slope and orientation affect production, but for roof preparation they matter as installation conditions. Steep roofs are harder and riskier to work on. Unusual angles can limit layout. Some roof areas may be productive but difficult to access, attach to, or service.
Production modeling is a separate discussion. Here, the question is whether the planned roof area is buildable.
Shade and Array Placement
Trees, chimneys, dormers, nearby buildings, and roof geometry can all affect array placement. For preparation, the important step is making sure the installer sees these conditions before final design.
Do not move vents, trim trees, or change roof features based on a guess. Let the installer model production and layout first, then decide what work is actually justified.
Installation Process and Roof Prep
Roof preparation fits into the installation sequence from the start. Homeowners do not need to manage every technical step, but they should understand the order. Permits usually come before installation. After installation, local inspection and utility permission usually come before the system operates on the grid.
Site Assessment and Photos
The first roof-related step is the site assessment. The installer gathers roof dimensions, photos, attic or framing details, electrical information, access notes, and obstruction details. Clear access and honest roof history make this visit more useful.
Before the visit, disclose leaks, repairs, difficult access areas, roof damage, HOA rules, and anything that may affect layout or mounting.
Design and Structural Review
The design team turns roof information into a buildable plan. That plan may include panel layout, attachment locations, racking, conduit routing, electrical equipment, and structural documentation.
If roof concerns show up during design, the project may pause for a roofer, engineer, revised layout, or new documents. That is frustrating, but it is better than finding the issue after crews arrive.
Permit Submission
Most jurisdictions require permits before rooftop solar installation. Permit review may include electrical plans, structural documentation, roof layout, attachment details, fire access paths, and code items. Requirements vary by city, county, utility, and authority having jurisdiction.
Do not treat permit timing as fixed. Incomplete applications, missing roof information, engineering questions, and utility requirements can all stretch the schedule.
Physical Installation
Once approvals and scheduling are in place, many residential rooftop installations take a typical range of about 1–3 days. Roof work may include layout marking, framing location, attachment installation, flashing, rail mounting, panel placement, and wiring or conduit routing.
If the crew finds damaged roofing, unsafe access, blocked work areas, or a roof condition that was not disclosed, they may stop or reschedule. That is a bad time to discover something that could have been fixed earlier.
Inspection and Activation
After installation, the system usually needs local inspection and utility permission before grid operation. Inspectors may review mounting, electrical work, labeling, setbacks, access, and code compliance. Roof attachment and flashing details can matter during this review.
A system can be physically installed and still not approved to operate. That is why shortcuts during mounting and waterproofing are not worth it.
| Expectation | Reality | Roof Preparation Lesson |
|---|---|---|
| Panels go on as soon as I sign | Design, permit, and utility steps come first | Prepare roof documents before design |
| Installation is the whole project | Installation is often only 1–3 days | Delays usually happen before or after roof work |
| The installer will catch everything | Installers rely on access and accurate disclosure | Clear attic, roof, meter, and panel access |
| A small leak can wait | Panels may block easy repair access | Fix known leak risks before mounting |
The roof work may look fast from the outside. The approval chain around it is where small mistakes turn into delays.
Roof Mistakes That Delay Solar
Roof-related delays usually come from avoidable gaps: hidden leaks, poor access, missing approvals, undocumented repairs, or assumptions about who owns the roofing work. These mistakes can lead to trip charges, rescheduling, repair bills, redesign, or arguments about responsibility.
Hiding an Active Leak
Some homeowners hold back leak history because the leak is intermittent or because it is not directly under the planned array. Bad call. A ceiling stain, attic mark, or old leak near flashing should be disclosed before the design is finalized.
A leak-focused roof inspection often falls somewhere around $100–$600 as a typical service benchmark, depending on access, roof complexity, and testing. That is easier to deal with before rails and panels cover the work area.
Assuming Roof Repairs Are Included
Solar installation is not roof repair. Unless the contract clearly says otherwise, the solar company is not automatically fixing old flashing, brittle shingles, cracked tiles, or leak-prone roof details.
Localized roof repair may run around $250–$700 in many common cases, with broader repairs costing more depending on material and damage. The bigger risk is paying later for rework, panel removal, or a leak dispute because a known problem was left under the array.
Ignoring Access Problems
Locked gates, blocked driveways, stuffed attic hatches, and electrical panels hidden behind storage can stop a scheduled job. Crews plan labor, equipment, and timing around the installation day. If they cannot reach the work areas, the project can slip.
This is not technical. It is basic site readiness. Clear the access.
Skipping HOA Approval
HOA or exterior modification approval can affect panel placement, conduit routing, and visible equipment. Even where solar access rights exist, the paperwork may still matter.
If approval comes after the design is done, the installer may need to revise the layout. That can add time and friction that could have been avoided.
Overlooking Old Flashing
Old flashing around vents, chimneys, and skylights is easy to ignore because it may not leak every storm. Once solar is installed around it, repair access gets harder.
New solar mounts do not fix old roof penetrations. If an existing vent boot or chimney flashing is failing, handle it before the array goes on.
Installing Over Soon-To-Fail Areas
A weak roof section is not ready just because it is dry today. Brittle shingles, deteriorated underlayment, cracked tiles, soft decking, and repeated patch repairs are all warning signs.
This does not always mean a full roof replacement. It does mean a roofer should confirm whether the planned solar area is reliable enough to cover with equipment.
Checklist Limitations
A homeowner checklist is useful. It catches visible issues, organizes records, and helps the installer get accurate information. It is not a technical approval. Some roof conditions need a professional inspection, leak test, or engineering review.
Not a Leak Diagnosis
Water does not always enter directly above the stain. It can travel along rafters, underlayment, flashing, or penetrations before showing up indoors. If there is an active leak or repeated stain, call a roofer before relying on a solar assessment alone.
The solar installer needs to know about the leak. The roofer needs to diagnose it.
Not Structural Engineering
Homeowners can spot warning signs like sagging, cracked framing, and water-stained decking. They cannot confirm structural capacity from the ground.
When framing concerns exist, engineering review may be needed for installation safety, permit approval, or both. Depending on the installer and local requirements, that review may be included or handled separately.
Not Permit Approval
A well-prepared roof does not guarantee fast permit approval. Local rules vary. Some jurisdictions want specific structural documents, roof layouts, attachment details, electrical diagrams, labels, or access-path information.
The homeowner’s job is to provide accurate roof and property information early so the installer can submit a complete package.
Not Final Layout Confirmation
A homeowner can estimate usable roof space, but the final layout depends on installer measurements, fire setbacks, obstructions, attachment points, shade review, and electrical routing.
Treat the checklist as preparation, not final design authority. If the final layout changes, ask what roof condition, code rule, or design constraint caused the change.
Roof-Prep Cost Context
This is not a solar pricing guide. Full system cost, cost per watt, financing, tax incentives, and payback belong in a separate discussion. For roof preparation, the relevant costs are inspections, leak checks, minor repairs, access corrections, and structural review when needed.
Budget for Readiness Items
A pre-solar roof inspection often falls around $125–$358 as a typical home-service benchmark, depending on roof size, access, location, and inspection depth. Leak-focused inspections can cost more when attic review, moisture tracing, or additional testing is needed.
Minor repairs are usually simpler before panels are installed. If the roof has active leaks, damaged flashing, cracked tiles, deteriorated vent boots, or membrane problems, get repair pricing before final solar scheduling.
Avoid Cost-Per-Watt Thinking
Do not bury roof preparation inside a solar cost-per-watt comparison. A lower solar quote may not include roof repairs, structural fixes, access corrections, or responsibility for old flashing.
Ask each installer what happens if roof repair is needed before installation, who handles penetrations, who is responsible for flashing details, and whether structural review is included. The cheapest quote is not always the cleanest scope.
Final Pre-Installation Checklist
Once the project is approved and installation is scheduled, the job shifts from evaluation to execution. The goal is to keep the crew from discovering access, documentation, or roof-condition problems after they arrive.
One Week Before Installation
Confirm permits, HOA approvals, and required roof repairs. Review the planned panel areas, conduit route, and equipment locations. Make sure the installer has roof records, photos, repair history, and a reliable contact person.
If a new leak, storm damage, or roof issue appears after the site visit, notify the installer before installation day.
One Day Before Installation
Clear the driveway, garage work areas, attic hatch, side gate, electrical panel, utility meter, and equipment locations. Move fragile items stored near attic access or work zones. Handle pets, tenants, locked areas, and parking before the crew arrives.
Installation Morning
Walk the work areas with the crew lead. Confirm the roof planes being used, conduit route, equipment locations, and who can answer questions. If you have concerns about a vent, skylight, leak, or access point, raise them before the panels go up.
After Installation
Check accessible work areas, look for debris, confirm the next inspection steps, and keep copies of permits, inspection documents, warranties, photos, and the final system layout. Do not operate the system on the grid until the required inspection and utility permission steps are complete.
FAQ
Can solar go on minor roof damage?
Sometimes, but the damage should be identified first. Minor shingle, tile, flashing, or vent problems near the planned array should usually be repaired before panels are installed. Small roof problems become less convenient once rails and modules cover the area.
Who checks roof support for solar?
The installer usually performs the first site assessment and design review. If the roof has sagging, old water damage, unusual framing, or local permit requirements, a structural engineer may need to review the roof before approval.
Should a roofer inspect first?
Use a roofer before or alongside the solar assessment when there are active leaks, ceiling stains, cracked flashing, ponding water, deteriorated roofing, or uncertainty about roof condition. A solar installer can flag installation concerns, but roof diagnosis is roofing work.
What roof issues delay installation?
Common delays include active leaks, unsafe access, blocked attic access, damaged flashing, structural concerns, roof obstruction conflicts, missing HOA approval, and incomplete permit documents. Many of these can be caught before installation day.
Do I need a new roof first?
Not always. The decision depends on roof condition, leak risk, attachment suitability, warranty concerns, and whether future repairs would require panel removal. Targeted repair may be enough for a localized issue. A weak roof area under the planned array should be handled before solar goes on.