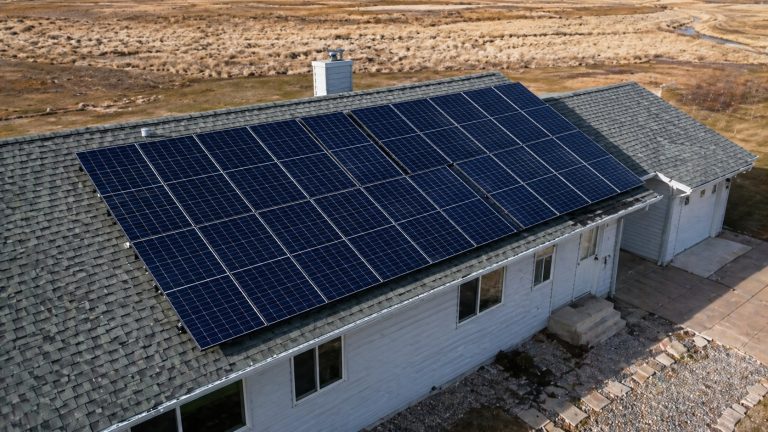
Solar Panels Roofing Checklist for Homeowners
Quick Answer
Use the Checklist Before Mounting Panels
A solar panels roofing checklist should confirm the roof condition, structural support, mounting method, flashing plan, permits, inspection steps, and utility approval before anyone starts drilling into the roof. In a typical residential job, the physical rooftop work may take only 1–3 days. The full project usually takes longer because design approval, permitting, inspection, and utility signoff control the schedule. The main decision is simple: do not let panels go on the roof until the approved layout, attachment method, waterproofing details, and responsibility for roof damage are clear in writing.
The Biggest Red Flag
The biggest warning sign is an installer who is ready to mount panels before documenting the roof condition and attachment details. Solar panels do not automatically damage a roof. Bad layout changes, vague flashing details, rushed inspections, weak attic verification, and unclear contractor scope are what create trouble.
Checklist Before Signing
Verify the Roof Inspection
Before signing a solar contract, make sure the company has done more than look at the roof from the driveway or a satellite image. A useful pre-install review should cover the roof covering, existing penetrations, attic access where available, rafters or trusses, decking concerns, vents, chimneys, skylights, and the electrical service location.
Photos are fine for an early proposal. They are not enough for final roof clearance. Roofs hide things. Soft decking, brittle shingles, cracked tiles, old leak repairs, and awkward framing are often found only after someone looks closely.
Ask About Added Roof Load
Solar equipment adds dead load through panels, rails, clamps, wiring, and mounting hardware. A common field estimate for rooftop solar assemblies is about 2–4 pounds per square foot. Some solar-ready construction guidance uses 6 pounds of added dead-load capacity as a planning benchmark.
That does not mean every roof passes automatically. Older framing, low-slope construction, tile roofs, snow-heavy areas, and previous structural changes can all justify a closer structural review.
Confirm Repair Needs First
If the roof has active leaks, missing shingles, cracked tiles, soft decking, ponding water, rusted metal panels, or exposed fasteners, deal with those issues before solar goes on. Once panels and rails are installed, even a simple roof repair becomes slower.
This is not a roof replacement article. Still, timing matters. A small repair before installation is usually cleaner than working around racking and energized equipment later.
Check Roof-Specific Hardware
The mounting system has to fit the roof. Asphalt shingles, tile, standing-seam metal, exposed-fastener metal, low-slope membrane roofs, and specialty roof systems do not use the same attachment method.
Do not get distracted by the racking brand. The real question is whether the mount, flashing, clamp, standoff, or roof attachment is appropriate for that roof covering and shown correctly in the project documents.
Separate Roofing and Solar Scope
Ask who is responsible for existing roof defects, installation damage, flashing failures, broken tiles, attic access, and leak diagnosis after the job. A solar installer may not be a roofing contractor. A roofer may not be responsible for attachments installed by a solar crew.

Get the split in writing. Otherwise, if a leak appears later, the roofer may blame the solar work, the solar company may blame the old roof, and the homeowner gets stuck in the middle.
Main Explanation
What the Checklist Prevents
A solar roofing checklist is not paperwork for the sake of paperwork. It is a way to prevent failed inspections, water intrusion, unsafe attachments, avoidable delays, unapproved layout changes, and missing records. It also gives the homeowner a practical way to challenge vague answers before the roof is covered with equipment.
From Assessment to Activation
The checklist should follow the real project path: site assessment, roof readiness, design, permit review, installation, inspection, utility approval, and activation. The roof work can move fast. The approvals usually move slower.
For many residential projects, a practical planning range is 4–12 weeks from contract and design through final approval and activation. Some jobs move faster. Some get held up by permit corrections, engineering questions, inspections, or utility paperwork.
Not a Solar Savings Guide
This checklist is not about tax credits, battery backup, payback periods, or panel efficiency. Those topics matter, but they are separate decisions. For this page, the focus is the roof: whether it can receive the system safely, stay watertight, and pass inspection without rework.
Roof Readiness Checklist
Roof Surface Condition
Look for missing shingles, cracked tiles, loose ridge caps, worn underlayment, soft areas, ponding, rust, damaged flashing, and exposed fasteners. These are not small cosmetic issues once solar is involved. If a defect sits near an attachment area, it can become much harder to inspect or repair after panels are installed.
Structure and Live Load
Local roof requirements vary. Many residential roofs use a live-load baseline of at least 20 pounds per square foot, with higher requirements in snow-heavy regions. Solar adds dead load, so the real question is whether the existing structure can handle the added system under local wind and snow conditions.
For older homes, low-slope roofs, tile roofs, or homes with altered framing, ask whether the design package includes structural verification or an engineer’s review. Do not assume the answer is yes.
Layout and Obstructions
The roof layout should account for vents, chimneys, skylights, ridges, valleys, plumbing stacks, satellite mounts, attic fans, access paths, and fire-code setbacks. These details are easy to miss when the first proposal is based on a clean satellite image.
| Roof Item | Why It Matters | What to Confirm |
|---|---|---|
| Vents and stacks | Can interrupt panel rows and racking | Final layout leaves service access where needed |
| Skylights | Need clearance and leak protection | Panels do not crowd flashing areas |
| Valleys | Carry concentrated roof drainage | Attachments stay out of major water paths |
| Fire pathways | May be required by local code | Layout matches the approved access plan |
The best layout is not always the one that squeezes in the most panels. It is the one that fits the roof without blocking code access, drainage, flashing areas, or future service work.
Waterproofing Details
Every roof penetration is a roofing detail first and a solar detail second. Flashing, sealant, standoffs, conduit penetrations, and attachment points should match the approved plan and the roof type.
Sealant alone should not be treated as a magic fix where proper flashing is required. That shortcut can look fine on installation day and fail during a hard rain.
Work Access
Confirm ladder placement, driveway access, material staging, gate access, attic access, pet restrictions, and interior panel access before the crew arrives. Good installers plan this before the truck shows up. Poor access leads to rushed work, broken tiles, damaged gutters, and avoidable safety problems.
Solar Site Assessment Checklist
Measure Usable Roof Planes
The installer should verify the usable roof planes before finalizing the array. Design software is useful, but field measurements catch vent conflicts, dimension errors, roof obstructions, and access problems that a satellite image can miss.
Check Shade and Obstructions
Shade, orientation, and pitch affect production, but this checklist is not an efficiency guide. For roof installation planning, the important point is whether the installer verifies anything that could change the layout, attachment plan, or inspection path.
Collect Roof and Attic Photos
Ask for roof photos, attic photos when attic access is available, and electrical panel photos in the project file. These records help if an inspector asks questions, if the layout changes, or if a roof issue shows up after installation.
Know When Engineering Is Needed
Engineering review becomes more important when the home has older framing, tile roofing, low-slope construction, unusual structural layout, heavy snow exposure, high wind exposure, or limited attic visibility. A solid installer flags those conditions early. Not after the crew has already unloaded rails and panels.
In the field, I get more cautious when the roof looks simple from the outside but attic access is limited. You cannot verify every structural concern from a satellite image. Framing uncertainty should be handled before rails are installed, not after.
Permit and Design Checklist
Submit Complete Roof Details
The permit package should include the roof layout, attachment plan, electrical design, structural notes, fire access, equipment specifications, and any local forms required by the authority having jurisdiction. Some offices review this manually. Some use an automated platform for standard residential projects.
Check SolarAPP+ Eligibility
Some jurisdictions use SolarAPP+, which can speed up permitting for qualifying code-compliant residential systems and generate inspection checklists. That can save time, but it does not mean every project qualifies.
Nonstandard roof conditions, unusual electrical work, structural concerns, or local restrictions may still push the project into traditional review.
Plan for 4–12 Weeks
Homeowners often see panels installed in a day or two and think the project is nearly finished. Sometimes it is not. Design approval, permits, inspections, utility paperwork, and permission to operate can make the full timeline land in the 4–12 week range for many residential jobs.
| Expectation | Field Reality | Checklist Control |
|---|---|---|
| Panels go up and the system works | Utility approval may still be pending | Confirm permission to operate |
| Permit approval is automatic | Corrections can delay the job | Review approved plans before work starts |
| Layout changes are minor | Unapproved changes can fail inspection | Match the install to approved drawings |
| Roof attachments are standard | Roof type changes the mounting detail | Verify roof-specific flashing and hardware |
The takeaway: installation day is only one part of the job. The paperwork, inspection, and utility path should be just as clear as the panel layout.
Match the Approved Design
Before installation starts, compare the final roof layout to the version you approved. Check the panel count, roof planes, setbacks, access paths, conduit route, and equipment locations. Field changes happen, but they need to be documented.
Wait for Permit Approval
In most residential projects, rooftop solar should not be installed before permit approval unless the local process clearly allows it. Installing first and fixing the paperwork later is risky. It can trigger failed inspections, stop-work issues, redesigns, and delayed activation.
Installation-Day Checklist
Follow the Approved Layout
On installation day, the crew should follow the approved roof plan. If a vent, damaged roof area, or layout conflict forces a change, that change should be reviewed before the system is built differently from the permit drawings.
Inspect Flashing and Sealing
Flashing and sealing details should be visible and documented before panels cover the work. On shingle roofs, that may mean flashed mounts. On tile roofs, it may mean tile-compatible hooks or replacement flashing systems. On metal roofs, the clamp or fastener method has to match the roof profile.
Secure Rails and Conduit
Rails, clamps, junction boxes, wiring, and conduit should be secured without damaging the roof covering. Wires should not be left loose, rubbing against sharp edges, or routed through drainage paths. Inspectors notice these things. So do storms.
Photograph Covered Areas
Ask for photos of attachment points, flashing, conduit penetrations, and roof areas that will be hidden once panels are mounted. These photos can matter later for warranty claims, resale, future roofing work, and post-storm checks.
Check Cleanup and Damage
Before the crew leaves, check for broken tiles, loose fasteners, packaging, drill debris, unused penetrations, damaged gutters, disturbed vents, and roof debris. Small leftover problems can turn into roof damage later.
- Confirm the installed panel count matches the approved layout.
- Ask how each roof penetration was flashed or sealed.
- Request photos of attachments before panels hide them.
- Walk the property for broken tiles, debris, or gutter damage.
- Save written notes on any field changes.
Inspection and Activation Checklist
Verify Local Inspection Items
Local inspectors may check roof attachments, fire access, labeling, electrical work, conductor support, attic conduit clearance where applicable, and whether the installed array matches the approved plan. Many inspection issues are boring on paper but expensive in the field because they require a crew to come back.
Wait for Utility Approval
Permission to operate is separate from physical installation. Even after panels are mounted and the local inspection is complete, the utility may still need to approve interconnection before the system operates normally with the grid.
Keep Project Documents
Save the approved plans, permits, inspection approvals, equipment manuals, warranty paperwork, photos, utility approval, and any engineering documents. Future buyers, roofers, inspectors, and service technicians may need them.
Request Final Roof Photos
Final photos should show racking, flashing, conduit runs, junction boxes, attachment areas, and roof penetrations. These records help establish what the installation looked like when the job was completed.
When to Pause the Project
Active Roof Damage
Pause the project if the roof has leaks, soft decking, cracked tiles, missing shingles, damaged flashing, ponding, or other unresolved defects. Solar should not be used to cover up a roof problem. That usually backfires.
Unclear Penetration Details
If the installer cannot explain how attachments and conduit penetrations will be flashed or sealed, stop and ask for the roof-specific method. “We seal everything” is not a complete answer.
Design Does Not Match
Pause if the layout being installed does not match the approved plan. Moving a panel around a vent may seem harmless, but it can affect fire access, setbacks, attachment locations, and inspection approval.
No Damage Responsibility
If no one can explain who handles broken tiles, roof leaks, damaged shingles, or installation-related roof repairs, the scope is not clear enough. That uncertainty becomes expensive only after something goes wrong.
Unclear Permit Path
Do not accept vague answers about permits, inspections, or utility approval. The installer should know who submits the permit, who schedules the inspection, what documents are needed, and when utility approval happens.
Common Checklist Mistakes
Using Only a Visual Glance
A quick look at the roof is not roof readiness. It can miss soft decking, brittle materials, attic limitations, old repairs, and awkward attachment areas. This happens because the sales process moves faster than the technical review.
Assuming Open Space Is Enough
Open roof space does not automatically mean usable solar space. Fire setbacks, obstructions, drainage paths, vents, skylights, and attachment points can all change the final layout.
Forgetting Attic Access
Attic access can matter for structural verification, conduit inspection, and framing review. If nobody checks it until inspection day, the correction can be awkward and slow.
Delaying Small Repairs
Small roof repairs are usually easier before solar is installed. After panels go on, even basic work may require more coordination, more labor, or partial access around the array.
Losing Proof and Photos
Missing documentation creates real risk. If a leak appears after a storm, a buyer asks for records, or a roofer needs to work near the array, the homeowner needs proof of the approved design and roof attachment details.
| Mistake | Why It Happens | Financial Risk |
|---|---|---|
| No roof repair decision before install | Homeowner focuses on panel approval | Higher access and service costs later |
| No written flashing method | Roof details are treated as routine | Leak dispute and repair uncertainty |
| Unapproved layout changes | Crew solves a field conflict quickly | Inspection failure or redesign delay |
| Missing project documents | Installer keeps all records | Harder warranty, resale, and repair claims |
The expensive mistake is rarely one missed checkbox by itself. It is the combination of no documentation, unclear responsibility, and roof work hidden under panels.
Copyable Homeowner Checklist
Before Contract
Confirm roof condition, contractor scope, repair needs, roof damage responsibility, warranty impact, site access, and whether a separate roofer should inspect the roof before solar design is finalized.
Before Permit
Review the roof layout, attachment method, structural notes, electrical plan, fire access, roof obstructions, conduit route, and whether the project qualifies for a streamlined permit process or needs traditional review.
Before Installation Day
Confirm the approved design, arrival window, ladder access, attic access, material staging, pet access, driveway clearance, and who can approve field changes.
During Installation
Check that the crew follows the approved layout, uses roof-specific attachments, flashes penetrations properly, secures conduit and wiring, protects roof materials, and documents areas that will be covered.
After Installation
Collect inspection approval, utility approval, final photos, warranties, approved plans, equipment documents, and any notes about roof repairs or field changes.
- Do not sign until roof responsibility is clear.
- Do not install until the approved layout is final.
- Do not operate normally until inspection and utility approval are complete.
- Do not lose final photos and permit records.
FAQ
What should be checked before solar panels go on a roof?
Check roof condition, structural support, roof layout, obstructions, attachment method, flashing, fire access, permit requirements, inspection steps, and utility approval. The roof-specific priorities are condition, mounting method, waterproofing, and whether the installed layout will match the approved plan.
Should a roofer inspect the roof first?
A roofer inspection is smart when the roof has leaks, age concerns, cracked tiles, soft areas, prior repairs, unusual materials, or warranty questions. A solar installer can assess solar readiness, but a roofer is usually better suited to judge roof-covering condition and repair needs.
How much weight do panels add?
A typical field estimate for rooftop solar equipment is about 2–4 pounds per square foot. Some solar-ready construction guidance uses 6 pounds of added dead-load capacity as a planning figure. The practical question is whether the specific roof structure, local snow or wind loads, and mounting plan have been verified.
Can installation start before permit approval?
Usually, no. Local governments commonly require permit approval before rooftop solar installation. Some jurisdictions use automated platforms such as SolarAPP+ for qualifying projects, but the homeowner should still confirm the permit path before work begins.
What documents should I keep?
Keep the approved plans, permit record, inspection approval, utility permission to operate, final roof photos, equipment documents, warranty paperwork, engineering notes if provided, and any written roof repair or damage responsibility terms. These records matter for warranty claims, resale, roof repairs, and future service work.