Solar Panels and Roofing Risks: Homeowner Checklist
Quick Answer
Solar panels do not automatically damage a roof. The real risk is the installation work: roof penetrations, flashing, fastener placement, brittle roofing materials, and unclear warranty responsibility. A typical residential rooftop solar system adds roughly 2–4 pounds per square foot, which is usually manageable on a sound roof, but weight is only one part of the risk. Wind, snow, roof condition, water flow, and workmanship matter just as much. The safe move is simple: do not approve the job until the roof condition, mounting method, flashing detail, and leak responsibility are clearly documented.
Main Explanation
How Solar Creates Roof Risk
The panel itself is rarely the problem. Roof trouble usually starts with how the system is attached and how water is managed around those attachment points. A roof is built to shed water in layers. When a solar installer drills through that system, the waterproofing detail has to be right.
In real-world conditions, solar-related roof problems usually fall into four buckets: leaks around penetrations, cracked or disturbed roofing materials, structural concerns, and warranty disputes. None of those are mysterious. They are usually visible in the planning, the contract, or the workmanship before the panels ever produce power.
Roof Penetrations
Many residential solar systems are attached with mounts that penetrate the roof and fasten into rafters or other approved structural members. That is normal. Roofs already have penetrations for vents, chimneys, plumbing stacks, skylights, and other details.
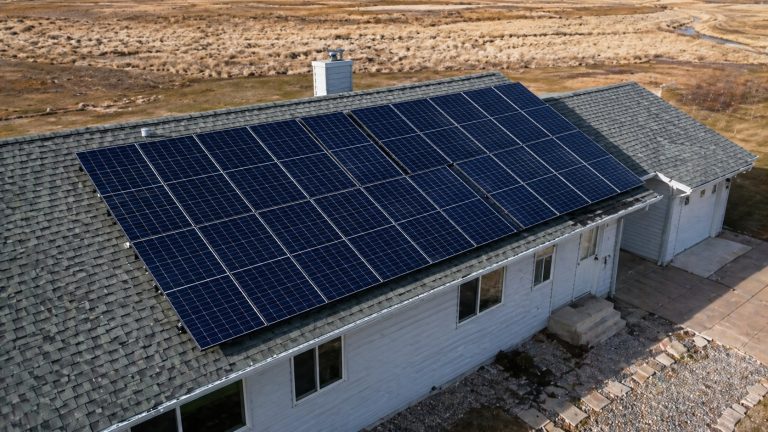
The difference is whether the penetration is treated like a permanent roof detail or like a hole with hardware on top of it. On asphalt shingles, a proper solar mount typically uses flashing that tucks under the upslope shingle course so water runs over the flashing. The fastener hole may also need a correctly sized pilot hole and compatible sealant as backup protection. Sealant is not a substitute for flashing.
Flashing Failures
Flashing is the part most homeowners never see, and it is often the part that matters most. If the flashing is missing, lifted, poorly seated, or slapped on top of the shingles, water can work its way under the roof covering. It may take one storm. It may take a few seasons. Either way, the failure point is now hidden under an array.
A ceiling stain also does not always appear directly below the bad mount. Water can travel along decking, rafters, underlayment, or conduit before it shows up indoors. That is why leak diagnosis under solar can get slow and expensive.
Cracked Roofing Materials
Solar installation puts workers, tools, racking, and panels on the roof. If the roof covering is brittle, that activity can cause damage before the system is even turned on. Tile roofs are the obvious example. Clay and concrete tiles can crack from foot traffic, poor access technique, or the wrong attachment method.
Asphalt shingles can also be damaged. Older shingles may crack when lifted for flashing. Curled tabs can break. Granule loss can make the surface more fragile. A roof can be technically “not leaking” and still be a poor candidate for solar work without repairs first.
Structural Load
Most rooftop solar systems add an estimated 2–4 pounds per square foot. On many homes, that is not a major load by itself. But stopping the review there is sloppy.
The roof also has to handle wind uplift, snow load where applicable, roof slope, rafter spacing, sheathing condition, and anchor spacing. A light system can still be poorly attached. A roof that looks fine from the driveway can still have weak framing, soft decking, or old repairs that should be checked before installation.
Wind, Snow, and Anchors
Wind changes the conversation. The issue is not just what the panels weigh. It is whether the attachment system can resist uplift forces when wind gets under or around the array.

Snow adds another layer. In snow country, the roof may already be designed for snow loads, but the solar layout can affect how snow collects, slides, or loads certain roof areas. Anchor spacing matters because the racking transfers those forces into the structure. If mounts are too far apart, poorly placed, or not fastened into approved framing, the roof surface and waterproofing both take unnecessary stress.
Solar Roofing Risk Checklist
Check for Soft Spots
Before solar is approved, the roof should be checked for soft decking, sagging, rot, attic staining, and old leak repairs. These signs do not always kill the project, but they do mean the roof needs attention before it gets covered with equipment.
This is where people usually get into trouble. A small roof problem is easier to fix before solar. After panels are installed, even a minor repair may involve removal work, electrical coordination, and scheduling two trades instead of one.
Confirm Structural Soundness
Some simplified solar reviews reference rooftop systems at 4 pounds per square foot or less, but that does not mean every roof is automatically ready. The better question is: can this specific roof handle this specific system under local wind, snow, slope, and attachment conditions?
Older framing, visible sagging, unusual roof construction, high snow exposure, high wind exposure, or past structural changes deserve a closer look. If the answer from the installer is just “the panels are light,” keep asking.
Require Proper Flashing
Every roof penetration needs a waterproofing method that fits the roof type. Asphalt shingles usually call for flashed attachments integrated with the shingle courses. Tile roofs may need hooks, standoffs, replacement tiles, or formed flashing systems. Low-slope roofs have their own rules for membranes, pads, drainage, and warranty protection.
In leak calls, the weak point is often small and boring: one mount, one conduit entry, one rushed flashing detail, one hole treated like it only needed caulk. Those small details are exactly what protect the house.
Verify Structural Attachment
Solar mounts should be installed the way the racking manufacturer requires. If the design calls for rafters or other structural members, fastening into sheathing alone is a serious red flag unless that specific method is engineered and approved.
Good crews locate framing, drill the right pilot holes where required, use compatible sealant where specified, and seat fasteners correctly. None of that is glamorous work. It is also the difference between a durable roof attachment and a future leak dispute.
Photograph Roof Condition
Photos are cheap protection. Before work starts, photograph roof planes, valleys, vents, old stains, cracked shingles, broken tiles, gutters, attic staining, and the areas where the array will sit. After installation, ask for photos of representative mounts and flashing before panels cover the work.
Without photos, everyone has an opinion after a leak. With photos, the conversation gets a lot more practical.
Get Leak Responsibility in Writing
The contract should say what happens if a leak appears near a solar attachment. Who responds? Who diagnoses it? Who pays for roof repair? Who pays if panels have to be removed? Verbal promises are not enough.
This matters because detach-and-reset work is not minor. A typical residential solar removal and reinstall can run around $1,500–$6,000, depending on system size, access, racking complexity, and local labor. Per-panel removal benchmarks often fall somewhere around $200–$500 per panel. Those are practical ranges, not guarantees, but they show why the responsibility should be settled before there is a problem.
Confirm Warranty Effects
Roof warranties are not all written the same way. Some allow solar attachments if approved methods are used. Some exclude areas modified by another contractor. Some require specific flashing details or authorized work.
If the roof is still under warranty, contact the roofer or manufacturer before installation. Get the answer in writing. Do not let a solar salesperson interpret a roofing warranty for you.
Practical Decision Criteria
Green Light Conditions
A roof is a stronger solar candidate when there are no active leaks, no visible sagging, solid decking, acceptable roofing condition, a clear mounting plan, and written leak responsibility. The installer should be able to explain the exact mounting and flashing method for your roof type.
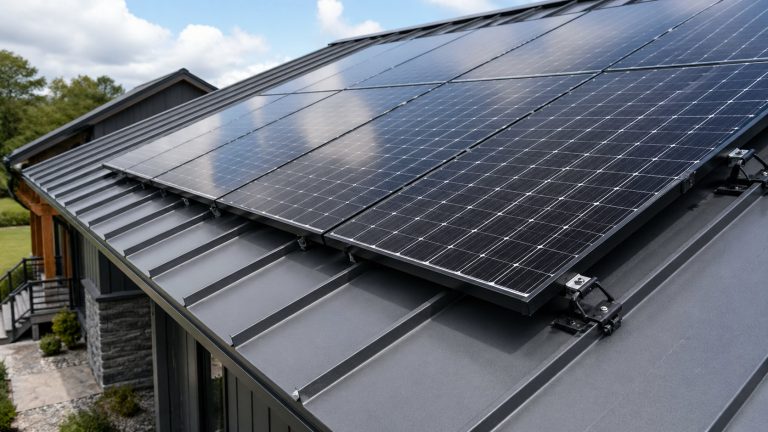
For an asphalt shingle roof in good condition, flashed attachments into approved framing are common. For a standing seam metal roof, approved clamps may reduce roof penetration risk if the clamp system matches the seam profile. The details still matter.
Yellow Light Conditions
Yellow light does not always mean stop. It means slow down. Older shingles, minor prior leaks, previous repairs, brittle roof material, unclear warranty coverage, complex roof geometry, or steep access all deserve more documentation.
A roofer’s inspection can be useful here. The inspection should focus on the planned array area, not just the front slope that is easy to see from the driveway.
Red Light Conditions
Active leaks, soft decking, rot, sagging rafters, widespread cracked tiles, loose shingles, or obvious structural movement should pause the solar project. Installing panels over those problems is not a fix. It is a cover-up.
If an installer is willing to proceed over obvious roof damage without a written explanation, treat that as a contractor problem, not just a roof problem.
When to Call a Roofer
Call a roofer when the roof has leak history, brittle materials, visible wear, warranty questions, or repairs that may be needed under the planned array. A roofer can check shingles, tiles, underlayment, flashing, decking, and existing penetrations before solar makes access harder.
The roofer does not need to design the solar system. Their job is to tell you whether the roof surface and roof assembly are ready to be walked on, penetrated, and covered.
When to Call an Engineer
A structural engineer may be needed when the framing is unusual, the home is older, rafters look undersized or altered, the area has heavy snow or high wind exposure, or the design does not fit simplified permitting assumptions.
Not every solar project needs engineering beyond the normal design and permit process. But when the risk is structural, guessing is a bad plan.
| Condition | Risk Level | Best Next Step |
|---|---|---|
| Sound asphalt shingle roof with clear flashed-mount plan | Lower | Proceed with documentation and photos |
| Older roof with minor wear or previous repairs | Medium | Get roofer inspection before install |
| Tile roof with brittle or cracked tiles | Medium to high | Require tile-specific mounting plan |
| Active leak, soft decking, or sagging | High | Pause solar until repaired or evaluated |
| High snow or wind region with unclear attachment design | High | Request structural basis or engineering review |
The takeaway is straightforward: “solar-ready” should mean the roof, attachments, waterproofing, and responsibilities have all been checked. It should not mean someone wanted the sale to keep moving.
Common Installation Mistakes
Using Caulk Instead of Flashing
Caulk has a role. It is not the roof system. Sealant breaks down with heat, UV exposure, movement, and age. If a mount depends mainly on caulk to stay watertight, the installation is carrying avoidable risk.
A small shortcut can become a costly repair. A practical roof leak repair range near a problem area may be around $360–$1,550, depending on access and damage. If solar equipment has to be removed to reach the area, the bill can climb quickly.
Installing Over Brittle Roofing
Brittle roofing does not forgive heavy foot traffic or rushed flashing work. Older asphalt shingles can crack when lifted. Clay and concrete tiles can break under workers, tools, or poor access methods.
This happens when the sales process outruns the roof assessment. The layout may look clean on a plan set, but the roof material still has to survive the installation.
Poor Penetration Placement
Mounts and conduit entries should not be dropped into poor drainage areas, low spots, valleys, roof transitions, or tight spots around skylights and dormers without careful detailing. Those areas already handle more water.
Adding a weak penetration there is asking for trouble. Sometimes the fix is a better layout. Sometimes it is a different mounting detail. Sometimes the answer is not to place equipment there at all.
Ignoring Leak History
A roof that leaked once deserves attention before solar goes on. The old leak may have been patched at the surface while the underlying weakness remained. Once panels cover that area, troubleshooting gets harder.
Leak history should be shared with both the solar installer and the roofer. Hiding it helps nobody.
Confusing Permits With Roof Approval
A permit is not the same thing as a roof condition inspection. A jurisdiction may review electrical plans, structural assumptions, setbacks, fire access, or code requirements. That does not mean someone inspected every shingle, tile, flashing detail, or section of decking under the future array.
This assumption catches homeowners off guard. The project can be permitted and still be installed over a roof that needed repair first.
Unclear Panel Removal Terms
Many roofers will not remove solar panels, and they usually should not unless they are qualified to handle the system. Solar equipment involves electrical connections, racking, roof attachments, and warranty issues.
If roof work is needed later, a solar contractor may have to detach and reinstall the array. Typical field pricing can run about $200–$500 per panel for removal work, while a full residential detach and reset often lands around $1,500–$6,000. That range depends heavily on the system and site, but it is large enough that the contract should spell out who pays.
| Mistake | Why It Happens | Possible Cost Exposure |
|---|---|---|
| Sealant-only roof mounts | Fast installation shortcut | Leak repair plus possible panel removal |
| No pre-install roof photos | Weak documentation process | Disputed responsibility after leak |
| Mounts missing framing | Poor layout or rushed drilling | Remounting, roof repair, leak risk |
| Ignoring brittle tile or shingles | Roof condition underestimated | Broken roofing and hidden water paths |
| No detach-and-reset terms | Contract reviewed too quickly | $1,500–$6,000 typical reset exposure |
The financial pattern is plain. The expensive disputes usually start with small details that were never documented, never assigned, or never checked.
Installer Roofing Questions
Who Inspects the Roof?
Ask who actually inspects the roof before design approval. Is it a salesperson, a site surveyor, the install crew, or a roofing professional? Does the inspection include attic review, roof surface photos, and notes on existing damage?
“We check the roof” is too vague. You want to know what was checked, by whom, and where it is documented.
What Mounting System Is Used?
The installer should be able to name the mounting and racking products and explain why they fit your roof. Asphalt shingle, tile, metal, and low-slope roofs do not all use the same approach.
If the installer cannot explain the roof attachment until after you sign, you are taking on roof risk before seeing the most important detail.
How Is Flashing Integrated?
Ask how flashing connects with the existing roof layers. On shingles, does the flashing tuck under the upper course? On tile, is the installer using hooks, standoffs, replacement tiles, or another tile-specific system? On low-slope membranes, how are slip sheets, drainage, protection pads, and warranty rules handled?
What Happens After a Leak?
The leak response process should be clear before the first hole is drilled. Who comes out first? Does the solar company coordinate with a roofer? What if the leak is near a mount? Who pays if panels need to be removed for diagnosis?
Without a written process, a leak can turn into a three-way argument between the homeowner, roofer, and solar company.
Will Mounts Be Photographed?
Ask for photos of representative mounts, flashed penetrations, conduit entries, and any repaired roof areas before modules cover them. You may not be able to judge every detail yourself, but the photo record still matters.
It gives a roofer, inspector, or warranty reviewer something to evaluate later if a problem shows up.
What Warranty Covers Roof Damage?
Solar workmanship warranties vary. Some cover installation defects. Some cover labor but not interior damage. Some exclude pre-existing roof conditions. Some require the original installer to inspect before anyone else touches the system.
Read the exclusions. The exclusions are where the real answer usually lives.
Roofer Questions Before Solar
Is the Roof Deteriorated?
A roofer should check for cracked shingles, granule loss, curled tabs, broken tiles, soft decking, failing flashing, damaged underlayment, and leak stains. The planned array area matters most because that section becomes harder to reach later.
Can the Roof Handle Attachments?
A roofer can evaluate the roof covering and deck condition. A structural engineer may be needed for framing calculations, but a roofer can still spot practical attachment problems: rotted decking, loose sheathing, layered roofing, weak surfaces, or materials likely to crack during the install.
Are Leak Paths Already Present?
Existing leak paths often come from valleys, vents, chimneys, skylights, wall flashing, old repairs, or storm damage. Solar does not have to cause the original leak to make the repair harder.
That is the part many people miss. Panels can turn a simple roof diagnosis into a coordination job.
Will Warranty Coverage Change?
If the roof is under warranty, ask the roofer or manufacturer what solar does to that coverage. Some warranties may remain valid except where another contractor modifies the roof. Others may require specific flashing methods or approved contractors.
Should Repairs Come First?
Small repairs are usually easier before solar. Replacing a cracked tile, tightening a flashing detail, or repairing a worn section of shingles may be simple while the roof is open. After solar, access can be the expensive part.
- Repair active leaks before solar installation.
- Replace cracked or broken tiles in the array area.
- Fix loose flashing near vents, valleys, and walls.
- Document roof condition with dated photos.
- Confirm roof warranty rules before penetrations are made.
Risk Limits
Visual Checks Miss Hidden Damage
A roof can look fine from the ground and still have soft decking, old moisture damage, weak sheathing attachment, or altered framing. Visual checks help, but they do not prove everything.
This matters most when there is leak history, attic staining, sagging, or older roof material. Those signs call for a closer look before the roof gets covered.
Permits Are Not Roof Inspections
Permit approval is not a roof health certificate. The local review may check electrical design, setbacks, structural assumptions, fire access, or other code items. It may not involve a hands-on review of the roof covering, decking, or flashing condition.
Installers Are Not Warranty Authorities
A solar installer can explain its own workmanship warranty. It cannot always speak for the roof manufacturer, roofing contractor, insurance carrier, or future buyer.
If warranty coverage matters, ask the party that controls the warranty. Get the answer in writing.
Leaks May Be Unrelated
Not every leak after solar is caused by solar. Roofs can leak from old flashing, clogged drainage, skylights, plumbing vents, storm damage, or unrelated roofing failures.
The problem is access and proof. Once panels are installed, any leak on that roof plane is harder to diagnose and easier to dispute. Pre-install photos and a written leak response process are the best protection.
| Expectation | Field Reality | Better Decision |
|---|---|---|
| The solar permit means the roof is approved | Permits may not verify roof condition | Get roof condition documented separately |
| Panel weight is the only structural issue | Wind, snow, slope, and anchors also matter | Ask for structural basis when conditions are unusual |
| Caulked mounts are waterproof | Sealant ages and should not replace flashing | Require roof-type-specific flashing |
| A roofer can work around panels | Many repairs require panel removal | Clarify detach-and-reset responsibility upfront |
The practical reality is blunt: solar roof risk usually comes from small assumptions made early. Once the array is installed, those assumptions become harder and more expensive to unwind.
FAQ
Do solar panels cause roof leaks?
Solar panels themselves usually do not cause leaks. Leaks are more often tied to poor flashing, sealant-only penetrations, unflashed conduit entries, cracked roofing materials, or mounts installed in the wrong place. A sound roof with properly flashed attachments carries much less risk.
How much weight do panels add?
A typical residential rooftop solar system adds roughly 2–4 pounds per square foot. That is usually manageable on a sound structure, but roof weight is not the whole review. Wind uplift, snow load, roof slope, rafter condition, and anchor spacing also matter.
Can solar affect my roof warranty?
Yes. The effect depends on the warranty language and the installation method. Some warranties allow solar attachments when approved flashing and installation methods are used. Others may exclude modified areas. Check with the roofer or manufacturer before installation and keep the written response.
Should a roofer inspect before solar?
A roofer inspection is a smart move when the roof has age, leak history, brittle materials, visible wear, prior repairs, or warranty uncertainty. The inspection should focus on the area where the array will sit, not just the easiest roof section to see.
Who handles leaks after installation?
That should be answered in the solar contract before work begins. The agreement should say who responds, how a roofer is involved, what workmanship coverage applies, and who pays if panels must be removed for diagnosis. If it is not written down, expect a dispute.