Removing Solar Panels for Roof Work: Homeowner Guide
Quick Answer: Panels Usually Come Off First
Solar panels usually need to come off before a roof replacement or any roof repair under the array. For a typical residential detach-and-reset, the hands-on work is often about 1–2 working days for removal and another 1–2 working days for reinstallation. That does not mean your system is only offline for four days. Roofing delays, weather, inspections, missing parts, and contractor scheduling can stretch the downtime. The main decision is straightforward: do not let roofers work under an active solar array until a qualified solar contractor has shut it down, disconnected it, labeled it, removed it, stored it, and planned the reinstall.
The short version for roof work
Solar roof removal is not just “taking the panels off.” It is a detach-and-reset job. Panels, wiring, rails, clamps, roof mounts, flashing, and monitoring connections all have to go back together correctly. If one part is rushed, the roof can leak or the solar system can underperform after the job is done.
When panels can stay in place
Panels can sometimes stay in place for small repairs away from the array. Gutter work, trim repairs, or roof work on a separate roof plane may not require removal. But if the roofer needs access to shingles, underlayment, decking, flashing, or penetrations beneath the solar array, the panels usually need to come off.
Why removal is not a shortcut
A cheap, rushed removal often creates the expensive part later. Broken connectors, unlabeled wiring, cracked glass, missing clamps, or reused bad flashing can turn a roof replacement into a solar troubleshooting job.
What Solar Panel Roof Removal Means
Temporary versus permanent removal
Temporary removal means the solar system is taken off the roof for a specific project and reinstalled afterward. That is common during reroofing, leak repair, decking repair, storm restoration, or remodeling that affects the roof surface.
Permanent removal is different. That applies when the system is being retired, replaced, relocated, or abandoned. This guide is about temporary roof-related removal, which contractors often call a detach-and-reset.
The five main stages
A clean job usually follows five stages: assessment, shutdown, removal, roof work, and reinstallation. Each stage matters. The shutdown protects workers and equipment. Labeling protects the reinstall. Correct flashing and mounting protect the new roof.
| Stage | Main task | Why it matters |
|---|---|---|
| Assessment | Map the system and roof scope | Prevents unclear contractor responsibility |
| Shutdown | Power down and disconnect safely | Reduces electrical hazard |
| Removal | Detach panels, wiring, rails, and mounts | Allows roof access without damage |
| Roof work | Repair or replace roof surface | Creates a sound base for reinstall |
| Reinstall | Reset array, reconnect, and test | Confirms safe operation and production |
The takeaway is simple: the roofing crew and solar crew need to agree on scope before work starts. If the roofer assumes the solar contractor is handling mounts and the solar contractor assumes the roofer is handling flashing, the homeowner usually gets stuck in the middle.
What comes off the roof
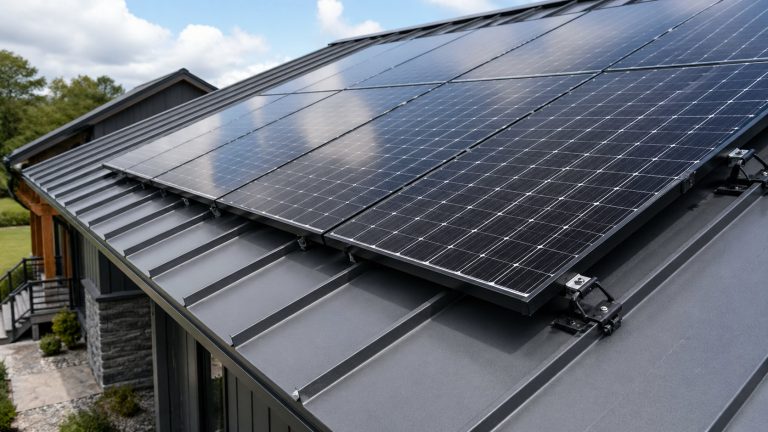
Most detach-and-reset jobs start with the panels, then move to clamps, rails, wire clips, roof attachments, and sometimes flashing. For a full roof replacement under the array, the mounting hardware normally has to be removed or reset so the new roof can be installed properly.
What usually stays connected
The inverter, monitoring gateway, main electrical panel connections, and exterior disconnects may stay in place if they are not part of the roof work. They still need to be shut down correctly. The key issue is not whether the inverter leaves the wall. The issue is whether the roof array is electrically safe before anyone handles the modules.
Who Should Remove Solar Panels
Use a qualified solar contractor
A licensed solar contractor or qualified electrical contractor should handle the removal. Solar modules can still produce voltage in sunlight, and the wiring needs to be disconnected in the right sequence. This is not ordinary roofing labor.
Why roofers should not disconnect panels
Many roofers are excellent at roofing. That does not mean they should disconnect solar equipment. The danger is not just shock. The more common mess is what shows up after reinstall: failed connectors, monitoring errors, mismatched strings, ground faults, or an array that no longer produces the way it should.

Independent contractor view: the cleanest projects happen when the roofer handles the roof and the solar contractor handles the solar. A quote that says “remove solar” is not enough. It should say who shuts the system down, who labels the wiring, who stores the panels, who reinstalls the array, and who tests it afterward.
Coordinate both crews early
The solar crew should remove the array shortly before the roofing crew starts. Too early, and the system sits offline for no reason. Too late, and the roof crew gets delayed. Both cost money, just in different ways.
If the original installer is gone
If the original installer is no longer available, use a solar service company that regularly does detach-and-reset work. If the system is leased, financed, under a power purchase agreement, or tied to a manufacturer service account, check the paperwork first. Unauthorized removal can create warranty or contract trouble.
Step-by-Step Removal Process
Step 1: Site visit and panel count
The contractor should confirm the number of panels, roof planes, array layout, conduit runs, inverter type, disconnect location, and storage plan. This is also when access problems show up: steep pitch, two-story edges, multiple arrays, brittle shingles, limited staging space, or awkward ladder placement.
Step 2: Shut down the system
The inverter and disconnects should be shut down before anyone removes panels. The exact steps depend on the equipment. Skipping this is not a small mistake. Solar wiring can stay energized when panels are exposed to light.
Step 3: Disconnect wiring safely
Wiring, optimizers, microinverters, grounding, and connectors need careful handling. Pulling on cables or separating connectors without labeling can create faults that are hard to find after the roof is finished.
Step 4: Label panels and connections
Every panel and connection should be labeled before removal. Good labeling preserves the original layout and saves time during reinstall. It matters even more on systems with multiple roof planes, panel-level electronics, or more complicated string layouts.
Step 5: Remove panels carefully
Panels should be unclamped, lifted, and staged without twisting the frames or dragging the glass. Cracked glass, bent frames, and damaged connectors are not cosmetic issues. They can affect safety, production, and warranty claims.
Step 6: Remove or protect racking
For a full roof replacement, rails, mounts, and flashing usually need to be removed or reset. Working around old mounts may seem faster, but it can leave the new roof improperly sealed under the future array.
Step 7: Store panels safely
Panels need a secure, dry, protected storage area. They should not be stacked casually in a driveway, leaned against a fence, or left where roofers are moving shingles and debris. Storage is part of the job.
During Roof Repair or Replacement
Decking, underlayment, and flashing
Once the panels are off, the roofer can inspect the roof properly. That includes shingles, underlayment, decking, flashing areas, and old attachment points. If there is soft decking or a questionable penetration, this is the time to fix it.
Prepare for solar reinstallation
The roof should be finished, cleaned, and ready before the solar crew returns. Raised fasteners, loose shingles, unresolved soft spots, or unclear flashing details near the solar attachment areas should be handled before the array goes back on.
Avoid early detachments
Do not remove panels weeks before the roofing crew is ready unless there is a specific reason. The system stays offline longer, panels sit in storage longer, and parts are more likely to get misplaced. Most people miss this part when they schedule roofing and solar separately.
Weather and part delays
Rain, wind, inspection timing, broken clamps, missing rails, or damaged mounts can delay reinstallation. Older arrays are more likely to need replacement hardware, especially if bolts or clamps do not release cleanly.
Reinstallation After Roof Work
Reset attachments carefully
The reinstall is where the new roof either stays protected or gets compromised. Attachments must be placed and flashed correctly for the new roof surface. Reusing bent, cracked, corroded, or mismatched flashing is asking for trouble.
Rebuild the racking layout
The racking should follow the documented layout unless the roof design, code requirements, or roof repair scope requires a change. If the array shifts, wiring routes, conduit placement, and panel grouping may need adjustment too.
Reconnect wiring and grounding
After the panels are mounted, the contractor reconnects wiring, grounding, optimizers or microinverters, and monitoring equipment. Small connector mistakes can leave the roof looking finished while the system is quietly underperforming.
Test before turning on
The system should be checked before it is considered complete. That means looking for inverter errors, monitoring problems, missing panel-level data, abnormal production, or visible connection issues. Turning on is not the same as testing.
Monitor after restart
Homeowners should watch production for the first few days after reactivation. A sudden drop in output, missing panels in the monitoring app, inverter faults, or communication errors should be reported quickly while the job is still fresh.
Timeline: 1–2 Days Each Way
What makes removal faster
A simple one-plane array with safe access, clear staging, reusable hardware, and familiar equipment can move quickly. Many standard residential systems can be removed in about 1–2 working days under normal conditions.
What adds time
Multiple roof planes, steep slopes, two-story access, fragile roofing, awkward conduit, damaged hardware, or unclear ownership paperwork can slow the project down. The solar labor may be short, but the total downtime often depends on the roof schedule.
Inspection and weather delays
Some locations may require inspection or approval depending on the work performed. Weather can also interrupt both roofing and solar work. A realistic schedule leaves room for those delays instead of assuming everything happens back-to-back.
Keep timing tight
The best schedule removes the array close to the roofing start date and reinstalls it soon after the roof is complete. That reduces lost production, storage risk, and contractor confusion.
Narrow Cost Context: $1,500–$6,000
A planning range only
For many residential projects, a practical industry estimate for solar removal and reinstallation falls somewhere around $1,500 to $6,000. Treat that as a planning range, not a guaranteed price. Labor market, system size, roof access, hardware condition, and storage needs can push the number up or down.
Per-panel pricing
Some contractors quote roughly $200 to $500 per panel. Others price the whole job. Per-panel pricing is easy to compare, but it may not tell the full story if the quote excludes shutdown, labeling, racking removal, protected storage, reinstallation, and testing.
Main cost drivers
The main drivers are panel count, roof height, roof pitch, array complexity, equipment type, hardware condition, storage, and replacement parts. Flashing, mounts, clamps, rails, wire clips, and conduit parts can all become adders if they are damaged or not reusable.
| Cost factor | Why it changes price | Risk if ignored |
|---|---|---|
| Panel count | More panels require more labor and labeling | Underquoted labor |
| Steep or tall roof | Access and safety setup take longer | Change order after site visit |
| Old hardware | Clamps, rails, or mounts may not release cleanly | Replacement parts needed |
| Storage | Panels need protected staging | Glass, frame, or connector damage |
| Testing | System must be verified after reinstall | Hidden production fault |
The practical takeaway: a low number for “panel removal” may not include the work needed to protect the roof and get the system producing again. Compare the scope before you compare the price.
What quotes should include
A complete detach-and-reset quote should identify who shuts down the system, who removes the panels, whether racking and flashing are included, where the panels will be stored, what replacement parts may cost, who reinstalls the array, and who tests the system after it is turned back on.
Checklist Before Removing Panels
Confirm system ownership
If the system is leased, financed, under a power purchase agreement, or managed through a manufacturer account, confirm the removal rules before scheduling. The account holder may need approval before any contractor touches the system.
Check warranty rules
Solar equipment warranties, workmanship warranties, roof warranties, and leak warranties can all be affected by removal work. Get the requirements in writing when possible. Verbal promises are hard to use later.
Ask about new hardware
New flashing, mounts, clamps, wire clips, or conduit parts may be needed. Older hardware should only be reused if it is compatible and in good condition.
Photograph the system first
Photos help document panel layout, conduit runs, roof penetrations, inverter status, and visible roof conditions before work starts. They do not replace contractor documentation, but they can help if a disagreement comes up.
Get scopes in writing
- Who performs the electrical shutdown and disconnect?
- Who removes and stores the panels?
- Who removes or resets racking and flashing?
- Who coordinates with the roofer?
- Who tests the system after reinstall?
Risks and Mistakes to Avoid
Unqualified disconnection
The biggest mistake is letting an unqualified crew disconnect the array. It usually happens because the homeowner sees a line item for “solar removal” and assumes it includes proper electrical work. The financial risk can include damaged equipment, failed monitoring, warranty disputes, and another service visit to diagnose the problem.
Reusing damaged flashing
Old flashing and mounts should not be reused automatically. If a part is bent, cracked, corroded, poorly seated, or wrong for the new roof surface, it can create a leak path. Saving a small amount on hardware can become an expensive roof repair later.
Losing labels or layout
Unlabeled panels, wires, and racking parts slow the reinstall and increase the chance of production faults. This becomes a bigger issue when one company removes the system and another company comes back to reinstall it.
Poor panel storage
Panels left loose in a driveway, leaned against a wall, or stored near roofing debris are easy to damage. Frames bend. Connectors get dirty. Glass gets scratched or cracked. A storage plan should exist before removal day.
No final testing
The job is not finished just because the panels are back on the roof. If the inverter shows a fault, monitoring is missing panels, or production is clearly lower than expected, the issue should be addressed before the contractor closes the job.
Assuming coverage applies
Insurance, roof warranties, and solar warranties do not automatically cover detach-and-reset work. Coverage depends on the cause of the roof work, the policy language, the ownership structure, and who performed the removal.
When Removal Is Not Optional
Full roof replacement
If the roofing under the array is being replaced, the panels need to come off. Roofers cannot properly replace shingles, underlayment, flashing, or decking while a solar array is mounted over the work area.
Leaks under solar mounts
If the suspected leak is near a solar mount, rail, flashing point, or conduit penetration, removal may be required for proper diagnosis. Working around the array can leave the real leak untouched.
Structural decking repairs
Soft decking, rot, fire damage, or structural repair beneath the array requires clear access. Panels and rails should not be treated as obstacles to work around when the roof structure needs attention.
Storm, hail, or fire damage
Storm or fire damage near the array may affect panels, wiring, roof decking, and mounting points. The system should be checked before and after roof restoration, especially if roof penetrations or attachment points were involved.
Major remodeling
Dormers, roofline changes, additions, skylights, and ventilation changes may require removal and a revised solar layout. This can change both the roofing scope and the solar reinstall plan.
Questions for a Removal Contractor
Are you licensed and insured?
Ask about solar electrical work specifically. General contracting insurance is not the same as being qualified and insured to disconnect, remove, and reinstall a photovoltaic system.
Do you handle both phases?
Some contractors only remove panels. Others remove and reinstall them. If two companies are involved, the handoff needs to be clear. Otherwise, each side may blame the other when a part is missing or a connection does not test correctly.
How will parts be labeled?
The contractor should have a clear process for labeling panels, wiring, racking, and hardware. A vague answer here is a red flag.
What parts are included?
Ask whether new flashing, mounts, clamps, wire clips, conduit parts, or sealants are included or billed separately. This is one of the most common places where a low quote becomes a larger invoice.
Who tests the system?
The company that reinstalls the system should verify that it operates correctly. Homeowners should not be left to discover faults later through a monitoring app or a lower electric bill credit.
FAQ
Can roofers remove solar panels themselves?
Only if they are also qualified and insured for solar electrical work. In most cases, the roofer should coordinate with a solar contractor, while the solar contractor handles shutdown, disconnection, labeling, reinstallation, and testing.
Can panels stay on during roof replacement?
Usually no. If the roofing material, underlayment, decking, or flashing beneath the array needs work, the panels have to come off. They may stay in place only when the roof work is away from the array and does not affect the mounting area.
How long will the system be off?
Removal often takes about 1–2 working days, and reinstallation may take another 1–2 working days on many standard homes. Total downtime depends on the roof schedule, weather, inspections, hardware condition, and contractor availability.
Does removal void the warranty?
It can if the wrong contractor performs the work or if the system is leased, financed, or manufacturer-managed and the provider was not contacted. Check the solar agreement, roof warranty, and workmanship warranty before scheduling removal.
Do I need inspection after reinstall?
It depends on the jurisdiction and whether any electrical or structural changes were made. Even if a formal inspection is not required, the contractor should still test the system after reinstallation and confirm that monitoring and production look normal.