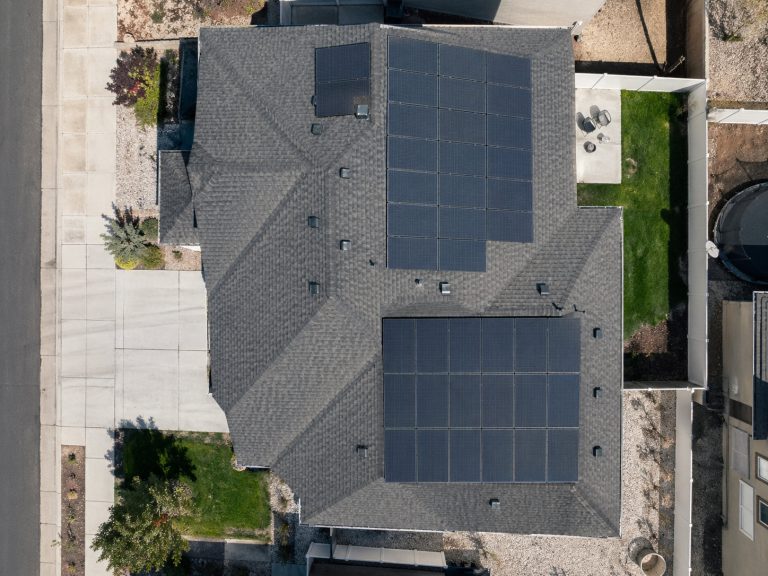
Solar Panels Roof Inspection Checklist
Quick Answer
A solar panels roof inspection is a maintenance check of the roof surface, mounting points, flashing, drainage, visible panel condition, and interior leak signs around a roof-mounted solar array. For many U.S. homes, a professional solar roof inspection typically lands around $150 to $350, but access changes everything. A steep roof, tile roof, two-story roof, or tight roof layout can move this out of safe DIY territory fast. The practical line is clear: homeowners can do ground-level and interior checks, but loose racking, roof penetrations, wiring, cracked panels, and leak diagnosis near the array need a roofer, solar technician, or both.
Solar Panels Roof Inspection Checklist
Check for loose or shifted panels
Look at the array as one flat plane. The panel rows should be straight, even, and consistent. If one panel sits lower than the others, looks twisted, has opened a gap, or appears lifted at one corner, treat it as a warning sign.
That kind of movement can point to a loose clamp, rail movement, a failed attachment, or wind damage. It may look minor from the ground. It is not something to ignore. The same movement that shifts a panel can also stress the roof attachment and the flashing below it.
Look for damaged roofing
The roof around the array matters just as much as the panels. On asphalt shingles, look for lifted tabs, missing granules, curling, cracks, or exposed underlayment near the solar mounting area. On tile roofs, look for cracked, slipped, or broken tiles around the panel field and along likely access paths.
Solar panels can hide part of the roof, so you will not see everything from the ground. That does not mean panels need to come off for every inspection. It means the visible edges, attic, gutters, roof valleys, and areas around the array need a closer look.
Inspect flashing and penetrations
Roof-mounted solar systems usually attach through flashed mounting points. Those areas need to stay weather-tight. Watch for cracked sealant, rust stains, raised flashing, gaps, exposed fasteners, or water marks near a mount.
A leak near a solar mount is not automatic proof that the solar installer caused it. Roofs age. Storms happen. Flashing can fail. But the roof-solar connection is the first place I would want checked. A roofer can evaluate the roofing and flashing. A solar company may be needed if panels or rails have to move before the area can be repaired.
Check for corrosion or exposed fasteners
Rust, staining, oxidized metal, missing caps, and exposed fasteners deserve attention. Corrosion shows up more often on older systems, coastal homes, wet roof areas, and systems where water or debris sits around the hardware.
A little staining does not always mean the mount is failing. Still, it is a useful clue. Photograph it, note where it is, and have it checked during the next service visit or sooner if there are leak signs nearby.
Look for trapped debris
Leaves, branches, pine needles, bird nesting material, and wind-blown debris often collect under the lower edge of solar panels. That buildup can hold moisture, block drainage, feed gutters with debris, or attract pests. Most people miss this part because the panels themselves look clean.
- Check the lower panel edge for leaves, branches, or nesting material.
- Look at roof valleys close to the array after storms.
- Watch for bird activity under or around the panels.
- Check whether debris is washing into nearby gutters.
- Take photos before anyone cleans or removes the debris.
Do not reach under panels blindly. There may be wiring, sharp rail edges, nests, or unstable roofing hidden from view. If the debris requires roof access, treat it as a service task, not a quick weekend chore.
Check gutters and drainage
Gutters near solar arrays need more attention than many homeowners give them. Panels change how water sheds off that part of the roof. During heavy rain, runoff can concentrate at panel edges, roof valleys, and gutters.

Look for overflowing gutters, stained fascia, water streaks below panel rows, packed debris, or downspouts that cannot keep up. These are not just gutter problems. They can become roof-edge problems if water keeps backing up or spilling where it should not.
Inspect attic and ceiling signs
Some leaks near solar panels show up inside before the roof problem is obvious outside. After heavy rain, check the attic below the array. Look for damp insulation, dark roof decking, mold smell, water trails, or staining around penetrations.
Inside the living space, watch for ceiling stains, bubbling paint, soft drywall, or recurring damp spots. A small stain below a solar array should be taken seriously. Waiting until water is dripping usually means the repair is no longer small.
Review monitoring for output drops
Solar monitoring can help, but it is not a roof inspection. A sudden production drop after hail, high wind, falling branches, or heavy debris buildup may point to cracked glass, wiring damage, shading from debris, or equipment trouble.
Use monitoring as a clue, not a final answer. A roof leak can develop while the system continues producing normally. Output data tells you something about solar performance. It does not prove the roof is dry.
How to Inspect Safely
Start from the ground
The safest first inspection uses no ladder. Use binoculars, a phone camera with zoom, or a view from an upper window. Look for uneven panel rows, cracked glass, debris, gutter overflow, missing roofing, and obvious movement around the array.
Rooftop solar work has a real fall risk. A roof that looks easy from the driveway can be awkward once you are near panels, rails, wires, and roof edges. There is less room to step and more to trip over.
Take clear photos
Good photos make the next step easier. Take wide shots that show the whole array, then closer shots of the suspected issue. Include gutters, roof edges, attic stains, ceiling marks, and monitoring screenshots if the system output changed.
This matters for homeowners, buyers, roofers, solar companies, and insurance adjusters. A single close-up with no context is often useless. A photo set that shows where the issue sits on the roof can save a second visit.
Avoid walking near panels
Walking near solar panels is riskier than walking an open roof. Panels reduce usable footing. Rails create trip points. Roof damage can be hidden under or around the array. Tile roofs are especially easy to crack during inspection.
Even asphalt shingles can be damaged if they are brittle, hot, old, or already disturbed around mounting points. If someone needs to get on the roof, they should have proper fall protection and know how rooftop solar is mounted.
Do not remove panels
Homeowners should not remove panels to inspect the roof underneath. Panel removal is not just unscrewing hardware. It involves electrical safety, grounding and bonding, racking torque, wire management, roof seals, and warranty issues.
In the field, the expensive mistake is turning a visual concern into a hands-on repair without understanding the system. A loose clamp, cracked tile, or suspected leak may look simple. Once the array is disturbed, both the roof warranty and the solar workmanship warranty can become harder to sort out.
Post-Storm Inspection
After wind
High wind can loosen hardware, shift panels, move debris under the array, lift flashing, or stress wiring. From the ground, compare the panel rows. If one row looks uneven, raised, or out of plane, photograph it and schedule a professional inspection.
Also check gutters, roof edges, and attic spaces. Wind-driven rain can expose weaknesses that stay hidden during normal weather.
After hail
Hail can crack panel glass, dent frames, damage shingles, bruise roofing, and mark flashing. Some damage is obvious. Some is not. Small cracks and roof impact marks often need a closer professional look.
If production drops after hail, save monitoring screenshots and take safe photos from the ground. Do not climb up to touch cracked glass. Broken modules can create cut hazards and electrical risk.
After heavy rain
After heavy rain, start inside. Check ceilings, attic decking, insulation, and walls below the solar array. A slow leak near a mount may darken decking or dampen insulation before it ever shows as a drip.
Outside, look for water stains below roof edges, overflowing gutters, and areas that stay wet longer than the surrounding roof. Those small clues often tell you where water is not draining correctly.
After snow or ice
Snow and ice can change drainage around solar panels. As snow slides or melts off the array, it may pile near gutters, valleys, or lower roof sections. In colder areas, blocked drainage can contribute to ice buildup and water backing under roofing materials.
The job is to inspect drainage and visible damage, not scrape snow aggressively from the panels. Rough scraping can damage panels, wires, seals, or roofing.
After falling branches
A branch impact can damage more than the panel it hits. It can bend rails, crack roof materials, pull at wiring, dent gutters, or shift a mount.
For insurance or warranty review, document the branch location, impact area, roof damage, gutter damage, panel condition, and any production change after the event. Take the photos before cleanup if it is safe to do so.
| Storm event | What to check first | Main risk | Who usually handles it |
|---|---|---|---|
| Wind | Panel alignment, loose edges, flashing | Shifted racking or water intrusion | Solar installer or roofer |
| Hail | Cracked glass, dented frames, roof bruising | Panel damage and roofing damage | Solar technician, roofer, insurer |
| Heavy rain | Ceilings, attic, gutters, penetrations | Hidden leak | Roofer, sometimes solar installer |
| Snow or ice | Drainage paths, gutters, lower roof edges | Ice buildup or blocked runoff | Roofer or maintenance contractor |
| Falling branches | Panel glass, rails, wiring, roof surface | Combined roof and solar damage | Solar installer and roofer |
The practical takeaway is simple: after severe weather, do not inspect only the panels. A roof can be damaged even if the solar system still produces power.
When to Call a Professional
Call a roofer
Call a roofer when the concern is roof-based: leaks, soft decking, damaged shingles, cracked tiles, roof staining, gutter overflow, flashing problems, or suspected water intrusion. If the symptom is inside the home or on the roof surface, a roofer is usually the right first call.
The catch is access. A roofer may not be able to fully inspect or repair the area under the array unless the solar company removes or loosens panels. That is why leak work around solar often needs coordination.
Call a solar installer
Call a solar installer or solar service technician when the issue involves loose racking, panel movement, cracked module glass, exposed wiring, monitoring faults, or any hardware tied to the PV system. Solar mounting hardware is not something to tighten by feel.
If the original installer is still in business and responsive, start there. If not, use a qualified solar service company that works on rooftop systems, not just general electrical equipment.
Call both for mount leaks
A leak near a solar mount sits between two trades. The roofer understands shingles, tiles, underlayment, decking, and flashing. The solar installer understands rails, attachments, clamps, wire management, and panel removal.
This is where people waste time. A roofer may find the leak but need the array moved. A solar installer may identify a mount issue but not repair the surrounding roof. If the leak appears near a mounting point, assume both scopes may be involved.
Expect hourly inspection labor
Inspection labor is often estimated around $60 to $100 per hour, depending on the market, licensing, access, and provider. Some companies quote a flat inspection fee instead.
Steep roofs, two-story access, tile roofs, tight arrays, and leak diagnosis all add time. If panels must be removed, that becomes a different scope from a basic inspection.
Inspection and Maintenance Costs
Basic inspection costs
A basic professional solar panel roof inspection commonly falls around $150 to $350 for a residential system. That usually covers a visual review of the array, roof interface, mounting condition, and obvious roof-related concerns where access is reasonable.
It is not the same as a repair quote, insurance inspection, electrical troubleshooting visit, panel removal job, or roof leak repair. Ask what the inspection includes. At minimum, it should address visible roof penetrations, racking, wiring condition, panel condition, drainage, and any interior leak clues.
Cleaning and maintenance visits
Solar cleaning and maintenance visits vary a lot. A typical range can run from about $150 to $925 depending on system size, access, service scope, roof height, and local labor. Some providers price cleaning by panel, often around $15 to $35 per panel as a practical benchmark.
Cleaning matters here because cleaning and inspection often happen during the same visit. If the roof is steep or tile, much of the cost may be about safe access, not how dirty the panels are.
Annual maintenance plans
Annual professional maintenance plans often land around $300 to $600 as a field estimate when inspection and cleaning are combined. The value depends on the actual checklist, not the name of the package.
A useful roof-related solar maintenance visit should include visible panel condition, racking review, roof penetration observation, debris assessment, gutter and drainage notes, monitoring review, and basic documentation. A service that only washes glass may miss the problem you actually care about.
What increases the price
Access drives price. A one-story asphalt shingle roof with open access is a very different job from a steep tile roof with panels high near the ridge. More safety setup means more labor. Fragile roofing means slower work.
| Cost driver | Why it matters | Likely impact |
|---|---|---|
| Steep roof | Requires more fall protection and slower work | Higher labor cost |
| Tile roof | Tiles can crack under foot traffic | Higher service difficulty |
| Two-story access | Ladder setup and safety risk increase | Higher inspection or cleaning cost |
| Large array | More panels, rails, and mounts to check | Longer service time |
| Leak diagnosis | May require both roofer and solar technician | Separate repair estimate |
The cheapest inspection is not always the best value. If the visit ignores flashing, mounts, drainage, attic evidence, and roof access limitations, it may miss the exact issue you needed checked.
Common Inspection Mistakes
Assuming no leak means no damage
No visible leak does not prove the roof is fine. Moisture can travel along framing, darken decking, or soak insulation before it shows up as a ceiling stain.
The money risk is delay. A small flashing or roof penetration issue can turn into drywall repair, insulation replacement, mold cleanup, or roof decking work if it sits long enough.
Checking only the panels
Panels are easy to focus on because they are visible and expensive. But the roof risks often sit around the panel edges, under the array, at the mounting points, in gutters, and inside the attic.
A clean, uncracked panel does not prove the roof is healthy. The inspection has to include the roof system supporting the array.
Using a pressure washer
Pressure washing near solar panels, flashing, sealant, and roof penetrations is a bad shortcut. High-pressure water can force moisture into places it should not go, disturb seals, damage roof materials, or harm panel surfaces.
Use soft cleaning methods, appropriate brushes, safe access, and manufacturer-aware practices. If the roof is difficult to reach, paying for professional cleaning is usually cheaper than repairing damage caused by improvised work.
Ignoring small debris
Small debris becomes a problem when it sits in the same place and traps moisture. Leaves under the panel edge, branches in valleys, bird material near gutters, and packed debris around drainage paths all deserve attention.
One leaf is not the issue. Repeated buildup is. Especially after storms, wet seasons, or heavy tree drop.
Waiting for production loss
Solar production is useful information. It is not a full roof report. A system can keep producing while a roof penetration leaks. A gutter can overflow while the inverter looks normal. A cracked tile near a mount may not affect production at all.
Use monitoring after storms or visible damage, but do not wait for an output drop before checking roof conditions.
Hiring the wrong trade
Some problems are roofing problems. Some are solar service problems. Some are both. Hiring the wrong trade can lead to a partial diagnosis and another bill later.
| Symptom | Likely first call | Possible second call |
|---|---|---|
| Ceiling stain below array | Roofer | Solar installer if panels block access |
| Loose or shifted panel | Solar installer | Roofer if flashing is affected |
| Cracked tile near mount | Roofer | Solar installer if rail access is needed |
| Frayed rooftop wire | Solar technician | Roofer if roof surface is damaged |
| Gutter overflow near array | Roofer or maintenance contractor | Solar installer if panel layout traps debris |
Use this rule of thumb: roof material problem, call a roofer. Panel, rail, wiring, or production problem, call a solar professional. Mounting-point problem, expect overlap.
What to Document
Photos of roof and racking
Take photos that show the full array first. Then take closer shots of the defect. Include panel alignment, visible rails, roof surface, flashing areas, gutters, debris, and any nearby roof damage.
Context matters. A close-up of a stain or cracked tile helps. A wider photo showing where it sits relative to the solar array helps more.
Dates of storms and repairs
Keep a simple record of storms, leaks, cleanings, inspections, and repairs. You do not need a complicated log. Dates, photos, service notes, and the name of the contractor are enough for most situations.
For warranty or insurance discussions, timing matters. A ceiling stain after a hailstorm tells a different story than an old stain that predates the solar installation.
Monitoring screenshots
If production drops suddenly, save screenshots from the monitoring app. Capture the date, the affected portion of the system if the app shows it, and the comparison to normal output.
This helps a technician decide whether the issue is likely panel damage, wiring, shading from debris, inverter trouble, or something unrelated to the roof.
Contractor notes and reports
Ask for written notes after a professional inspection. They do not need to be long. They should say what was checked, what was found, and whether roofing, solar, electrical, or cleaning follow-up is recommended.
For home buyers, this is especially useful. “The system works” is not the same as “the roof penetrations, racking, drainage, and visible wiring were inspected.”
Simple Inspection Schedule
Annual visual inspection
For most residential roof-mounted systems, an annual visual inspection is a reasonable baseline. That does not always mean a full paid service visit every year, but the array, roof surface, gutters, attic, and visible wiring should be checked regularly.
Older systems, coastal homes, heavy tree cover, prior leaks, fragile roofing, and difficult drainage all justify closer attention.
Extra checks after storms
Storms override the normal schedule. After high wind, hail, heavy rain, snow, or falling branches, check from the ground and inside the home once it is safe.
Look for panel movement, cracked glass, debris, water stains, gutter overflow, and sudden monitoring changes. Those are the clues that tell you whether a professional visit is worth scheduling.
Cleaning plus inspection
If the panels need cleaning, use the same visit to check roof-related conditions. Cleaning without inspection misses an opportunity to catch loose clamps, debris traps, flashing concerns, and drainage problems.
In dusty, wooded, pollen-heavy, or bird-heavy locations, cleaning frequency depends more on local conditions than on a fixed calendar.
Before repairs or home sale
A solar roof inspection is worth considering before roof repairs, warranty claims, insurance claims, and home sales. Buyers should be cautious with systems that have no maintenance records, uneven panel rows, visible stains, fragile roofing, or unclear ownership and service history.
The goal is not to prove the system is perfect. The goal is to understand whether the roof and solar array can be maintained normally or whether hidden repair costs are likely.
FAQ
Can I inspect my roof with solar panels?
Yes, but keep it safe. Use the ground, windows, attic, monitoring app, and visible interior surfaces. Do not climb onto the roof, walk near panels, touch wiring, tighten hardware, or remove panels unless you are trained and properly equipped.
How often should I inspect it?
Once a year is a practical baseline for many homes. Add another check after severe wind, hail, heavy rain, snow, falling branches, visible panel movement, roof leaks, or sudden production drops. Homes with trees, tile roofing, older systems, or past leaks may need closer attention.
Who checks a leak near solar panels?
Start with a roofer if you see ceiling stains, attic moisture, damaged shingles, cracked tiles, or other roof symptoms. Bring in a solar installer if panels, rails, wiring, or mounts need to be moved or inspected. Leaks near mounting points often need both trades.
Do solar panels make leaks harder to find?
They can. Panels cover part of the roof, which can hide damaged shingles, cracked tiles, flashing problems, or debris buildup. That is why attic checks, gutter review, array perimeter inspection, and professional evaluation near roof penetrations matter.
How much does inspection cost?
A typical residential solar panel roof inspection often runs around $150 to $350. Cleaning and maintenance visits can cost more, especially with steep roofs, tile roofs, two-story access, heavy debris, large arrays, or service that combines cleaning with inspection.