Installing Solar Panels on a New Roof: What Homeowners Should Know
Quick Answer
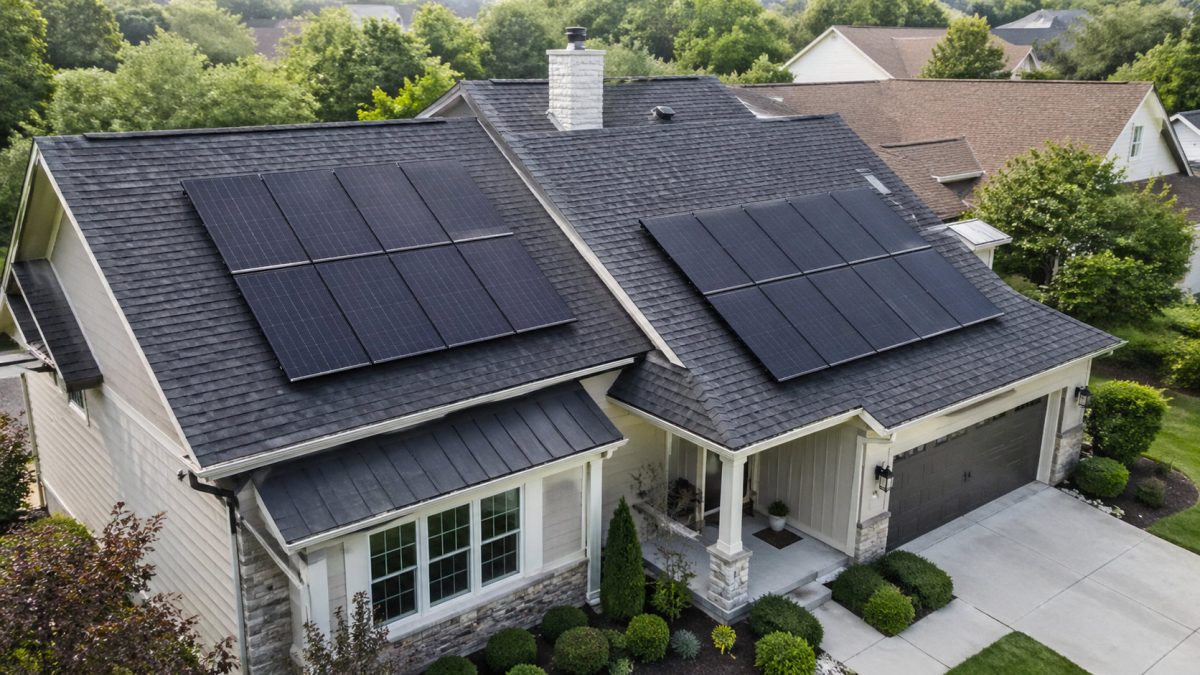
Yes, solar panels can be installed on a new roof. In real-world projects, that is often the best timing because the roof is fresh, the surface is predictable, and you are less likely to pay for panel removal later just to fix or replace roofing. But a new roof is not automatically solar-ready. The roof still needs final roofer sign-off, a solar site assessment, proper attachment planning, permits, inspection, and utility permission before the system is turned on. A typical residential rooftop installation may only take about 1–3 days once everything is approved and scheduled, but the full process can run 25–60+ days when permitting, inspection, and utility approval are included. The real decision is not whether solar can go on the new roof. It is whether the roof, paperwork, mounting method, and contractor responsibilities are clean before anyone starts drilling into it.
Why New Roofs Work Well
Less Future Panel Removal
A new roof solves one of the biggest problems with rooftop solar: installing panels on a roof that is close to needing replacement. If solar goes on an old roof, future roofing work can require the array to be removed, stored, and reinstalled. That adds cost, scheduling friction, and another chance for something to be damaged.
With a new roof, that risk is lower. Not gone. Lower. The roof still has to be finished correctly, and the solar installer still has to treat it as a roof system, not just a flat surface to bolt equipment onto.
Site Assessment Still Matters
A new roof still needs a solar site assessment. The installer should review the finished roof surface, attic or framing access where possible, rafter or truss locations, vents, roof planes, setbacks, safe access, and any areas where mounting would be risky.
This matters because many solar designs are started before the roof is replaced. Then the new roof changes something. A vent moves. Decking gets repaired. A skylight gets added. A ridge detail changes. Those small changes can affect the final panel layout and attachment points.
The Real Decision
The answer to “can solar panels be installed on a new roof?” is usually yes. The better question is whether the roof is actually ready for solar work.
Good projects have a clean handoff. The roofer finishes. The roof is inspected or signed off. The solar company verifies the completed roof. Mounting and flashing details are clear. Bad projects are rushed. Panels go up before roof details are finished, and when a leak shows up later, nobody wants to own it.
Main Installation Process
Confirm Roof Completion
Before the solar design is finalized, the roof should be completely done. That includes the roof covering, flashing, underlayment details, vents, ridge caps, edge details, gutters where relevant, and cleanup items. If the roofer still has to come back, the solar job should wait.
Ask for the final invoice, warranty documents, roof material information, and any inspection paperwork before solar work starts. Take photos of the completed roof too. They are useful if a leak, cracked tile, or warranty question comes up later.
Review Roof Structure
A new roof surface does not always mean the underlying structure is perfect. The solar installer still needs to confirm that attachments can be made safely and that the roof can handle the system under local wind, snow, and code requirements.
As a practical benchmark, many rooftop solar systems are discussed in the range of roughly 2–4 pounds per square foot, depending on the panels, rails, and layout. That number is useful, but it is not the whole story. Wind uplift, attachment spacing, roof slope, rafter condition, snow load, and roof height can matter just as much.
Check Solar Roof Load
Most properly built modern roofs are not overwhelmed by solar panel weight alone. The bigger issue is whether the mounting system transfers loads correctly. Solar attachments have to resist downward load, wind uplift, and movement over time.
On a new roof, the installer should know what roof material is installed and how the roof is framed. If the attic is accessible, rafter verification is easier. If the underside is closed, the crew may need other approved methods to confirm attachment points.
Finalize the Panel Layout
The final panel layout should be based on the finished roof, not the old roof. It needs to account for access paths, fire setbacks, vents, skylights, plumbing stacks, valleys, hips, ridges, and areas where attachments do not make sense.
This is also the time to deal with warranty questions. If the roofer requires certain flashing products, approved mounting methods, or notice before roof penetrations, those details need to be handled before the solar equipment is ordered.
Complete Permits and Utility Paperwork
The paperwork often takes longer than the rooftop work. Permitting, interconnection, plan review, inspection scheduling, and utility approval can push the project timeline well beyond the installation day itself.
A typical planning range for many residential projects is 25–60+ days from design and approval work through activation. Some move faster. Some take longer. Permit review may include electrical drawings, structural details, roof slope, attachment spacing, wind load, snow load, fire access, and equipment specifications.
Expect a 1–3 Day Install
Once the design is approved, materials are ready, and the crew is scheduled, many residential rooftop solar installs take about 1–3 days of physical work. A simple asphalt shingle roof with good access may be faster. Tile, slate, steep roofs, low-slope membranes, or difficult staging can stretch the work.
The crew usually marks the layout, locates framing, installs attachments and flashing, sets rails, places modules, routes wiring, installs exterior electrical equipment, and prepares the system for inspection. The panels may be on the roof by the end of the job, but that does not mean the system is ready to operate.
Pass Inspection Before Activation
After installation, the project typically needs local inspection and utility permission to operate. In practical terms, that usually means at least two checkpoints after the crew leaves: inspection by the local authority and final approval from the utility.
Do not turn on a grid-tied system just because the panels are installed. Installed is not the same as approved. The system is not truly complete until inspection and utility permission are handled.
Practical Decision Criteria
Install Soon After Reroofing
Installing solar soon after reroofing can be a smart move when the roof is complete, documented, and compatible with the mounting method. You reduce the chance of paying to remove panels later for roof work.
The timing has to be disciplined. “The shingles are on” or “the roof looks done” is not enough. Final flashing, vents, ridge work, cleanup, inspection items, and warranty paperwork should be finished first.
Delay Solar for Roof Punch-List Work
Delay solar if the roofer still needs to fix flashing, replace cracked tiles, correct soft decking, finish drainage details, or return for inspection items. Once the array is installed, some roof areas become harder and more expensive to reach.
A short delay is usually cheaper than removing panels later. As an industry estimate, removing and resetting a small section of panels for roof access can run roughly $500–$2,500, depending on how many modules must be moved, how the wiring is arranged, and how difficult the roof access is.
Coordinate Roofer and Solar Installer
The best projects happen when the roofer and solar installer agree on the roof attachment method before the solar crew shows up. This matters most on tile, slate, metal, and low-slope roofs, where the wrong method can create expensive damage.
The roofer does not have to install the solar system. But the roofer should be able to say whether the proposed mounting and flashing method conflicts with the roof warranty or the roof material requirements.
Confirm Leak Responsibility
A leak after solar installation can get messy. It might come from roofing workmanship. It might come from a solar attachment. It might be a damaged tile, a cable penetration, bad flashing, or a roof detail near the array that had nothing to do with solar.
The contract should spell out who is responsible for solar roof penetrations, flashing, mount-related leaks, and repair access. Vague language helps the contractors more than it helps the homeowner.
Plan for Code Access Paths
Solar layout is not just about fitting as many panels as possible. Many areas require roof access paths, setbacks, and clearances for emergency access. Those rules can reduce the usable roof area, even on a brand-new roof.
This is not a full production-design discussion. It is a practical installation point: the layout has to be legal and inspectable, not just packed with panels.
Installation Timing
Permits Can Take 25–60+ Days
Homeowners often focus on installation day. In the field, the slower part is usually paperwork. Permits, utility applications, plan review, inspections, and permission to operate can take longer than the rooftop labor.
Some cities process solar permits quickly. Others take weeks or request revisions. Utilities can also add time after the physical installation is complete. A realistic planning range for many projects is 25–60+ days from design and approval work to activation, with some projects taking longer.
| Stage | Typical Timing | What Can Delay It |
|---|---|---|
| Roof completion | Before final solar layout | Punch-list work, failed roof inspection, material delays |
| Solar permit review | Days to several weeks | Local backlog, missing structural details, plan revisions |
| Physical installation | About 1–3 days | Tile work, steep roof, difficult access, weather |
| Inspection | After installation | Scheduling backlog, failed inspection, documentation gaps |
| Utility PTO | After inspection package | Incomplete paperwork, utility review backlog |
The practical takeaway is simple: the new roof may be ready before the solar paperwork is ready. That is normal. Keep the sequence clean. Finish the roof. Finalize the solar design. Permit the correct design. Install. Inspect. Then activate.
Roof Ready Before Paperwork
A roof can be physically ready for solar while the permit is still under review. That waiting period can feel annoying, but it is better than installing early and finding out the approved plans require a different layout or attachment method.
Use the waiting period well. Collect warranty documents. Take roof photos. Get material details. Send anything relevant to the solar installer before the crew is scheduled.
Early Scheduling Can Cause Redesigns
Scheduling solar before the roof is finished can create redesign work. Roofers may move vents, repair decking, adjust flashing, or uncover framing conditions that change the solar plan.
Sometimes the change is minor. Sometimes it means the layout no longer fits. Either way, it creates delays and forces decisions to be made under pressure.
Late Scheduling Creates Scope Confusion
Waiting too long can create its own problems. If the roofer leaves the project and the solar installer arrives months later with no coordination, warranty requirements and approved methods may be harder to confirm.
The cleanest path is usually this: plan for solar before reroofing, finish the roof, then have the solar installer verify the finished roof before final installation design.
New Roof Warranty Issues
Ask About Workmanship Coverage
Solar does not automatically void a new roof warranty. But solar work can create warranty problems if it damages the roof or uses methods the roofer or manufacturer does not approve.
The weak spots are predictable: damaged tiles, wrong fasteners, poor flashing, low-quality racking, and unapproved penetrations. Roof leaks are often caused by details, not by the main roof material.
Confirm Solar Flashing Coverage
The solar installer should explain what they cover around mounts, flashing, and penetrations. Some contractors offer a specific roof penetration warranty. Others have exclusions that homeowners do not notice until there is water in the attic.
Ask the blunt question: if water gets in around a solar mount, who comes out, who pays, and what is excluded?
Get Penetration Responsibility Written
Roof penetrations should never rely on a handshake. The contract should say whether the solar installer is responsible for penetrations they create and how long that coverage lasts.
In field work, the expensive disputes are rarely about whether solar was allowed on the roof. They are about who owns the repair when a leak appears near a mount six months later. Written scope language is boring. It is also cheaper than a diagnostic visit, panel removal, and two contractors pointing at each other.
Avoid Unapproved Roof Modifications
Do not let an unapproved contractor alter a new roof if the warranty requires specific methods. This matters more with specialty roof systems such as tile, slate, standing seam metal, and low-slope membranes.
If the roofer requires approved flashing, specific mounting hardware, or a certain penetration method, the solar installer needs that information before materials are ordered.
Risks and Mistakes
Assuming New Means Ready
A new roof can still be a poor solar candidate until the details are checked. New shingles over weak decking, awkward framing, blocked access, unusual roof planes, or strict warranty language can all affect the job.
This mistake happens because people focus on the roof surface. Solar installers have to care about the whole assembly: covering, structure, attachment points, waterproofing, and code layout.
Using Old Roof Measurements
Old measurements cause real problems. A reroof can change vent locations, ridge details, repaired roof areas, skylights, valleys, and usable planes.
If the solar company designed the array before reroofing, they should verify the completed roof before installation. Otherwise, expect field changes, delays, or layout decisions made too quickly.
Installing Before Final Sign-Off
Installing solar before roof sign-off is one of the easiest mistakes to avoid. If the roof later needs repair, the array may block access. If a leak appears, the roofer may argue that the solar work disturbed the roof.
The cost exposure can add up quickly. A practical benchmark for roof leak diagnosis is roughly $150–$500. Flashing repair around mounts may run about $300–$1,500. If panels need to be removed and reset for access, a small section can reach roughly $500–$2,500 or more depending on the layout and labor involved.
| Mistake | Why It Happens | Possible Consequence | Field Cost Exposure |
|---|---|---|---|
| Installing before roof sign-off | Schedule pressure | Blocked roof repairs, leak disputes | $150–$2,500+ |
| Relying on sealant only | Shortcut waterproofing | Water intrusion at penetrations | $300–$1,500+ |
| Using generic tile methods | Wrong hardware or crew inexperience | Cracked tile, warranty conflict | $300–$2,500+ |
| No pre-install photos | Poor documentation | Harder liability dispute | Diagnostic and repair exposure |
The point is not that solar is dangerous for a new roof. It is that new roofs still need documentation, proper flashing, structural review, and written responsibility. Skip those, and a simple installation can become a repair dispute.
Ignoring Flashing Compatibility
Solar attachments need a waterproofing method that fits the roof material. Asphalt shingles usually need flashed attachments designed for shingle roofs. Tile and slate often require specialty hooks, replacement flashing tiles, or other roof-specific hardware. Low-slope membranes need careful detailing, and some systems may use ballast to reduce penetrations where appropriate.
Sealant can help, but it should not be the whole waterproofing plan. Sealants age. Proper flashing and properly installed attachment systems do the real long-term work.
Some Roofs Need Special Mounting
Tile, slate, metal, and flat roofs can all work with solar when the right mounting system is used. They are just less forgiving than a basic asphalt shingle roof.
The wrong method can crack roof covering, compromise a membrane, damage metal panel finishes, or create a warranty fight. “New roof” is not enough information. The roof type drives the mounting method.
Local Rules Can Change Layout
Wind, snow, fire access, electrical rules, and local inspection habits can all affect the final panel layout. A roof may have enough physical space for panels and still need setbacks, access paths, or different attachment spacing.
That is why rough online layouts should not be treated as final designs. A permit-ready layout has more constraints.
Installation Checklist
Confirm Final Inspection
Before solar installation, confirm the roof is complete and any required inspection or roofer sign-off is finished. Do not rely on how the roof looks from the driveway.
Save Warranty Documents
Keep the roof material warranty, roofer workmanship warranty, invoice, product details, and any notes about approved solar attachment methods. If a warranty issue comes up later, those documents matter.
Share Roofing Details
The solar installer should know the roof material, installation date, decking concerns, attic access, and any special requirements from the roofer or manufacturer.
Confirm Flashing Method
Ask exactly how the installer will attach and flash the system. The answer should be specific to your roof type. “We seal everything” is not a good enough answer by itself.
Verify Approval Responsibilities
Clarify who handles the permit, inspection, utility application, and permission to operate. A solar system that is installed but waiting on paperwork is not finished.
Photograph Before and After
- Take clear photos of each roof plane before solar work begins.
- Capture vents, flashing, valleys, repaired areas, and roof penetrations.
- Ask for photos of attachments before panels cover them.
- Save final array photos after installation.
- Check the attic after the first heavy rain if access is safe.
Photos do not replace professional inspection, but they give everyone a record. That record can be useful if a leak, cracked tile, or warranty question appears later.
When to Involve the Roofer
Warranty Requires Approved Methods
If the roof warranty mentions approved penetrations, approved contractors, or manufacturer-specific methods, involve the roofer before solar installation. Do not create a warranty exclusion before the solar system is even turned on.
Attachments Need Specific Framing
Some roofs need careful attachment planning because rafters, trusses, decking, or prior repairs are not straightforward. If the roofer knows where structural repairs were made, that information can help the solar installer avoid bad attachment areas.
Special Roof Materials Are Present
Tile, metal, slate, and low-slope membrane roofs deserve extra coordination. They can be good solar roofs, but only when the mounting system and crew experience match the material.
| Roof Type | Solar Suitability | Main Installation Risk | Difficulty |
|---|---|---|---|
| Asphalt shingle | Generally suitable | Poor flashing or missed framing | Low to medium |
| Concrete or clay tile | Suitable with correct hardware | Cracked tiles, wrong hooks | Medium to high |
| Slate | Requires experienced installer | Broken slate, improper fastening | High |
| Standing seam metal | Often suitable | Wrong clamp or coating damage | Medium |
| Flat or low-slope membrane | Suitable with designed system | Membrane penetration or drainage issue | Medium to high |
The takeaway is straightforward: roof type changes the job. A new asphalt shingle roof and a new slate roof are both “new,” but they are not the same solar installation.
Leaks or Soft Decking Exist
If there are signs of leaks, soft decking, staining, ponding water, or unfinished details, bring the roofer in before solar starts. Solar will not fix a roof defect. It can hide it and make it harder to reach.
FAQ
Can solar be installed immediately after reroofing?
Yes, if the roof is fully complete, inspected or signed off where required, and documented. The solar installer should use the finished roof for the final layout, not old measurements or pre-reroofing photos.
Will solar void my new roof warranty?
Not automatically. Warranty trouble usually comes from roof damage, wrong fasteners, poor flashing, unapproved penetrations, or work that does not follow the roof manufacturer’s or roofer’s requirements. Get penetration responsibility in writing before the job starts.
Does a new roof need structural review?
Yes. A new roof covering does not prove that every attachment point is suitable. The installer still needs to account for framing, attachment spacing, wind uplift, roof slope, local code, and site conditions.
Who fixes a leak after solar installation?
It depends on the cause. A roofing workmanship issue may belong to the roofer. A leak from a solar mount, cable penetration, or flashing detail may belong to the solar installer. The contract should make that responsibility clear before installation.
Should solar be planned during roof replacement?
Yes. Planning early helps coordinate roof material, warranty requirements, and attachment methods. The final solar design should still be verified after the roof is complete so the layout matches the finished roof.