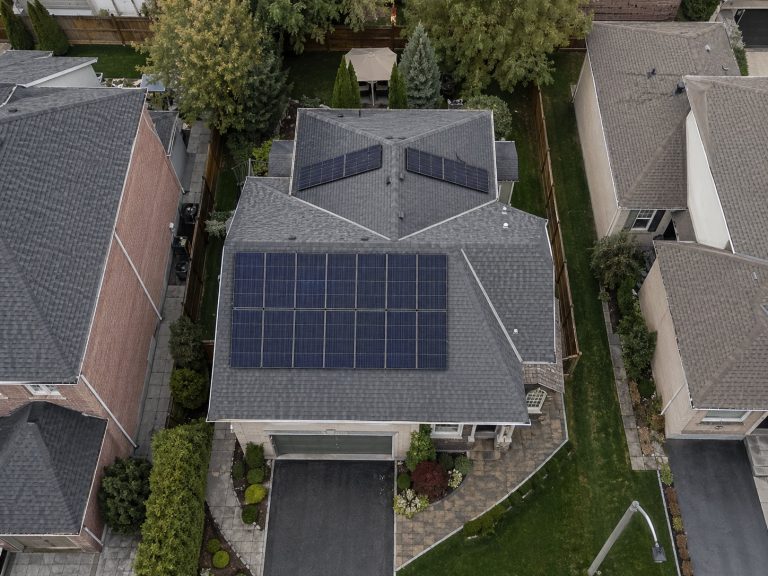
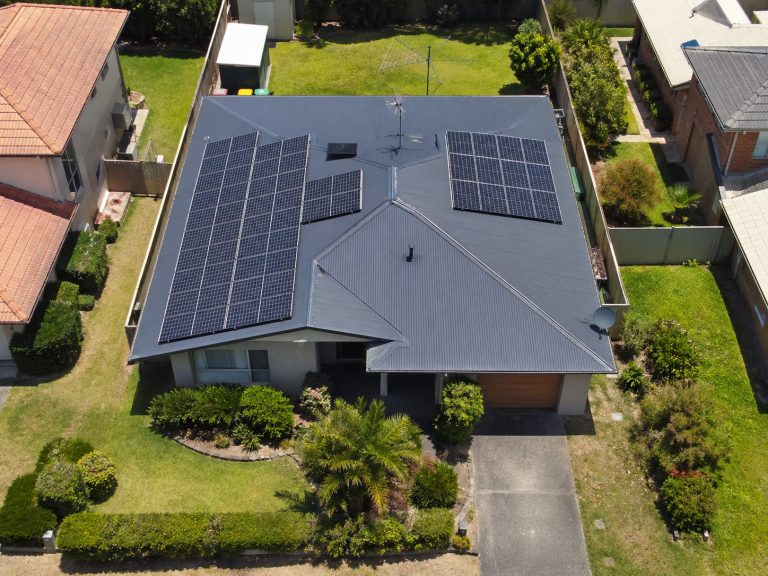
Will Solar Panels Damage Your Roof? What to Know About Mounting Holes
Quick Answer
Yes, solar panels often require holes in the roof, especially on asphalt shingle roofs and many tile roofs. But those holes should never be left exposed. A proper solar installation uses roof attachments, flashing, sealant, and structural fastening so water sheds around the mount instead of entering the roof. As a practical field estimate, many residential rail-mounted systems may use roughly 40 to 100 attachment points, depending on array size, rafter spacing, roof layout, and local wind or snow requirements. The important question is not simply whether holes are made. The real question is whether every penetration is flashed, sealed, fastened correctly, and documented before the panels cover the work.
Yes, But Not Exposed Holes
On many pitched roofs, solar panels sit on rails. Those rails connect to roof mounts. The mounts usually need fasteners that pass through the roof covering and into framing below. On a shingle roof, that can mean drilling through the shingle layer, underlayment, roof deck, and into a rafter.
That makes some homeowners nervous, and it should at least get your attention. But a roof penetration is not automatically roof damage. Roofs already have penetrations for plumbing vents, exhaust vents, skylights, satellite brackets, and other hardware. The difference is whether the penetration is treated like part of the roofing system or like a quick caulking job.
Flashing Is the Main Protection
Flashing is the key detail. On asphalt shingle roofs, a solar flashing plate is usually worked under the upper shingle course so rainwater flows over the flashing and continues down the roof. The mount then fastens through that assembly into the structure below.
Sealant matters, but it should not be doing all the work. Sealant can dry out, shrink, crack, or pull away over time. Flashing gives the roof a physical water-shedding path. That is what you want on a roof that may be carrying solar equipment for decades.
Some Roofs Need No Penetrations
Standing seam metal roofs are the big exception. When the seam profile works with an approved clamp system, the solar array can often be attached without drilling through the roof panel at all. The clamp grips the raised seam, and the solar rail or module hardware connects to the clamp.
That does not mean every metal roof is automatically hole-free. The seam shape, panel thickness, roof manufacturer rules, clamp rating, and project engineering all matter. If a standing seam metal roof is quoted with roof penetrations, ask why. Sometimes there is a good reason. Sometimes the installer is just using the system they know best.
How Solar Panels Attach to Roofs
Mounts Anchor Into Rafters
On many shingle-roof installations, the roof mount should fasten into rafters or another approved structural member, not just into shingles or thin roof decking. The rafter gives the attachment strength against wind uplift, snow load, and long-term movement.
A competent crew does not simply start drilling. They locate rafters, lay out the attachment points, drill pilot holes, seal where required, install flashing, and then fasten the mount. The panels themselves are not usually screwed straight to the roof. They are held by rails or mounting hardware, and that hardware transfers the load into the roof structure.
How Mounts and Rails Work
A typical rail-mounted system has several working parts: roof covering, flashing, attachment, rail, module clamps, and the solar panel. Each part has a job. The attachment provides strength. The flashing controls water. The rail creates the mounting plane. The clamps hold the module.
Problems show up when one of those jobs gets skipped or treated casually. A mount can feel tight on installation day and still be wrong if it missed the rafter or was waterproofed poorly. A solar roof attachment is both a structural detail and a roofing detail. You cannot separate the two.
Typical Attachment Spacing
Many solar roof attachments are spaced somewhere around 4 to 8 feet apart along the rails, but that is only a typical range. It is not a rule you can apply to every house. Spacing depends on the mounting system, wind zone, snow load, roof pitch, rail span, rafter spacing, and module layout.
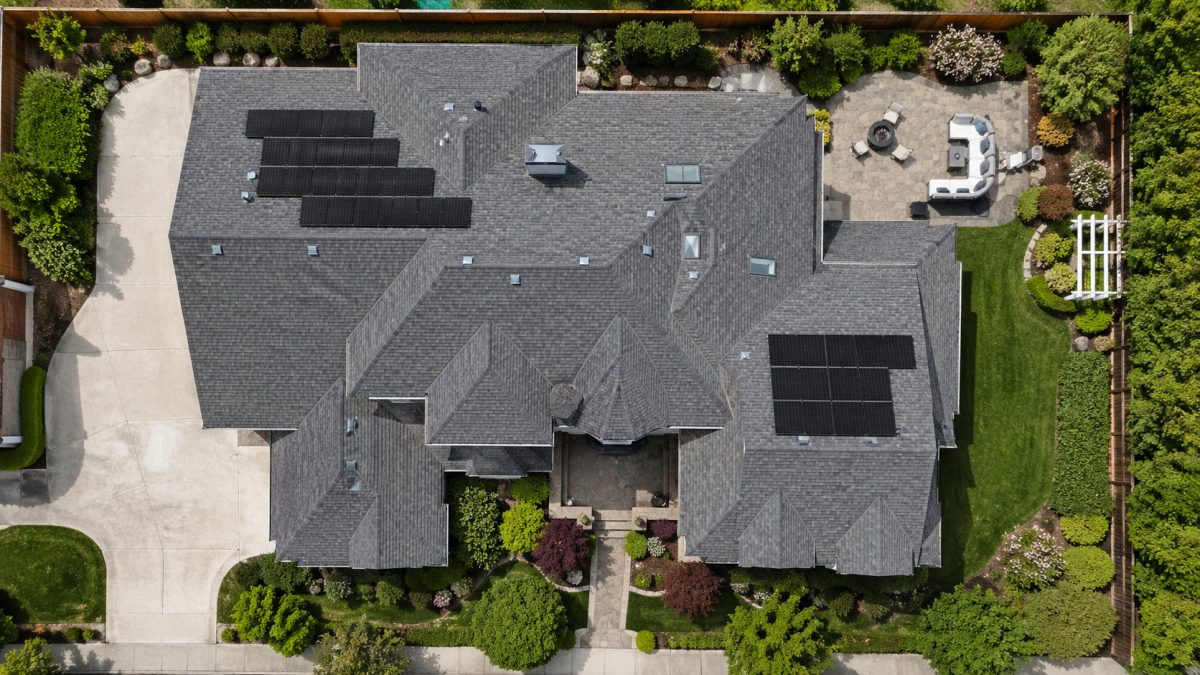
That is why two houses with similar panel counts can end up with different attachment counts. A simple roof in a mild wind area may need fewer mounts. A steeper roof, larger array, higher wind exposure, or awkward framing layout may need more. Fewer holes sound better, but fewer attachments are not better if the array needs more support.
Why Holes Do Not Mean Leaks
Penetrations Need Flashing
The basic rule is straightforward: a roof penetration needs a real waterproofing detail. For solar, that usually means flashing or a flashed standoff system. On shingle roofs, the flashing should work with the shingle courses so water sheds over the assembly instead of being trapped around it.
In the field, roofs deal with wind-driven rain, heat, cold, expansion, contraction, and crew traffic. A raw drilled hole with sealant smeared over it is not a durable roof detail. It may survive for a while. It may even pass a quick visual check. But it is not the standard you want under a solar array.
Flashing Redirects Water
Sloped roofs are designed to shed water, not hold it. Shingles, tiles, and metal panels overlap so water moves down and off the roof. Solar flashing has to respect that same water path.
On asphalt shingles, the flashing is commonly tucked under the shingle above the mount and laid over the shingle below it. Rain hits the upper shingle, runs onto the flashing, and keeps moving downhill. If the flashing sits on top of everything and relies only on sealant around the edges, water can end up going where it should not.
Sealant Alone Is Weak
Sealant has its place. It may be used around pilot holes, under washers, or as part of a manufacturer-approved mount assembly. But sealant is backup protection. It should not be the whole waterproofing plan.
When I see roof trouble after solar, the issue is usually not that a hole exists. The issue is that somebody treated that hole like a tube-of-caulk problem instead of a roofing detail. If the installer cannot explain the flashing path, the roof is taking on unnecessary risk.
You do not need to memorize every fastener spec. Ask one simple question before you sign: “What flashing system will be used at each roof penetration?” A good installer can answer that clearly.
When Holes Become Problems
Missing or Poor Flashing
The most obvious leak risk is a penetration without proper flashing. It may look neat from the ground. It may even be covered with sealant. But water can still work under the roof covering if the flashing is missing, misplaced, or poorly integrated.
This is more common when crews rush, work around brittle shingles, or try to force a standard detail onto a roof that needs a different approach. Older shingles can crack when lifted. Tile can break under foot traffic. The mount may be fine, but the roof covering around it may not be.
Missed Rafters
A missed rafter is a real problem. The crew drills expecting to hit framing, but the hole lands beside the rafter or only catches it poorly. If that mistake is not corrected and sealed properly, the roof may be left with an unnecessary penetration and a weak attachment point.
The cost risk can get bigger than the patch itself. If panels and rails have to be removed to reach the area, removal and reinstall work can run into real money. A practical benchmark for residential solar removal and reinstall is often around $1,500 to $6,000, with some contractors pricing in the range of $275 to $350 per panel depending on access, system size, and scope.
Cracked Tile or Shingles
Tile roofs need careful handling. The visible tile is not always the main waterproofing layer. The underlayment below often does much of that work. A cracked tile may not leak immediately, but it can expose the underlayment to more water and sunlight than it was meant to handle.
Shingle roofs have their own version of this problem. Brittle, curled, or worn shingles can break when lifted for flashing. That does not mean solar is impossible, but it does mean the roof condition needs to be looked at before anyone drills.
Unsealed Electrical Penetrations
Mounting feet are not the only roof penetrations that matter. Conduit, junction boxes, attic transitions, and roof-mounted electrical components can also create leak paths if they are placed or sealed poorly.
This is easy to miss during quote comparison. Homeowners usually look at panel count, production estimate, and price. The roof risk includes every place the solar system touches or passes through the roof surface, not just the feet under the array.
Old Leaks Blamed on Solar
Not every leak after solar was caused by solar. Older vent flashing, chimney flashing, skylights, valleys, roof-wall intersections, or worn shingles may already be weak. Once panels are installed, the solar array becomes the obvious suspect.
Leak tracing needs more than a guess. The interior stain, attic water path, roof slope, mount locations, vents, valleys, and nearby flashing all matter. Water can travel before it shows up inside the home, so the wet spot on the ceiling is not always directly below the entry point.
Roof Types and Hole Risk
Asphalt Shingle Roofs
Asphalt shingle roofs commonly use flashed penetrating mounts. That is a normal installation method when the hardware is designed for shingles and installed correctly. The flashing should tuck into the shingle courses, and the fastener should anchor into framing or another approved structural attachment point.
The main risk is poor flashing integration. If the shingles are brittle, cupped, loose, or heavily worn, lifting them to install flashing can cause damage. A good installer should notice that before drilling, not after the array is already on the roof.
Tile Roofs
Tile roofs can work well with solar, but they are less forgiving. Installers may use tile hooks, tile replacement flashing, standoffs, or other roof-specific hardware. The right choice depends on the tile profile, underlayment, structure, and local load requirements.
The common trouble point is broken tile or a poorly protected underlayment area around the mount. Replacing a cracked tile is one thing. Fixing hidden underlayment damage under a finished array is a bigger job.
Standing Seam Metal Roofs
Standing seam metal roofs are often the best candidate for avoiding roof holes. Compatible seam clamps can attach to the raised seams without penetrating the roof panel. That keeps the roof surface intact and removes one major leak pathway.
The catch is compatibility. Not every seam works with every clamp. The clamp manufacturer’s instructions, roof manufacturer’s warranty terms, and project engineering need to line up. Guessing is not good enough here.
Flat Roofs
Flat roofs may use ballasted systems, penetrating mounts, or a mix of both. Ballasted systems rely on weight and engineering instead of many roof penetrations, but they can affect drainage, roof membrane wear, and service access. Penetrating systems need careful waterproofing at every attachment.
On flat roofs, the question is not only “Are there holes?” It is also “Will water drain properly, and will the membrane be protected after the solar is installed?”
How Many Holes Are Typical?
Estimated 40 to 100 Attachments
For many residential rail-mounted systems, a reasonable field estimate is about 40 to 100 roof penetrations or attachment points. Treat that as a planning range, not a promise. The final number comes from the actual design.
A small, simple array may need fewer. A larger array with several roof planes, tougher wind requirements, or awkward framing may need more. The correct number is the number the engineered mounting plan requires, not the smallest number that sounds good in a sales conversation.
Why the Number Changes
Attachment count changes because roof conditions change. Wind load, snow load, roof pitch, module orientation, rafter spacing, rail span, and roof layout all affect the mounting design.
The table below shows why one roof may need more penetrations than another, even when the panel count looks similar.
| Variable | How It Affects Holes | Roof Risk |
|---|---|---|
| Array size | More panels usually mean more rails and attachments | More penetrations to flash and inspect |
| Wind exposure | Higher uplift may require closer attachment spacing | Weak fastening can lead to movement |
| Rafter spacing | Layout must align with structural framing | Missed rafters can leave extra holes |
| Roof planes | Multiple arrays need separate mounting zones | More work areas and transitions |
| Roof material | Tile, shingle, metal, and flat roofs use different methods | Wrong hardware can damage the roof |
The takeaway: do not judge the roof design by hole count alone. Judge whether the count is engineered, the hardware fits the roof, and every penetration has a clear waterproofing detail.
Fewer Holes Are Not Always Better
It is natural to want fewer holes. Nobody wants extra penetrations in a roof. But reducing attachment points without engineering support can create a different risk: movement, uplift, or overstressed hardware.
A solar array has to stay put through years of weather. The better question is not “Can you make fewer holes?” The better question is “Can you show me why this number of attachments is required, and how each one will be flashed and sealed?”
Decision Criteria Before Approval
Ask About Mounting Hardware
Before approving a quote, ask what mounting system will be used. “Roof mount” is not enough. The hardware should be appropriate for asphalt shingles, tile, standing seam metal, flat membrane, or whatever roof type you have.
This matters during quote comparison. Two bids can look similar on price but use very different roof attachment methods. One may include proper roof-specific hardware and documentation. Another may leave the details vague until installation day. Vague is not your friend on a roof.
Confirm Flashing at Penetrations
Ask whether every penetrating mount gets flashing or a flashed mount. For shingle roofs, ask how the flashing ties into the shingle courses. For tile roofs, ask how the underlayment is protected. For metal roofs, ask whether a non-penetrating clamp option is available.
If the answer is mostly “we seal everything,” keep asking. Sealing is part of the work. Flashing is the roof detail.
Confirm Rafter Attachment
Ask how the crew locates rafters and what they do if a pilot hole misses. This is a practical question, not a technical trap.
A clear answer should include how structural members are found, how mounts are fastened, and how any abandoned pilot holes are sealed. Missed holes happen in the real world. What matters is whether the crew has a proper correction process.
Clarify Leak Responsibility
Leak responsibility should be in writing before the job starts. Do not rely on a friendly verbal promise. A roof leak under solar can involve the solar installer, roofer, roof manufacturer, workmanship warranty, previous roof condition, or insurance.
The money adds up when access is blocked by the array. A small roof repair might be manageable, but if panels and rails must be removed first, the total service bill can climb quickly. That is why the contract language matters.
Request Photos Before Panels
Once panels are installed, many roof attachments disappear under the array. Ask for photos of the flashing and mounts before the modules cover them.
This is not about micromanaging the crew. It is basic documentation. If a leak question comes up later, photos can help a roofer or solar service technician understand what was installed without tearing into the system immediately.
Red Flags for Roof Damage
Sealant-Only Explanations
If an installer says the holes are protected because they “use plenty of sealant,” slow down. That is not a complete roof waterproofing answer.
Sealant-only work can look clean on day one. The risk shows up later, after heat, UV exposure, roof movement, and rain cycles have worked on it. If that weak point sits under an array, the repair may require solar removal before the roofer can even reach the problem.
No Mounting System Listed
A proposal that does not name or describe the mounting system is incomplete. Mounting hardware is not a minor accessory. It controls how the roof is penetrated, flashed, clamped, serviced, and repaired later.
If the contractor cannot explain the roof attachment method before installation, the scope is not clear enough. That is a quote problem, not just a paperwork problem.
Deck-Only Attachment Claims
Be careful when someone says the system will attach only to roof decking without explaining the engineering. Some approved systems may allow deck-mounted attachments in specific conditions, but it should never be assumed.
For many residential roof-mounted systems, fastening into rafters or using another approved structural method is expected. The installer should be able to explain what is allowed on your roof and why.
No Written Leak Terms
Verbal reassurance is weak protection. A leak claim can turn into finger-pointing between the solar company, roofer, roof manufacturer, builder, insurance carrier, or previous owner.
If the contract does not explain workmanship coverage, roof penetration coverage, and service responsibility, you may end up paying for diagnosis just to find out who should be responsible.
Existing Roof Problems
Solar should not be installed over active leaks, soft decking, failing underlayment, or obvious roof damage without dealing with the roof first. That is blunt, but true.
The issue is access. Solar can make later roof repair harder and more expensive. If the weak area ends up under panels and rails, even a modest repair can become a coordinated solar-and-roofing job.
What to Do After a Leak
Document the Leak Location
Start with photos. Photograph the ceiling stain, attic moisture if you can safely access it, the room location, and the array area from the ground. Write down when the leak appeared and whether it happens only during heavy rain, wind-driven rain, or every storm.
Do not remove panels yourself. Besides the roof hazard, solar equipment brings electrical risk. Unapproved removal can also make warranty conversations harder.
Compare Leak and Mount Locations
The ceiling stain may not sit directly below the roof entry point. Water can travel along rafters, decking, insulation, or drywall before it appears inside.
Still, location matters. A leak is more suspicious when the water path lines up with a solar mount, conduit penetration, junction box, or recently disturbed roof area. It is less clear when the leak lines up with an old vent, chimney, valley, skylight, or wall flashing.
Call the Installer First
If the solar installation is recent or under workmanship coverage, contact the installer before anyone disturbs the array. They may need to inspect the mounts, flashing, conduit, and roof penetrations.
Keep photos, emails, invoices, and notes. If the issue becomes a warranty dispute, documentation will matter more than memory.
Bring in a Roofer
If the installer cannot confirm the leak source, or if the water appears unrelated to solar, bring in a qualified roofer. Solar crews know the mounting system. Roofers are usually better at tracing water paths through a roof assembly.
The best repair setup is coordinated: the solar company safely handles the array if needed, and the roofer handles the roof diagnosis and repair. That reduces the risk of damaged panels, unsafe access, and blame-shifting.
Preserve Service Records
Save the proposal, mounting-system details, permit records, roof warranty, solar workmanship warranty, installation photos, inspection reports, repair invoices, and service emails. Keep them in one place.
Without records, you may have to pay for exploratory work before anyone accepts responsibility. With records, the diagnosis usually moves faster.
Checklist to Avoid Leaks
Confirm Roof Type and Mount
The mounting method should match the roof. Asphalt shingle, tile, standing seam metal, exposed-fastener metal, and flat membrane roofs do not all use the same attachment details.
Confirm Flashing
Every penetrating mount needs a waterproofing method beyond surface sealant. On shingle roofs, that usually means flashing worked into the shingle courses. On tile roofs, it means a tile-compatible detail that protects the underlayment. On flat roofs, it means a membrane-compatible waterproofing method.
Confirm Structural Attachment
Ask how the installer locates rafters or verifies the approved structural fastening method. If a pilot hole misses, ask how that hole is sealed and documented.
Confirm Warranty Terms
Review both roof and solar workmanship coverage. A roof warranty may limit coverage around third-party penetrations. A solar workmanship warranty may cover only the installer’s work. That overlap is where disputes usually start.
Confirm Photo Documentation
Ask for photos of mounts and flashing before the modules cover them. It is one of the simplest ways to protect yourself before the work disappears under the array.
- Ask for the roof mounting system name before signing.
- Confirm flashing or flashed mounts at each penetration.
- Ask how rafters are located before drilling.
- Clarify who pays if a solar-related roof leak appears.
- Request installation photos before panels cover the mounts.
FAQ
Do solar panels always require roof holes?
No. Many asphalt shingle and tile systems use penetrating mounts, but compatible standing seam metal roofs can often use non-penetrating seam clamps. Some flat roof systems may also avoid many penetrations through ballast, depending on the roof and engineering requirements.
Can solar be installed without drilling?
Yes, in the right conditions. Standing seam metal roofs are the most common example because clamps can attach to the seams without drilling through the roof panel. The roof profile, clamp system, engineering, and warranty terms still need to match.
Will solar holes void my roof warranty?
They can affect coverage if the work is done by an unapproved contractor, uses incompatible hardware, or does not follow the roof or mounting manufacturer’s requirements. Review the roof warranty before installation and get roof penetration responsibility in writing from the solar contractor.
Are solar roof holes permanent?
They can usually be patched if the panels and mounts are removed, but the patch should be handled as roofing work, not just sealed with caulk. As a practical benchmark, solar removal and reinstall for roof access often runs about $1,500 to $6,000 for many residential systems, depending on array size, access, and scope.
Who pays if the roof leaks after solar?
It depends on the cause and the contract. If the leak comes from solar workmanship, the installer’s workmanship coverage may apply. If it comes from an old roof condition, storm damage, or unrelated flashing failure, the homeowner, roofer, roof warranty, or insurance may be involved. Clear documentation and a proper leak diagnosis decide the next step.