Can You Install Solar Panels on a Tile Roof?
Quick Answer
Yes, solar panels can be installed on most tile roofs, including clay, concrete, Spanish, S-tile, and flat tile roofs. The catch is simple: the solar mounts must attach to the roof structure, not to the tiles themselves. A practical planning benchmark for solar panels and racking is roughly 3 pounds per square foot of panel area, but weight is rarely the first thing that causes trouble on tile. Cracked tiles, bad flashing, and rushed mounting details are the real risks. If the installer has the right tile-roof hardware, knows how to move on tile, and puts the waterproofing scope in writing, a tile roof can be a solid candidate for solar.
Why Tile Roof Solar Needs Special Handling
Tile roofs can absolutely take solar. They do it every day in Arizona, California, Florida, Texas, Nevada, and plenty of other markets where tile roofs are common. But tile is not asphalt shingle. It is not forgiving. It is not something a crew should treat like a flat walking surface.
The tile is a roof covering. Its job is to shed water and protect the underlayment. It is not the structural part of the roof, and it should not be used as the thing holding the solar array in place. That one detail separates a decent installation from a future leak call.
A proper tile-roof solar installation works around the tile. The crew lifts, removes, trims, or replaces tiles at the mount locations, attaches the solar hardware into the roof structure, then flashes everything so water still drains the way it should. When a contractor skips that work, the roof may look fine from the driveway. The problems show up later.
Why Standard Mounts Are Not Enough
Tile roofs have shape. Some are flat. Some are curved. Some are brittle clay. Some are thick concrete. A mount that works cleanly on asphalt shingles may sit badly on tile or leave a tile raised after the bracket is installed.
That raised tile matters. It can catch wind, redirect water, or crack under pressure. On Spanish and S-tile roofs, the profile is even more important because water follows the curves of the tile. If the flashing does not match that profile, the roof detail is compromised from the start.
Panels Mount to Structure, Not Tile
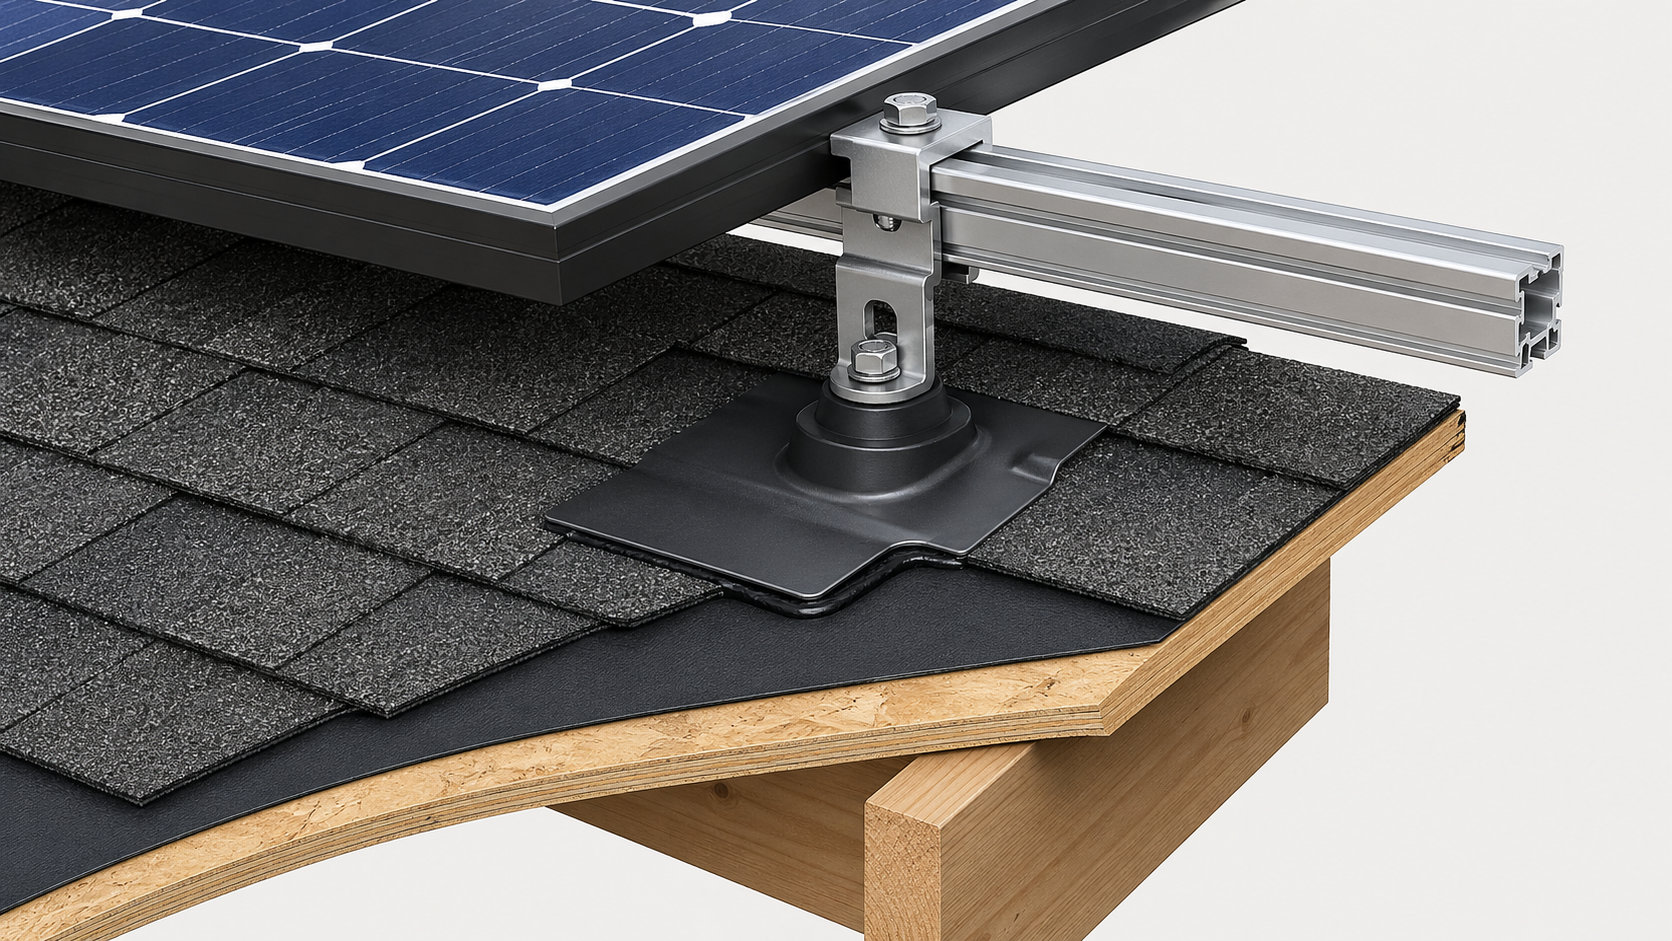
The panels sit on rails. The rails connect to roof attachments. Those attachments should be fastened into rafters or another approved structural part of the roof. The tile should not carry the solar load.
This is why tile hooks, flashed mounts, and tile-replacement mounts exist. They let the installer connect the solar array to the structure while keeping the tile layer functional as a weather barrier.
When Tile Roofs Work Well
A tile roof usually works well for solar when the tiles are in decent condition, the framing is sound, the installer can locate attachment points correctly, and spare matching tiles are available. That last part sounds small. It is not. Matching tiles can be hard to find on older roofs.
Concrete tile is often more forgiving than clay, but it still breaks. Flat tile can be easier to detail than curved tile, but it still needs proper flashing. There is no version of tile roofing where careless foot traffic is a good idea.
When Extra Review Is Needed
Slow down the project if the roof has brittle clay tile, discontinued tiles, prior leaks, sagging sections, loose tiles, or visible repairs. The roof may still be usable, but it needs a closer look.

Older tile roofs also deserve more caution. The tile may look fine, while the underlayment below it is near the end of its service life. Once solar panels are installed, getting back under the array is more expensive and more annoying. This is where planning saves money.
How Tile Roof Solar Is Installed
A tile-roof solar job takes more roof work than a basic asphalt-shingle job. Not because the panels are different. Because the roof covering is different. The crew has to build a secure attachment without breaking the roof’s water-shedding system.
| Step | What Should Happen | Why It Matters |
|---|---|---|
| Roof assessment | Identify tile type, damaged areas, rafters, access, and layout limits | Prevents hidden damage and wrong hardware selection |
| Mount preparation | Lift, remove, cut, or replace tiles at attachment points | Allows the mount to connect to the roof structure |
| Structural fastening | Anchor hooks or mounts into rafters or approved decking | Transfers load safely instead of stressing the tile |
| Flashing | Fit profile-compatible flashing or tile-replacement flashing | Reduces leak risk at penetrations |
| Panel installation | Attach rails, wiring, and modules after roof details are correct | Prevents burying roof defects under the array |
| Inspection | Complete electrical, structural, and utility approval steps | Allows legal activation and reduces rework |
The takeaway is blunt: the visible panel work is not the hard part. The hidden roof work is what protects the house.
Step 1: Roof Assessment
The site visit should identify the tile type, broken tiles, soft or suspicious areas, attic or framing concerns, roof access, rafter layout, and any layout limits. A real assessment also documents existing damage before anyone starts moving panels or tools onto the roof.
This protects the homeowner and the contractor. If three tiles were already cracked, that should be known before the installation crew arrives. If the crew breaks twenty more, that needs to be handled too.
Step 2: Layout Planning
The layout has to work with the roof, not just the solar model. Valleys, ridges, hips, vents, skylights, walk paths, and fire access all matter. In many jurisdictions, parts of the roof may need clear access pathways, often around 3 feet wide depending on local code and roof shape.
On tile, layout also affects how many attachment points land in awkward spots. A design that looks clean on a computer may need adjustment once the installer sees the tile profile and the rafter spacing.
Step 3: Tile Removal or Lifting
At mount locations, tiles are commonly lifted, removed, trimmed, or replaced. That gives the installer room to install the attachment and flashing correctly.
This is delicate work. Tiles crack from twisting, prying, stepping on unsupported edges, or forcing them back over hardware. A good crew moves slowly here. A bad crew makes noise and leaves surprises.
Step 4: Structural Anchoring
The attachment should be fastened into rafters or another approved structural base. That connection handles the loads from the array, including uplift from wind.
If the installer misses the structure or relies on the tile layer, the mount is wrong. The roof covering is not the load path. It never was.
Step 5: Flashing and Waterproofing
Flashing is the detail that decides whether the roof stays dry. It has to fit the tile profile, sit correctly with the surrounding tiles, and direct water over the roof covering instead of into a penetration.
Sealant can be part of the detail, but sealant should not be the whole plan. Caulk ages. Flashing geometry matters. If the installer cannot explain how water moves past the mount, that is a problem.
On tile roofs, I pay close attention to the flashing explanation. A contractor does not need to give a lecture, but they should be able to say exactly what mount they use, how it attaches, and how the tile is reseated. Vague answers usually mean vague workmanship.
Step 6: Tile Reinstallation
After the mount and flashing are installed, the surrounding tiles need to sit correctly. Sometimes a tile is notched. Sometimes a tile is replaced with a flashing component. Sometimes adjacent tiles need small adjustments.
What you do not want is a tile forced down over a hook. It may not crack that day. It may crack weeks later after heat cycles, wind movement, or normal roof expansion.
Step 7: Rails, Panels, and Wiring
Once the roof attachments are secure and watertight, the rails go on. Then the panels and wiring are installed. At that point, the crew should be working on the racking system, not using tiles as staging pads.
Tile damage often happens during movement, not during the actual tightening of clamps. Tools, rails, boots, and panel corners all need to be controlled.
Step 8: Inspection and Activation
The roof work may only take a short part of the overall project, but the full solar process usually includes permits, inspection, utility approval, and permission to operate. A practical planning range for many residential projects is several weeks, often around 4 to 10 weeks depending on the jurisdiction and utility.
Tile roofs can add delays if matching tiles are missing, a roofer has to repair damage, or an inspector flags access or attachment details. That is not a reason to avoid solar. It is a reason to plan properly.
Tile Types and Installation Differences
“Tile roof” is too broad to be useful by itself. Clay barrel tile, concrete flat tile, S-tile, and older lightweight tile all behave differently. The roof type changes the hardware, the walking method, the breakage risk, and sometimes the cost.
Clay Tile Roofs
Clay tile is often the most fragile common tile type. It can crack under foot traffic, pry pressure, or bracket pressure. Older clay tile can be worse because it may already be brittle.
Solar can still work on clay tile, but the crew needs real tile-roof experience. They should have a plan for access, spare tiles, and mount fitment before the job starts.
Concrete Tile Roofs
Concrete tile is usually tougher than clay tile, but it is not indestructible. It can crack when walked incorrectly or when a mount creates a pressure point.
Concrete tile roofs often work well with tile hooks or replacement flashing systems. The important thing is matching the hardware to the tile profile and fastening into structure.
Spanish and S-Tile Roofs
Spanish and S-tile roofs are common solar candidates, but the curve of the tile makes the flashing detail more sensitive. Water follows the tile shape. The mount has to respect that.
A flat piece of flashing shoved into a curved tile profile is asking for trouble. These roofs need hardware designed for curved tile or a roofing detail that creates a proper weather barrier.
Flat Tile Roofs
Flat tile roofs are often easier to lay out and may accept certain flashing systems more cleanly. That does not make them simple.
Flat tiles still crack under concentrated pressure. Edges and corners are especially vulnerable. The crew still needs to lift and reseat tiles correctly around attachment points.
Lightweight or Older Tile Roofs
Lightweight tile and older tile roofs need caution. Sometimes the concern is the tile itself. Sometimes it is the underlayment, decking, or framing below.
If the tile profile is discontinued, even a small amount of breakage can turn into a sourcing problem. Before approving the job, ask how replacements will be handled if the tiles cannot be matched easily.
Mounting Methods That Protect Tile
There is no single best mount for every tile roof. The right method depends on the tile shape, roof structure, wind requirements, product approvals, and installer skill. What matters is that the mount attaches to the structure and the roof remains watertight.
| Mounting Method | Best Use | Main Risk | What to Ask |
|---|---|---|---|
| Tile hooks | Many curved and flat tile roofs | Tile lifted or stressed around hook | How will tiles be trimmed and reseated? |
| Tile-replacement mounts | Profiles with compatible replacement flashing | Mismatch with existing tile profile | Is the product approved for this tile shape? |
| Flashed standoff systems | Where structural fastening and waterproofing are clear | Poor flashing integration | Where is the flashing layer and water path? |
| Comp-out area | Fragile tile areas where tiles are removed under the array | Added roofing scope and appearance concerns | Who warranties the new roof section? |
Do not judge the method by the name alone. Judge it by fit, structural attachment, flashing, and who stands behind the roof work.
Tile Hooks
Tile hooks are a common solution. The hook attaches below the tile surface and provides a connection point for the rail system.
The weak point is fitment. If the tile is not trimmed or reseated correctly, the hook can hold the tile up or press against it. That can lead to cracked tiles and leak concerns later.
Tile-Replacement Mounts
Tile-replacement mounts swap the tile at the attachment point for a flashing and mount assembly. When the product matches the tile profile, this can be a clean approach.
The risk is assuming compatibility. Flat, S, W, and curved profiles are not interchangeable. The installer should verify the specific tile shape before choosing the product.
Double Flashing and Sealant Details
Good waterproofing is layered. Flashing directs water. Sealant helps at specific points. Fasteners are placed according to the mounting instructions.
A roof detail that depends mainly on caulk is not a strong detail. Sealant breaks down over time. Proper flashing is what keeps water moving where it belongs.
Direct Drilling Is a Red Flag
Direct drilling through tile without a clear structural and flashing method should stop the conversation. It can crack the tile, miss the framing, and create a weak waterproofing point.
There are legitimate roof penetrations in solar work. The issue is not the hole itself. The issue is whether the penetration is structurally anchored and flashed correctly.
Why Tiles May Be Cut
Cutting or notching tile is not automatically bad. Sometimes it is necessary so the tile can sit properly around a hook or mount.
The problem is sloppy cutting or forcing a tile to fit after the mount is installed. The finished tile should not be under stress.
Decision Criteria Before Approval
Before signing, focus on the roof scope. Panel brand matters. Inverter choice matters. But for a tile roof, the biggest risk is usually the installation detail sitting under the array.
Confirm Tile-Roof Experience
Ask the installer how often they work on your specific roof type. Clay tile experience is different from concrete tile experience. Curved tile is different from flat tile.
A qualified installer should not get defensive when asked about tile breakage, flashing, or spare tiles. Those are normal questions.
Ask About the Mounting System
Ask what mounting system will be used and why it fits your tile profile. You do not need a parts catalog. You do need a clear answer.
If the response is “we use standard mounts,” keep pressing. Standard for what roof type?
Require a Broken-Tile Plan
Some tile breakage can happen even with a careful crew, especially on older clay roofs. What matters is how the contractor plans for it.
The agreement should state who provides replacement tiles, who pays for damage caused during installation, and who repairs the roof if the damage is more than a simple tile swap.
Check Spare Tile Availability
Spare tiles are cheap insurance when they exist. If the tile is discontinued, the project needs a plan before workers start lifting and walking on the roof.
Color match is one issue. Fit is more important. A replacement tile that does not seat correctly can create a roof problem even if it looks close from the ground.
Confirm Breakage Responsibility
Do not rely on a handshake here. Some solar companies cover tile breakage. Some exclude it. Some cover a limited amount. Some expect the homeowner to provide all replacement tiles.
None of those arrangements is automatically wrong, but surprise exclusions are a problem. Get the responsibility in writing.
Ask About Flashing Inspection
Once panels are installed, the roof attachments are hard to inspect. Ask whether the installer takes photos of the mounts and flashing before the modules cover the work.
Those photos can be useful later if a leak appears or if the home is sold. They also encourage better workmanship because the hidden details are documented.
Verify Roof Warranty Terms
Roof warranties often have conditions. Penetrations, third-party work, and unauthorized modifications can affect coverage.
If the tile roof is newer or still under a roofer’s workmanship warranty, ask the roofer how solar attachments should be handled. It may be worth coordinating the two trades instead of letting them blame each other later.
Confirm Roof Access Paths
The array layout must leave required access pathways where local rules apply. Fire access rules vary, but 3-foot pathway requirements are common enough that they should be part of the design conversation.
A design that fits more panels but fails inspection is not a good design. It is rework waiting to happen.
Roof Load and Structural Checks
Tile roofs are heavier than asphalt-shingle roofs, so load deserves attention. Still, the answer is not as simple as “tile roofs are too heavy for solar.” Many are perfectly suitable. Some need engineering review. A few need repair before solar makes sense.
Added Load Around 3 PSF
A practical benchmark for solar panels and racking is around 3 pounds per square foot of panel area. Treat that as a planning number, not a universal approval stamp.
The actual answer depends on framing, spans, roof condition, local wind or snow loads, and code requirements. The installer or engineer should evaluate the roof as it exists, not as a generic tile roof.
Tile Roofs Need More Review
Tile roofs need more attention because they combine a heavy roof covering with fragile surface materials. The structure has to carry the system, and the tile has to survive the installation process.
Both things matter. A roof can be structurally strong but still too brittle to work on without a roofer involved.
When Engineering Is Needed
Engineering may be required by the permitting office, the installer’s internal process, or the condition of the roof. Older homes, unusual framing, high-wind areas, visible sagging, and lightweight tile systems are common reasons to take a closer look.
Engineering review costs less than fixing a bad assumption after the roof is penetrated. It is not just paperwork.
Why Ballasted Systems Are Rare
Ballasted solar systems rely on weight instead of roof penetrations. They are more common on some flat commercial roofs.
For a sloped tile roof, ballast is usually not the practical answer. The system needs secure attachment, and adding more dead load to a tile roof is rarely the cleanest solution.
Risks, Mistakes, and Limitations
Tile-roof solar problems tend to come from a few repeat mistakes: poor walking practices, wrong mounts, weak flashing, unclear repair responsibility, and layouts that ignore access rules. None of these is mysterious. They are basic execution problems.
Cracked Tiles
Cracked tiles are the most obvious risk. They can happen from foot traffic, prying, staging materials, panel handling, or pressure from a poorly fitted hook.
The repair may be simple if spare tiles are available. It gets more expensive when the tile is discontinued, the damage is under the array, or a roofer has to remove solar equipment to access the problem.
Poor Flashing
Poor flashing is worse than a broken tile because it may stay hidden. Water can get under the roof covering and travel before the homeowner sees a stain indoors.
The best protection is boring: correct hardware, correct flashing, correct installation sequence, and photos before the panels cover the work.
Mismatched Replacement Tiles
Mismatched tiles are common on older roofs. Weathered tile rarely matches new tile perfectly, even if the profile is right.
From a roof-performance standpoint, fit matters more than color. A mismatched tile that seats correctly is better than a pretty tile that does not shed water properly.
Poor Mount Height
Mount height matters because it affects tile pressure and rail alignment. A mount that is too low can press against the tile. A mount that is too high can leave tiles raised or rails uneven.
If you see multiple tiles lifted around the array, or the rails look wavy, ask for an inspection before final payment.
Excluded Tile Repairs
Some installers exclude tile repair from the contract. That is not automatically unacceptable, but it needs to be understood before work starts.
The expensive mistake is assuming roof repair is included when the paperwork says it is not. Read that section carefully.
Brittle or Unsafe Roofs
Some tile roofs are poor solar candidates until repair work is done. Brittle tile, failing underlayment, loose sections, and unsafe access can turn a straightforward solar job into a roof claim.
If the roof is too fragile to work on safely, forcing the project forward is a bad idea. Fix the roof conditions first or change the installation approach.
Why Tile Roof Solar Can Cost More
This is not a full solar cost guide. The tile-specific issue is narrower: tile roofs can add labor, hardware, roof protection, and repair coordination. The panels are not the reason. The roof handling is.
| Cost Factor | Why It Adds Cost | Typical Confidence |
|---|---|---|
| Tile-specific mounts | Hooks, replacement flashings, and profile-compatible parts may cost more than basic mounts | Industry estimate |
| Slower roof labor | Tiles may need lifting, cutting, reseating, or replacing | Typical field condition |
| Breakage allowance | Spare tiles or roofer coordination may be needed | Field observation |
| Difficult access | Steep, brittle, or complex roofs require more safety planning | Industry estimate |
The low bid can still be the right bid. But on tile roofs, a suspiciously low bid often means something was excluded. Ask what happens if tiles break, who handles flashing problems, and whether a roofer is part of the plan if needed.
Extra Labor From Tile Handling
Tile work is slower. The crew may need to lift tiles, trim edges, fit flashing, reseat surrounding pieces, and move across the roof carefully.
That time has to be paid for somewhere. If the quote does not mention tile handling at all, ask whether it is included or assumed away.
Tile-Specific Hardware
Tile hooks, replacement flashings, and specialty mounts cost more than the simplest roof attachments. Individual hardware costs vary widely, and the installed cost depends more on labor and system design than the part alone.
The homeowner’s job is not to source the hardware. The homeowner’s job is to confirm the installer selected hardware that actually fits the tile roof.
Broken-Tile Replacement
Broken-tile replacement may be minor if spare tiles are sitting in the garage. It may be a headache if the tile is discontinued or the damaged area is hard to reach after the array is installed.
Ask about this before the job starts. It is much easier to solve on paper than on a hot roof with panels already staged.
Keep Full Pricing Separate
Full system pricing, financing, incentives, and payback belong in a separate solar cost review. For a tile roof, the important cost question is whether the roof-specific work is properly included.
A low solar price does not help if the roof scope is weak. Leaks and tile repairs can erase the savings fast.
Homeowner Checklist
Use this checklist before signing a tile-roof solar contract. It focuses on installation risk, not the entire solar buying process.
- Identify whether the roof is clay, concrete, Spanish, S-tile, W-tile, or flat tile.
- Photograph visible cracked, loose, or missing tiles before the site visit.
- Ask which tile-specific mounting system will be used.
- Confirm whether spare matching tiles need to be available before installation.
- Get tile breakage, flashing, leak responsibility, and repair exclusions in writing.
- Confirm permitting, inspection, and utility activation steps before scheduling.
This is not micromanaging the contractor. It is basic risk control. Tile roofs punish vague scopes.
Identify Your Tile Type
The tile type affects the mount. Flat tile, S-tile, Spanish tile, and W-shaped tile may need different flashing or hook details.
If you do not know the tile profile, ask the installer to identify it during the site visit. That answer should influence the mounting plan.
Photograph Existing Damage
Take photos of visible cracked, loose, or missing tiles before installation. Do it from the ground, a window, a ladder if safe, or another safe vantage point. Do not walk the roof just to take pictures.
Those photos help avoid arguments later. Pre-existing damage and installation damage should not be mixed together.
Ask About the Mounting System
Ask what mounting system will be used and how it protects the roof. A good answer should mention structural attachment and flashing.
If the installer cannot explain the method in plain English, that is not reassuring.
Confirm Spare Tile Needs
Some installers ask for spare tiles on site before installation. Others source them through a roofer or supplier.
Either approach can work. The bad approach is discovering on installation day that no matching tile is available.
Put Responsibility in Writing
Get the roof-related responsibilities in the contract. Broken tiles, leak repairs, flashing workmanship, and excluded roof work should be clear.
Written scope prevents the classic finger-pointing problem between the solar company, roofer, and homeowner.
Confirm Permits and Inspections
Solar work usually needs permits, inspections, and utility approval before operation. Tile-roof projects may also need careful structural or roof-access review.
Ask who schedules inspections, who handles corrections, and what happens if the inspector requires a layout or attachment change.
FAQ
Can solar panels go on Spanish tile roofs?
Yes. Spanish tile roofs can support solar when the installer uses hardware that fits the curved tile profile and attaches into the roof structure. The flashing detail matters because the tile shape controls how water drains.
Do installers remove tiles for solar?
Usually, yes, at the mount locations. Tiles may be lifted, removed, trimmed, or replaced so the attachment can fasten into rafters or approved decking. The solar array should not be fastened directly to the tile surface.
Will solar crack my tile roof?
It can, especially if the roof is brittle or the crew uses poor walking and mounting practices. A careful installer reduces the risk with tile-specific hardware, proper access methods, and a clear broken-tile plan.
Can solar cause leaks on tile roofs?
Yes, leaks can happen when penetrations are poorly flashed or when tiles are not reseated correctly. The best protection is a mounting system designed for the tile profile and documented flashing work before panels cover the roof.
Should broken tiles be replaced first?
Yes. Broken, loose, or missing tiles should be handled before the array is installed. Repairs are easier before panels cover the area, and pre-existing damage should be documented before the crew starts work.