How to Add Solar Panels to an Existing System
Quick Answer
Yes, Expansion Is Possible
Yes, solar panels can be added to many existing solar systems, but it is not as simple as filling empty roof space. The real decision depends on inverter capacity, roof layout, electrical panel limits, permits, and utility approval. A practical benchmark for many residential add-on projects is roughly 4–8 weeks once design, permitting, inspection, and permission to operate are included. The roof may have room for more panels, but the electrical system may not. That is the part many homeowners miss.
The Four Deciding Checks
Before anyone adds panels, four checks need to happen: how much more power the home actually needs, whether the existing equipment can support more solar, whether the roof still has usable code-compliant space, and whether the utility will approve the larger system. If one of those checks fails, the project may need a second inverter, a service-panel change, a separate add-on system, or a smaller design than expected.
Simple Versus Complex Expansions
A simple expansion usually means the inverter has spare capacity, the roof has clean space, the equipment is compatible, and the permit path is straightforward. A complicated expansion usually involves an older string inverter, discontinued panels, a crowded roof, a full electrical panel, or a utility rule that limits system size. In the field, those details matter more than the number of panels a homeowner wants to add.
How Solar Expansion Works
More Than Empty Roof Space
Adding panels to an existing solar system means changing an approved power-generating system. That can affect the roof layout, racking, wiring, inverter capacity, breaker sizing, labels, permit drawings, inspection, and utility records. A homeowner may look at a blank section of roof and think the job is obvious. The installer has to prove the updated system is safe, legal, and serviceable.
The age and design of the existing system also matter. A newer microinverter system may be fairly easy to expand. A 12-year-old string-inverter system with discontinued panels may not be. The add-on has to work with what is already on the roof and what is already approved at the electrical panel.
Equipment, Panel, and Utility Limits
The inverter is usually the first hard limit. If it is already near its capacity, more panels cannot simply be plugged into it. On many string inverter systems, the installer has to check voltage, current, string length, roof orientation, and inverter input capacity. With microinverters, the design can be more flexible because each panel has its own inverter, but the branch circuit, combiner, monitoring platform, and utility interconnection still need review.
The utility is the other gatekeeper. The original system was approved at a specific size. Increasing that size may require an updated interconnection application or a new permission-to-operate step. In some service areas, it can also affect net metering terms or export limits.
Older Systems Need Extra Review
Older systems deserve a closer look. The original panels, inverter model, racking parts, monitoring equipment, and code requirements may have changed. Panels also lose output gradually over time. A common industry estimate is about 0.5%–0.8% degradation per year, so a 10-year-old array may be producing somewhere around 92%–95% of its original output. That does not mean the system is bad. It means the add-on should be sized using real production data, not the nameplate rating from years ago.
Review the Need
New Loads Change the Math
The best reason to add panels is a clear increase in electricity use. Common examples include electric vehicle charging, heat pumps, a home addition, electric water heating, pool equipment, workshop loads, or a household that now uses more daytime power than it did when the original system was installed.
The wrong reason is a higher bill with no diagnosis. A rate-plan change, failed inverter, new shade, monitoring issue, or seasonal spike can make a system look too small when the real issue is something else. Adding panels before checking that is an expensive guess.
Use 12 Months of Bills
A serious expansion quote should start with a full year of electric bills and current solar production data. The installer needs to compare annual household use against what the existing system is actually producing.
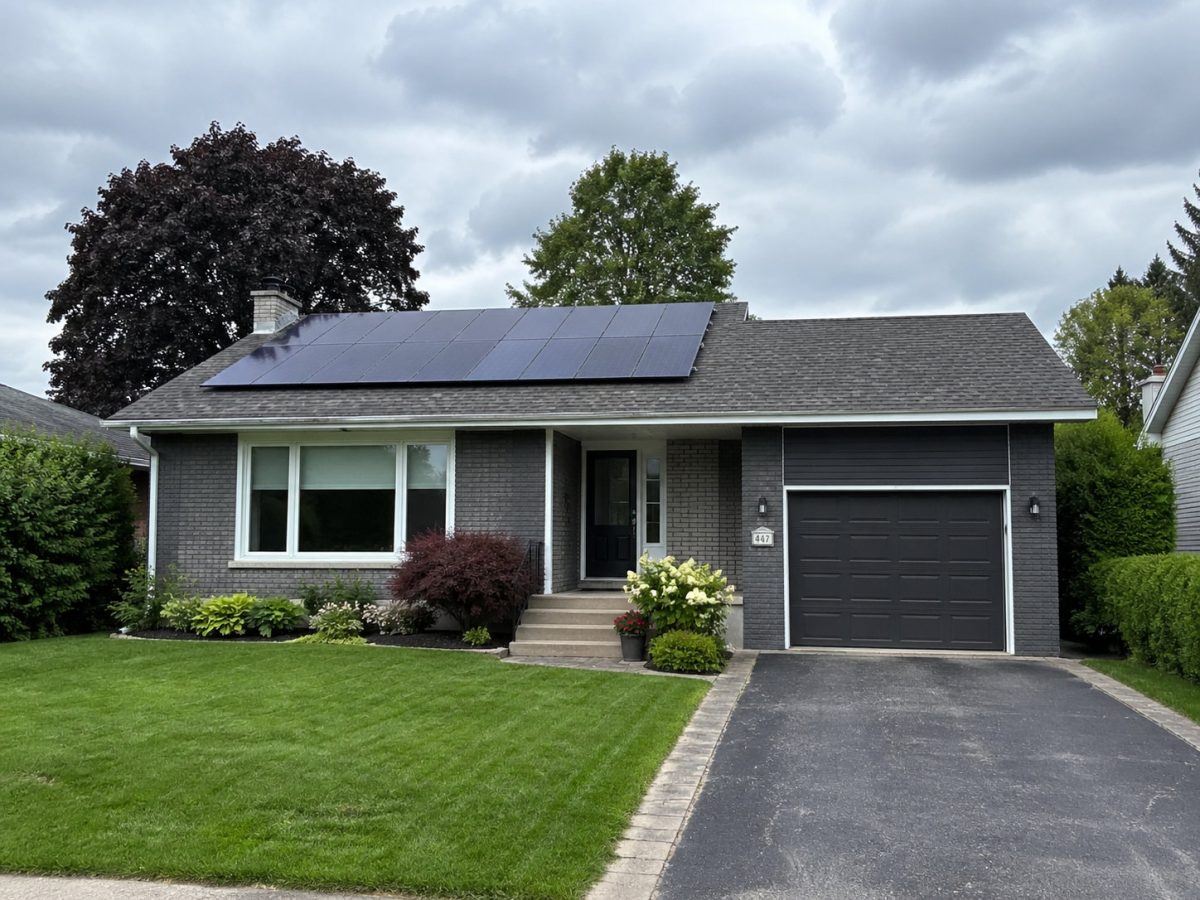
One or two high bills are not enough. They can point to a problem, but they should not drive the entire design. If the current system is underperforming, fix that first. Otherwise, the homeowner may pay for new panels while the old issue keeps costing money.
Avoid Oversizing Early
Some homeowners ask for as many panels as the roof can hold. That sounds logical, but it can create problems. The utility may limit the system size. The electrical panel may not accept more backfeed. The remaining roof area may produce poorly. The right target is not maximum panel count. It is enough added production to match the new load within the limits of the site.
Check Existing Equipment
Find the Current System Size
The existing system size is usually listed in kilowatts on the contract, permit documents, interconnection agreement, or monitoring portal. The installer also needs the panel count, panel wattage, inverter model, racking type, and electrical one-line diagram when available.
Without those details, the quote is partly guesswork. A qualified installer can inspect the system and rebuild the needed information, but original plans save time and reduce the chance of missing something important.
Identify the Inverter Type
The expansion path depends heavily on whether the current system uses a string inverter, microinverters, or power optimizers. Each setup handles add-on panels differently.
| Existing setup | Expansion path | Main limitation | Typical installer concern |
|---|---|---|---|
| String inverter | Add to the existing inverter only if capacity and string design allow it | Voltage, current, string length, inverter capacity | The system may need a new inverter or second inverter |
| Microinverters | Add new panels with compatible microinverters | Branch circuit, combiner, monitoring, utility approval | Usually easier to expand one panel at a time |
| Power optimizers | Add panels if the optimizer, inverter, and string design are compatible | Brand and model compatibility | Old and new equipment must be matched correctly |
| Unknown or older system | Field inspection required before design | Discontinued equipment or missing documentation | Higher design uncertainty |
The practical takeaway is simple: the inverter type often decides whether this is a clean expansion or a partial redesign.
Microinverters Are Easier
Microinverter systems are often easier to expand because each panel has its own inverter. That avoids some of the string-matching problems found on older central inverter systems. Still, the installer has to confirm that the new microinverters work with the existing monitoring platform and that the branch circuit can handle the added units.
String Inverters Need Capacity
A string inverter has defined input and output limits. If it has unused capacity and the new panels can be wired into a compatible string, expansion may be possible. If not, the homeowner may need a larger replacement inverter, a second inverter, or a separate system for the new panels.
Confirm Inverter Capacity
String Inverter Limits
With a string inverter, the installer has to calculate voltage and current across real operating conditions. Cold weather can raise panel voltage. Heat can reduce output. Those values affect whether new panels can safely connect to the existing inverter or string.
This is not a place to eyeball it. Panels with different electrical characteristics can reduce output or create a design that does not meet inverter requirements.
Microinverter Circuit Limits
Microinverters remove some string-design issues, but they do not remove electrical limits. The installer still has to check how many microinverters can be placed on a branch circuit, whether the existing combiner has room, and whether the added output changes the main panel calculation.
Optimizer Compatibility Checks
Power optimizer systems sit between traditional string inverters and microinverters. The panel-level electronics help with mismatch and monitoring, but compatibility is still brand- and model-specific. The installer should verify approved optimizer models, inverter limits, and string design before promising that new panels can be added.
Separate Systems May Be Better
A separate add-on system can make sense when the original inverter is full, the old panels are discontinued, the monitoring platform is outdated, or the original system should not be disturbed. The downside is that the homeowner may end up with two equipment groups, two monitoring views, and a more involved utility review.
In the field, the cleanest expansion is not always the one that looks cheapest on paper. If tying new equipment into the old system creates inverter, string, or monitoring problems, a separate add-on system can be the more reliable choice.
Check Panel Compatibility
Match Electrical Characteristics
New panels do not always have to match the old panels exactly, but their voltage, current, and operating behavior must fit the design. This matters most when new panels are added to an existing string. A bad match can reduce output or create a design the inverter will not accept.
Older Panels Produce Less
Existing panels may still be in good shape, but they usually produce less than they did on day one. Using the common degradation estimate of 0.5%–0.8% per year, a 10-year-old array may be around 92%–95% of its original output. That matters when comparing old-system monitoring data to the expected production from new higher-watt panels.
Separate Newer Panels
Newer panels often have higher wattage and different electrical ratings. On older string systems, that may mean they should not be placed on the same string as the original panels. They may need a separate string, a separate inverter input, microinverters, or a new inverter design.
Watch Monitoring Issues
Monitoring can get messy when the original system and the expansion use different platforms. The homeowner may still get full production, but it may show up in two apps or portals. That is not automatically a dealbreaker. It just needs to be explained before the work starts.
Confirm Roof Space
Usable Area Matters Most
Total roof area is not usable solar area. The installer has to account for existing panels, vents, plumbing stacks, skylights, fire access pathways, ridge setbacks, edge clearances, and safe movement for the crew.
This is where expansion plans often shrink. A homeowner may see room for six more panels. Once the code-compliant layout is drawn, the roof may only support three or four productive panels.
Keep the Review Practical
The roof review should stay focused. For this topic, the question is not whether every roof surface is ideal for solar. The question is whether added panels can be mounted safely, legally, and productively without blocking access or creating service problems.
Small Add-Ons Can Disappoint
Adding a few panels to a weak roof plane may not be worth the effort. Small expansions still involve design, permits, labor, inspection, and utility work. If the remaining roof area is shaded, awkward, or far from the existing electrical path, the result may not justify the scope.
Check Electrical Limits
The 120% Busbar Rule
Electrical panel capacity can stop an expansion even when the roof and inverter look workable. Under common NEC load-side interconnection methods, the main breaker plus solar breaker are generally limited to 120% of the panel busbar rating, with solar inverter output treated as continuous current.
As a common example, a 200-amp busbar with a 200-amp main breaker often leaves room for a 40-amp solar breaker under the 120% method. If the existing solar system already uses that available capacity, adding more output may require a different interconnection method or electrical changes.
Full Panels Need Options
When the main electrical panel is full or already at its backfeed limit, the installer may look at a main breaker derate, a line-side tap where allowed, a subpanel change, or a service upgrade. None of those are minor details. They affect safety, inspection, cost, and schedule.
Review Before Design
The electrical panel should be photographed and reviewed before a final design is promised. A quote that skips the main panel review can look clean early and get expensive later when the permit drawings are prepared.
Permits and Interconnection
New Permits Are Common
The original solar permit usually does not cover a later expansion. Added panels, racking, wire paths, inverter changes, and breaker changes may all need updated drawings and local approval. The permitting office may also require roof layout details, labels, structural notes, and electrical calculations.
Utility Approval May Change
Utility approval matters because the system interacts with the grid. A larger system may require a revised interconnection application or new permission to operate. In some cases, changing the system size can affect net metering terms or export rules.
Permitting Drives the Schedule
Permitting and inspection often take longer than the roof work itself. A useful benchmark from SolarAPP+ reporting found permit-to-final-inspection timelines around 33 business days in jurisdictions using SolarAPP+ versus about 47.5 business days with traditional permitting in the reviewed group. Local timing can vary a lot, but the lesson is consistent: paperwork can control the schedule.
Check Net Metering Early
Before adding panels, the homeowner should ask whether the larger system changes the utility agreement. In some areas, an expansion can move the system into newer tariff rules or different export compensation. That can change the value of the added panels even when the installation is technically possible.
Choose the Expansion Method
Use the Existing Inverter
This is usually the simplest path when the inverter has spare capacity and the new panels fit the string design. It can reduce equipment changes, but only when the electrical design is clean. If the inverter is already full, this option is off the table.
Replace the Inverter
A larger or newer inverter may support the expanded array and improve monitoring. It also changes the project scope. The installer has to verify compatibility with both old and new panels, update the permit design, and confirm utility approval.
Add a Second Inverter
A second inverter can avoid disturbing the original system too much. This approach is common when the old inverter is full or when the new panels should operate separately. The tradeoff is more equipment, more electrical review, and sometimes separate monitoring.
Use Microinverters
Microinverters can be a practical add-on method, especially when the old system is hard to modify. The installer still needs to check branch-circuit capacity, monitoring compatibility, labeling, and interconnection requirements.
Compare the Options
The best method is the one that passes technical review without creating service headaches later.
| Expansion method | Best fit | Main advantage | Main risk |
|---|---|---|---|
| Add to existing inverter | Inverter has spare capacity | Least equipment disruption | Not possible if the inverter is full |
| Replace inverter | Old inverter limits expansion | Can modernize the system | Higher scope and more compatibility checks |
| Add second inverter | Old system should remain separate | Cleaner separation of old and new panels | More equipment and electrical review |
| Microinverter add-on | Panel-by-panel expansion | Flexible layout and monitoring | Branch circuit and platform limits |
Do not choose the expansion method based only on the lowest number on the proposal. Choose it based on compatibility, inspection risk, utility approval, and how easy the system will be to service later.
Installation Process
System Assessment
The installer reviews energy use, current production, original plans, roof layout, inverter data, main panel photos, and utility rules. This first pass separates a simple add-on from a redesign.
Equipment Check
The installer confirms panel compatibility, inverter limits, racking availability, wire paths, monitoring requirements, and whether the old equipment can be modified without creating warranty or service issues.
Updated Design
The new design should show the added array, racking layout, roof access paths, wiring, inverter changes, breaker sizing, labels, and interconnection point. A drawing that only shows extra panels is not complete enough.
Permit and Utility Application
Permit drawings go to the local jurisdiction. Utility paperwork is submitted when required. This stage is often where delays show up, especially if the roof layout or electrical panel calculation needs correction.
Panel and Wiring Work
The crew installs racking, mounts panels, routes wiring, modifies or adds inverter equipment, updates labels, and completes electrical connections. Roof access matters. Crews should not be carrying panels up ladders in a way that creates a fall hazard, and workers should avoid walking on modules because point loads can damage panels.
Inspection and Activation
After installation, the local inspector verifies the permitted work. Utility permission to operate may be required before the expanded system is fully activated. Monitoring should then be checked so the homeowner can see whether the old and new portions are producing as expected.
Typical 4–8 Week Timeline
A practical field benchmark for many residential add-on projects is roughly 4–8 weeks from assessment to activation. The actual roof work may take much less time. Permitting, inspection, utility review, and missing documentation are usually what stretch the schedule.
| Step | What happens | Delay risk |
|---|---|---|
| Assessment | Review bills, monitoring, equipment, roof, and panelboard | Missing original documents |
| Design | Create updated roof and electrical plans | Inverter or busbar limits |
| Permit | Submit to the local jurisdiction | Setback or electrical corrections |
| Installation | Install racking, panels, wiring, and inverter changes | Roof access or equipment mismatch |
| Inspection | Local inspector verifies the work | Labeling or plan mismatch |
| Activation | Utility approval and monitoring setup | Interconnection backlog |
The takeaway is blunt: an expansion is a small construction and electrical project, not a same-day panel purchase.
Common Mistakes
Assuming Space Is Enough
Empty roof space is not the same as buildable solar space. Fire setbacks, roof pathways, vents, skylights, plumbing stacks, ridge clearance, and crew access can all reduce the final panel count. The financial risk is obvious: the homeowner expects a certain energy offset, then learns the approved layout is smaller.
Ignoring Inverter Capacity
This happens when the project is sold as “just adding panels.” If the inverter is already full, the job may need a replacement inverter or a second inverter. That can add equipment, labor, permit revisions, and utility review.
Mixing Incompatible Panels
Older panels may no longer be available. Swapping in newer panels without checking voltage, current, and string design can reduce performance or force a redesign. The homeowner may end up paying for equipment that cannot be installed the way the first quote described.
Forgetting Utility Approval
The utility approved the original system at a specific size. Expanding that system can require another review. If that step is skipped, activation can be delayed or the homeowner can run into compliance problems.
Hiring the Wrong Contractor
Not every solar company wants to work on another company’s installation. A contractor who adds panels but will not support the existing system can leave the homeowner stuck between service providers. The proposal should spell out what is being modified, what is excluded, and who supports the new work.
Expanding Before Diagnosing
If the original system is underperforming, expansion may be the wrong fix. A failed inverter, monitoring error, shade growth, or disconnected string should be checked first. Adding panels to cover up a repairable issue wastes money and makes future troubleshooting harder.
When Not to Expand Yet
The System Is Underperforming
If monitoring shows abnormal production, do not rush into an expansion. Fix the existing problem first. A new array should be designed from a healthy baseline, not used to hide lost production from the old one.
The Electrical Panel Is Limited
If the main panel cannot support more backfeed under the proposed method, the project may need electrical changes. That does not make expansion impossible, but it changes the scope and should be priced before signing.
Utility Rules Are Unfavorable
If adding capacity moves the system into worse net metering or export terms, the homeowner needs to know before approving the work. Technical feasibility and financial value are not the same thing.
The Roof Space Is Weak
The remaining roof area may be shaded, broken up, hard to access, or limited by setbacks. A small number of low-producing panels may not justify the design, permitting, labor, and equipment work.
The Equipment Is Unsupported
If the original inverter, monitoring system, or racking components are obsolete, the installer may recommend separating the new system or replacing equipment. Unsupported equipment increases the chance of service problems after the expansion.
Before Requesting Quotes
System Size and Inverter Model
Provide the current system size, inverter brand, inverter model, panel count, and panel wattage if you have them. Clear photos of equipment labels help when the original documents are missing.
12 Months of Bills
Give the installer a full year of electric bills. That helps separate a permanent load increase from a seasonal spike or billing change.
Current Monitoring Data
Monitoring data shows whether the current system is healthy. It also helps estimate how much additional production is actually needed.
Original Permit Documents
The original permit set or interconnection agreement can save time. It may include the approved system size, electrical layout, inverter details, and utility account information.
Photos of Roof and Panelboard
Good photos reduce surprises. Include the main electrical panel, inverter, disconnects, roof planes, existing array, and any roof obstructions near the likely expansion area.
- Current inverter brand and model
- Existing panel count and panel wattage
- Last 12 months of utility bills
- Solar monitoring screenshots or portal access
- Main electrical panel photos with breaker labels visible
- Original solar plans, permit, or interconnection paperwork
Narrow Cost Note
Inverter Changes Add Scope
This is not a full solar cost guide, but expansion costs can move quickly when inverter work is involved. As a practical benchmark, some residential add-on examples land around $9,600 for eight 400-watt panels, $10,800 for nine, and $12,000 for ten. Treat those as rough reference points, not guaranteed prices. Permits, interconnection, racking, inverter work, access, and crew time can all change the final number.
Electrical Changes Add Cost
If the main panel cannot support the added solar output, electrical work may become the cost driver. A main breaker derate, alternate interconnection method, subpanel change, or service upgrade can change the project more than the panels themselves.
Permitting Adds Work
Even a small add-on can need drawings, application fees, inspection coordination, and utility paperwork. Automated permitting may reduce time in some jurisdictions, but local rules still control the project.
Small Projects Cost More Per Panel
A small add-on often has a higher per-panel labor burden because the contractor still has to mobilize a crew, pull permits, work on the roof, update electrical equipment, and schedule inspection. Ten panels are not half the administrative work of twenty panels.
Compare Scope, Not Just Price
When comparing quotes, look for inverter work, panelboard review, permit fees, utility interconnection, monitoring integration, roof access constraints, and warranty responsibility. A lower quote that leaves those items vague may not be cheaper once the job is built.
Expansion Checklist
Clear Reason to Expand
The project should be tied to a real load increase or verified production need. Expanding without that step can lead to oversizing or spending money on panels that do not solve the actual problem.
Practical Inverter Path
The existing inverter must have capacity, or the quote must include a workable alternative. That may be a replacement inverter, a second inverter, or a separate add-on system.
Safe Electrical Capacity
The main panel calculation should be done before final design approval. Backfeed limits are one of the most common late-stage surprises in expansion work.
Utility Approval Path
The installer should explain whether the utility requires a new application, revised interconnection agreement, or permission to operate for the added capacity.
Usable Roof Space
The roof layout should show real usable area after pathways, setbacks, obstructions, and existing panels are considered. Do not rely on a rough satellite image alone.
Supported Equipment
The contractor should be able to support the old-new interface. If they only support the new panels and ignore the existing system, service responsibility can become unclear later.
FAQ
Can I add panels myself?
For a grid-tied rooftop system, professional installation is the safer and more realistic route. Expansion involves roof work, electrical design, permits, utility approval, and inspection. A homeowner can gather bills, photos, and monitoring data, but the actual add-on should be handled by qualified solar and electrical professionals.
Can I use different panels?
Sometimes. New panels can be used with older panels when the electrical design supports it. Voltage, current, panel type, inverter limits, and monitoring compatibility all matter. In some cases, the better design is to keep the new panels on a separate string, separate inverter, or microinverter setup.
Do I need a new inverter?
Not always. If the existing inverter has spare capacity and the new panels fit the design, it may be reused. If the inverter is full, outdated, or incompatible with the new layout, the project may need a replacement inverter, a second inverter, or a separate add-on system.
Will expansion affect net metering?
It can. Utilities approve solar systems at specific sizes, and increasing capacity may require a revised interconnection review. In some areas, expansion can affect export rules or net metering terms. This should be checked before the contract is signed.
Is a separate system better?
A separate add-on system can be better when the original inverter is full, the old panels are discontinued, or the existing monitoring platform is outdated. The tradeoff is more equipment and sometimes separate monitoring. It is often a practical choice when modifying the old system would create more risk than benefit.